Exacqvision start nvr software
Some of you have asked what software can I use to record from my surveillance cameras. There’s many choices on the market and I chose to start this series with a popular product that came out in a “lite” version called exacqVision Start about a year ago. ExacqVision is easy to use and efficient NVR software. Their Start version makes it affordable for home and small business users at a reasonable price of $50/camera. The server can be installed on Windows or Linux and the client can additionally be installed on a Mac. Also included are free smart phone apps. This not only works with IP cameras, but can also record from analog cameras.
My criteria for the review is to see if it meets the needs of it’s intended audience. A typical home user wants to record events as they happen, they want to view the cameras and the recordings not only remotely via any web browser, but from their smart phone’s web browsers and/or dedicated apps. They also want to run effectively on low-cost PCs that are small and have low power consumption.
What’s unique about this product is that it can run on Windows or Linux. For example, if you are using a low-cost nettop PC that did not come with Windows pre-installed, here’s a chance to take advantage of a free version of Linux and then use your Windows or Mac to run the client software.
As their entry-level version, it has all the key ingredients from their professional and enterprise version that most home and small business users need. It’s limited to 16 cameras, the client can only connect to one server, you can’t setup maps or groups or get event notifications. Some items like event notifications you can work around by configuring this into the camera and some features like groups, maps and single server client are not what most homes or small businesses need. If you do, you can upgrade to their Professional version for an additional $100 per camera.
Overall the software was very responsive, used very little CPU or memory resources on my desktop and the server software ran silently in the background. Included is a web service to allow you to connect via just about any browser. When viewing from a browser, you lose some of the functionality of the full client software such as being able to configure the server and some search capability. You can still review recorded video, but only by selecting a start/end time and have it play all the events sequentially. PTZ also worked from the browser but not DPTZ.
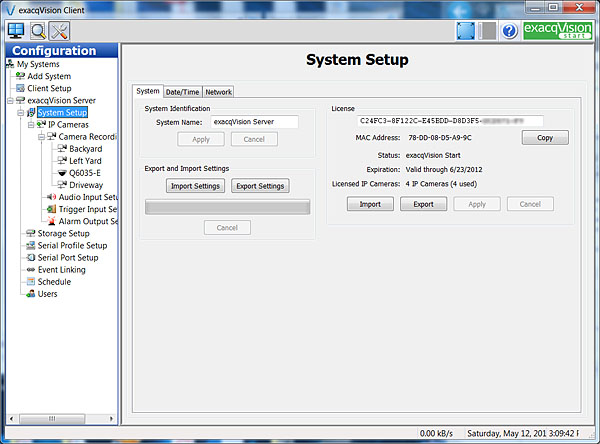
What does it all look like. This is the first screen you’ll go to after installing the software to enter the license key. Note that there’s 3 main icons on the top left. The first, a blue monitor icon is Live Video mode, the next one, a magnifying glass is their Search mode to view recorded events, the third icon, a wrench and screwdriver is for setup & configuration. For now, we are on the setup screens.
The next screen you’ll go to is to add cameras. This is where it’s a little different from other software. You click the NEW button, select the camera brand from the drop down, enter in the IP, the username and password. Sometimes it allows you to enter in a port, sometimes not. When it doesn’t allow you to enter a port number, I found it only works if the camera is set to port 80. It does have a feature to scan for cameras, but it was not able to find one of my cameras. When it does allow you to enter the port number, it’s the cameras http port. It’s intelligent enough to find the other camera’s port numbers for streaming video even if you changed it. I found that changing anything in the camera may confuse the software, so it’s best to delete the camera and re-add it. Because it has to scan the camera for its settings, it can take a while. Some cameras where quick, a few seconds, some took several minutes. After you are done, it will show you information about each camera for example; model, MAC address, firmware version. It can be quirky, for example, I setup a Panasonic BL-C230A, a common inexpensive VGA camera sold at big box stores. It confused it with a megapixel camera and would not display video until I went to another screen and changed it to VGA resolution. Support’s excuse is that it’s not a supported camera. They do have support for ONVIF cameras but was not able to make it work.

Once each camera has been set into the system, you may have to configure some options. The most common is the name of the camera (by default it gives it clever names like Input1) and if you want PTZ capabilities. The other options below are camera specific options, for example, on this camera you can set the motion detection options from the camera. It stores this at the camera level, not in the software. Not all options on your camera are available here, so you may have to go to the camera to set certain options up.
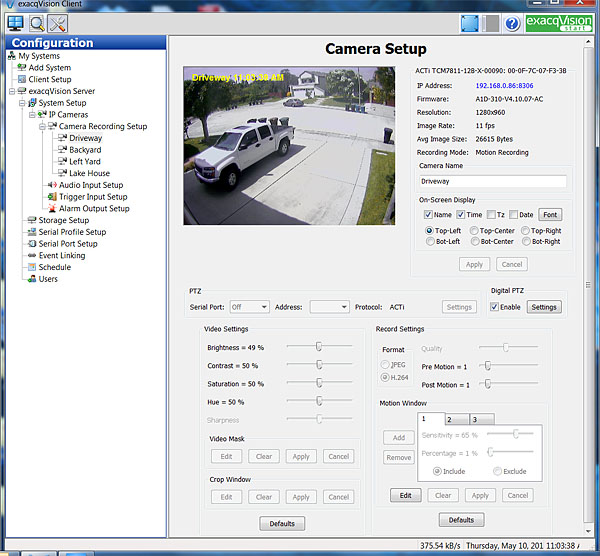
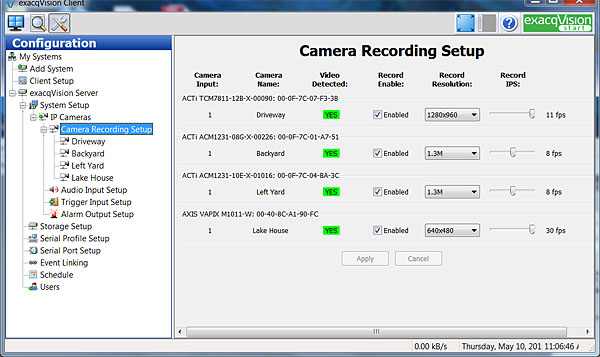
Camera recordings are enabled in this screen where you chose the recording resolution and the images per second.
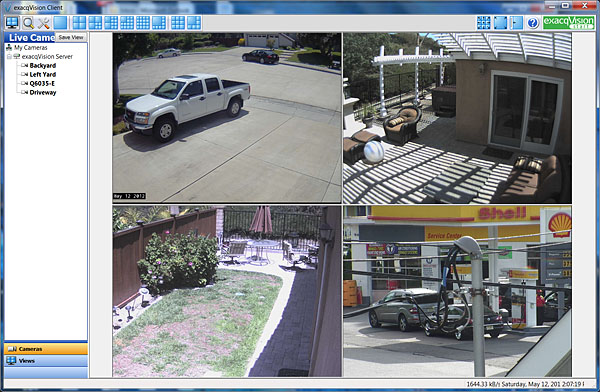
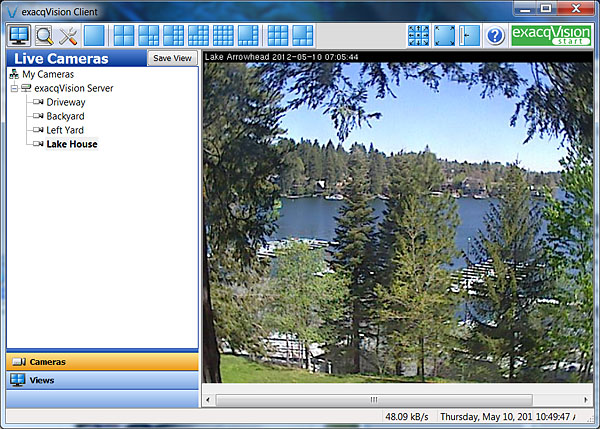
Once the cameras are completely setup, you click the blue display icon in the upper left to view the cameras. The camera names are displayed on a tree on the left. You then drag/drop the cameras onto the display. You can choose from a wide variety of layouts. Once you have completed this, you can save the layout by clicking on the Save View button. You can create views to separate out groups of cameras or to create a tour of multiple cameras. This is a 4 camera view.
This is a single camera view. You switch cameras by double-clicking on the camera name.
You can use the PTZ features even if your camera does not have PTZ capabilities as a digital PTZ. This allows you to zoom in and pan/tilt around the image either using your mouse (very slow), or the keyboard arrows (fast). On real PTZ cameras, it controls the cameras PTZ functionality. You can turn this feature on/off by right clicking on the image and selecting PTZ (or alt-Z keyboard shortcut).
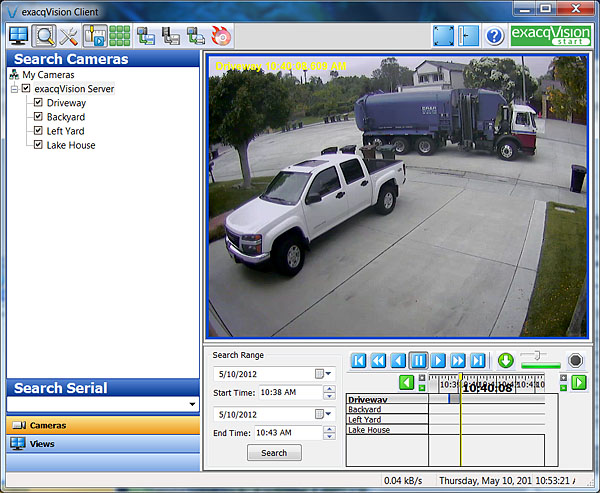
To view recording, you click on the magnifying glass icon on top. You can select which cameras you want to search. Enter the time range and click Search. You can move the yellow line on the timeline to move to the event you want to view and use the play button to start playing the video.
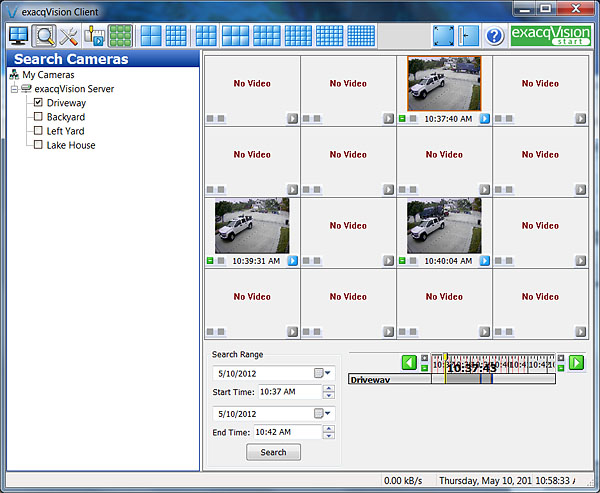
That was the timeline view. Alternatively you can use the thumbnail view. You switch from timeline to recording view by the two icons on top that looks like a timeline and the other looks like 9 blue squares. I tried to get an explanation of what the “No Video” means from their support but never received an answer. Click on the play button on a video starts playing it.
To export an event, you first have to set the start and end points. You do this by right clicking on the video and selecting “Mark Export Start” and then selecting “Mark Export Stop” where you want the export to end. You can span multiple events, say 3 single minute events in one hour, you can export them as one 3 minute video. Once the start/stop points has been marked, you click on the export video button on top. You can export to AVI, MOV or a clever standalone EXE file that starts a mini viewer with just that video.
What great about this software is that it takes full advantage of the camera’s processor to analyze video for motion detection. This allows you to run this software on slower older PCs becasue it’s not using your PC’s processing power to analyze each and every frame for video motion detection. It does this transparently so you don’t even realize that the software itself isn’t doing it.
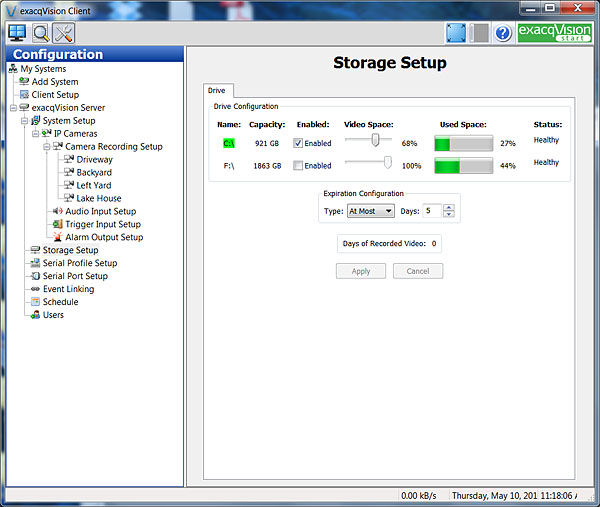
You do have to tell it where to record, what percentage of disk you want to use for recordings before it deletes old recordings and what’s the most amount of days you want to keep the recordings. There’s no provision for network mount points, just local storage and USB storage.
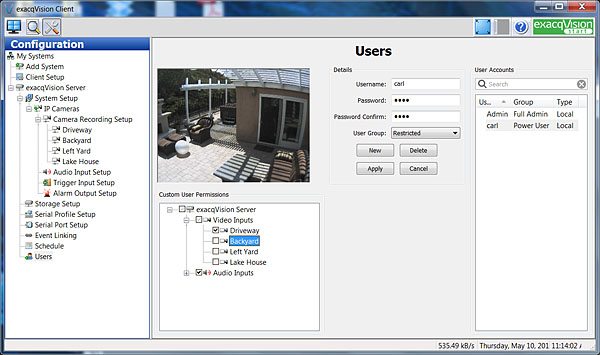
You can set up users with admin rights or restricted users that can view only certain cameras.
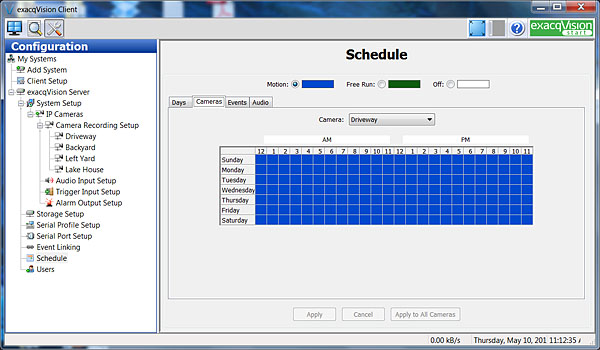
Recording schedules can be setup in case you don’t want to record during certain hours or you want to record continuously.
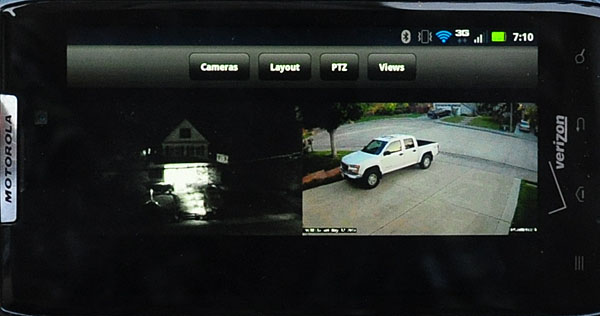
Finally the smart phone apps. Took a while to figure it out but it does work once setup. This is the Android app running on my Droid Razr.
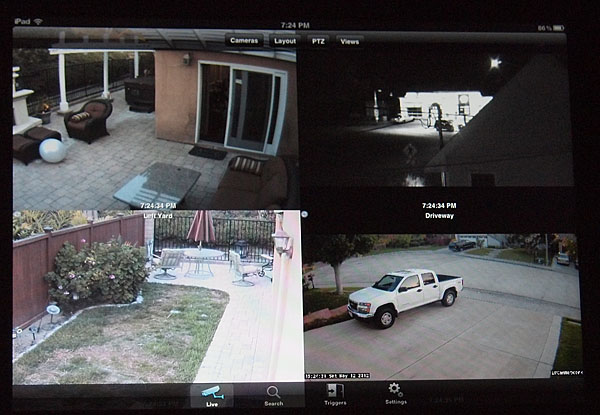
And this is on my iPad. When looking at multiple cameras, you tap on a camera to make it take up the entire screen tapping to go back is slow. PTZ controls the camera with a giant transparent overlay. You can move cameras around to different screen positions by swiping them over. You can’t do pinch zoom iPad stuff, sort of disappointing. Wasn’t able to pull up any recorded video. Searching is limited to a 10 minute window where you pick the time and multiple attempts crashed the app. Not user-friendly at all. This app needs some work. The good thing is you can access the cameras via the web browser which ironically was a superior interface to the app. In contrast to the AVTech IOS and Android apps previously reviewed, those were well done, this one is half-baked.
Conclusion
This is an easy to use, well featured, low-priced solution that’s dependable, stable and suitable for most small users. The $50 per camera price is reasonable for the features included as most software of this calibre can easily cost $100-200 per camera.
Pros
• Server process is separate, efficient and runs on Windows or Linux
• Client is easy to use and can also run on a Mac
• Start version does what most want at one-third the price of the professional version
• Intelligently installs cameras (can be slow)
• Available free smart phone apps for IOS and Android
• Works with other browsers like Chrome, Firefox, Safari & Internet Explorer
Cons
• Does not support all cameras, check their site for supported cameras
• Some cameras would not work if h.264 was selected, like the Axis Q6035-E
• No ability to notify you for events (can do this at the camera level or upgrade to Pro version)
• Smartphone apps are not ready for primetime
• Quirky “No Video” on thumbnail view, what were they thinking
- Pre:Dahua's video recorder added t 2019/9/9
- Next:Blueiris nvr software review 2014/9/3