Blueiris nvr software review
BlueIris is one of the bargains in recording software for your surveillance cameras at only $49.95 per server. It has some unique features that makes it idea for home or small business surveillance and it’s easy to use. It also has a huge list of cameras that are supported and new cameras are constantly being added.
This is the screen you see after you configure all the cameras and it’s been recording. The icons across the top allow you to configure a camera, set camera properties, start the web browser interface, see camera stats, take a snapshot, start/stop recording, the traffic light icon and the help button. The majority of the screen as you can see is the camera display and the most recent recordings are on the right.
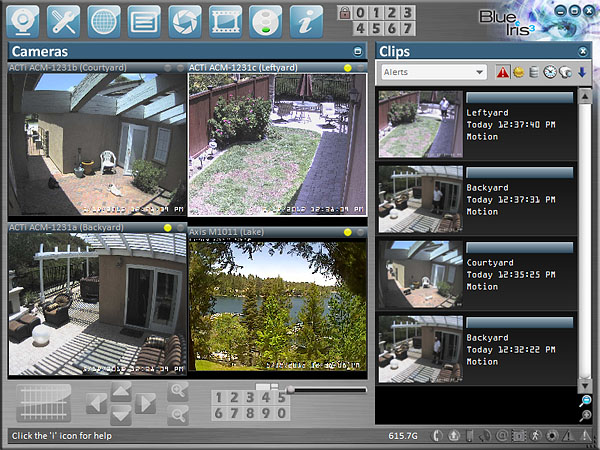
The traffic light icon is the most unique feature, especially for home use. You click it to control when the camera should record or not. If you select RED, it immediately stops recording. Selecting GREEN immediately starts recording. Selecting YELLOW gives you a minute or so to leave the house before it starts recording, like a house alarm. This way you won’t get a bunch of recordings and alerts sent to you while you are getting out of your house.
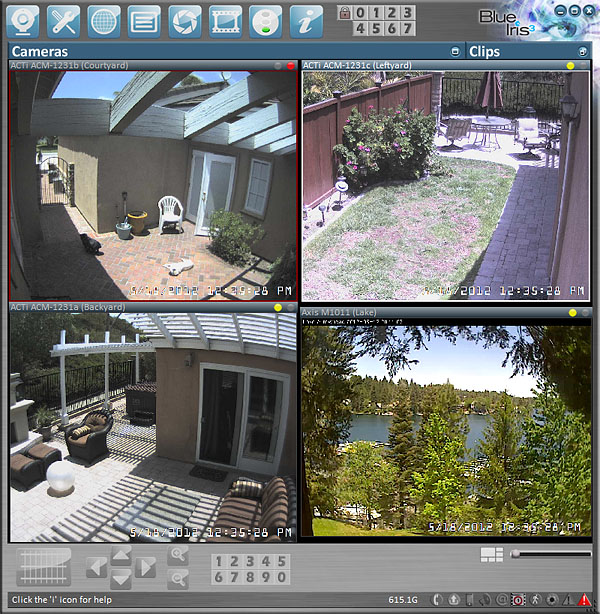
Double-clicking on a camera allows the camera take up the full screen, a feature that’s not that common among NVR software but very useful. If you want to see only cameras, you can click the X above Clips to hide the clips.
If you have a PTZ camera, you can control it using the PTZ controls at the lower left. You can also set presets to go to desired locations quickly.
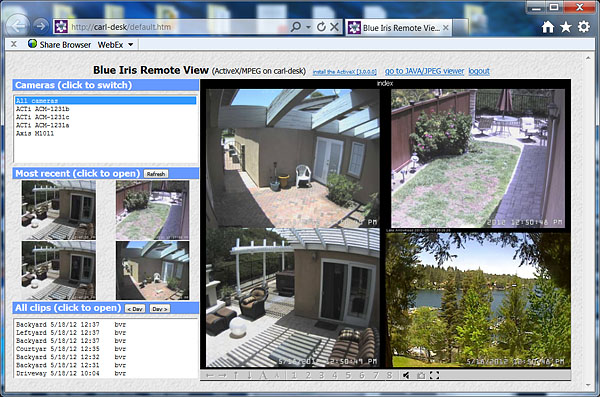
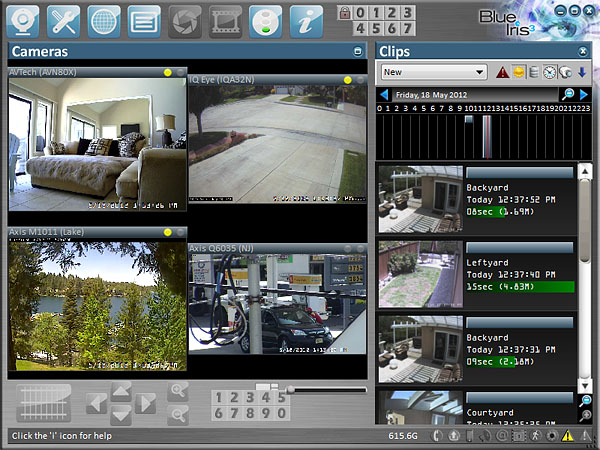
The client and server are combined into one program. If you want to access BlueIris remotely, you do so from its web interface. It works on all browser’s I’ve tested it with including Safari on IOS and Chrome on Android. This is what the interface looks like. Different in that the Clips are on the left and cameras displays on the right. You can view the cameras live and recorded video, but not configure any of BlueIris settings from the web interface.
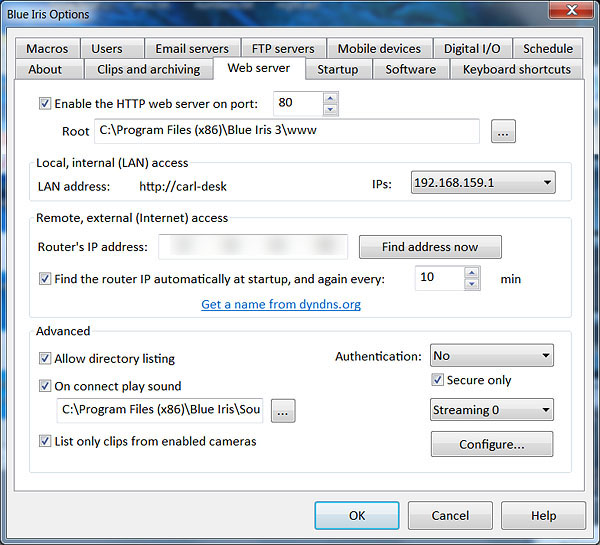
You configure the web server by clicking the Options button on the main screen and then the selecting the “Web server” tab.
Recordings (Clips) are managed by the thumbnails on the right. Clicking a recording starts to play it in a continuous loop by default. You stop playing it by clicking the X in the upper right corner. Right click on the thumbnail to delete it or copy/move it to another location. You can also show clips for all cameras or one camera and sort the clips.
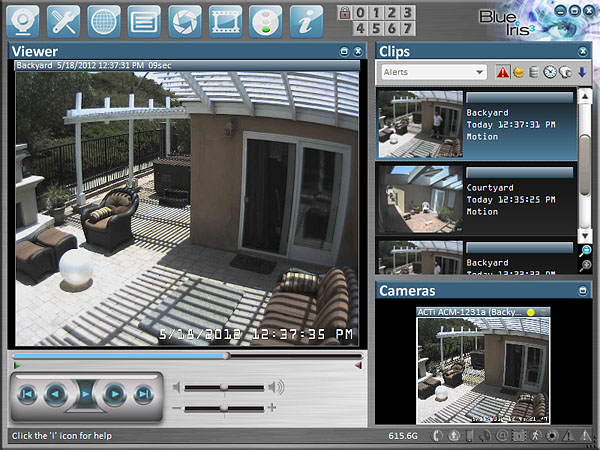
Clicking on the clock face icon will give you a timeline that you can scroll through to find recordings by time. You can scroll by date and/or move the timeline with your mouse. As you move the timeline, it displays the thumbnails below for that time period.
That’s basically how it works and it’s pretty simple. Setup is a little more complex, but not more so than most other NVR software. You add a camera by right-click on the background and selecting “Add new camera” which brings up this screen. As you can see, there’s a lot of tabs for different options. In the General tab you name the camera.
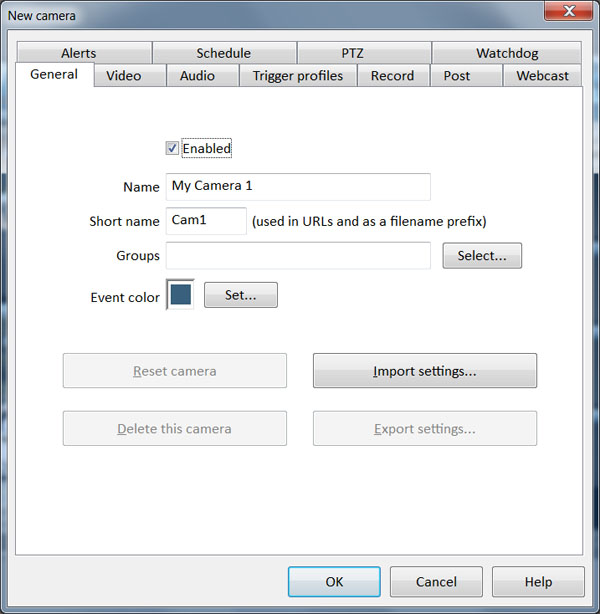
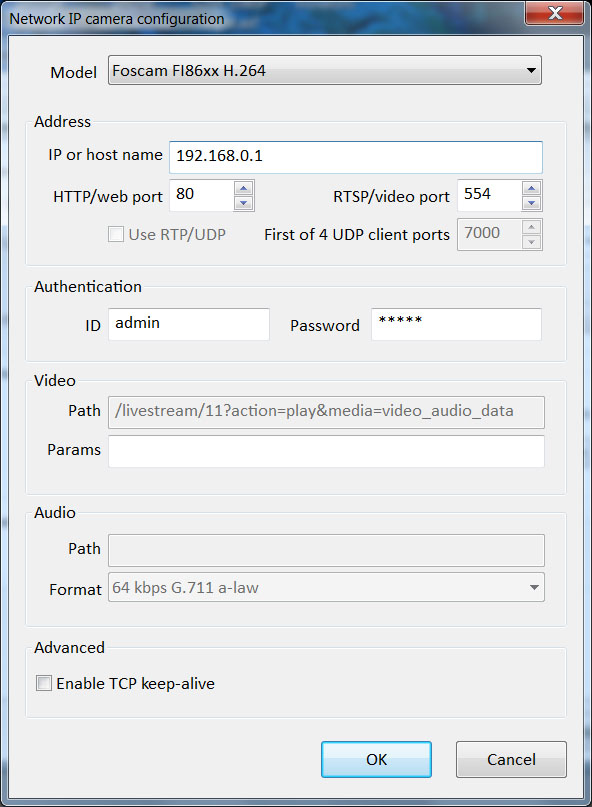
The next thing to do is going to “Video” tab and click the “Configure” button to select the camera brand/model from the drop down, enter the IP address, port number, user and password.
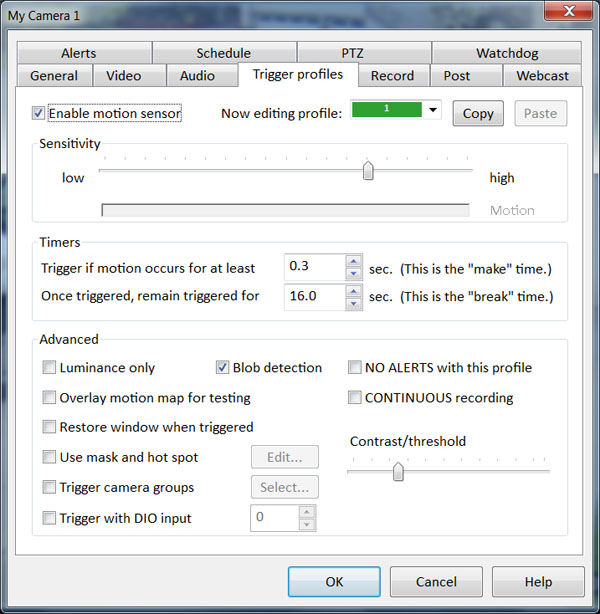
Other tabs of importance are the Trigger Profiles where you set motion detection options. I suggest cranking it up towards higher sensitivity until you capture what you need.
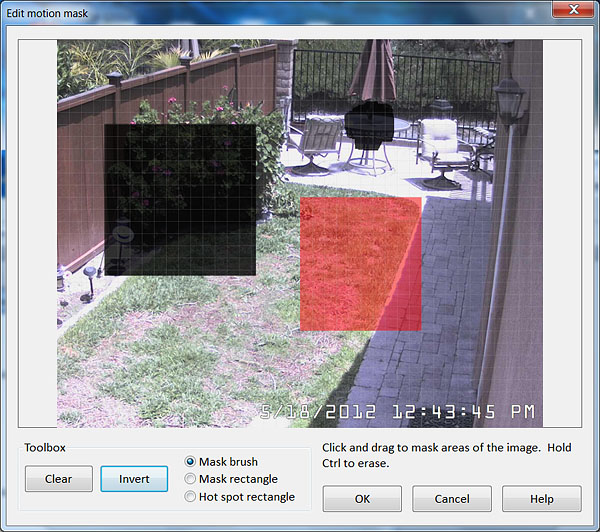
It captures any movement anywhere on the image by default but you can create a motion mask which contains various shapes to either detect motion or mask motion. In this screen, the black is areas are masks where not to look for motion and the red is motion detect hot spots. You can use rectangular shape or create your own shapes with a brush
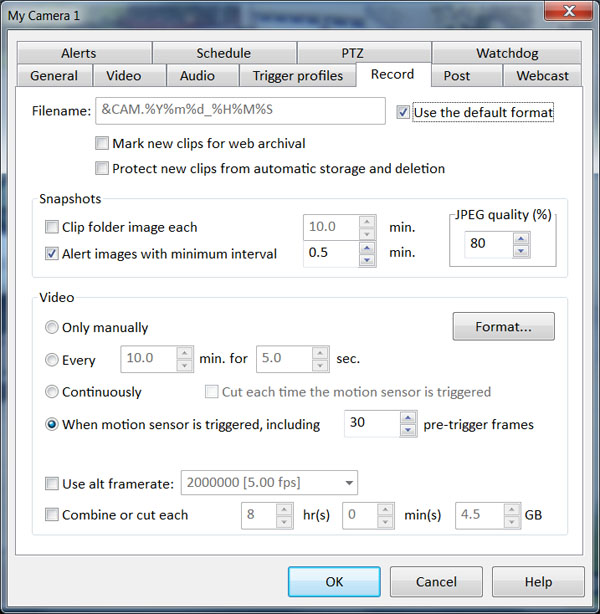
The other tab that’s useful is the “Record” tab. This is where you set recording options for a camera. If you click on the Format button, it lets you chose from their proprietory format BVR or a common format like AVI or WMV. You can also chose the compression options like H.264 or MJPEG.
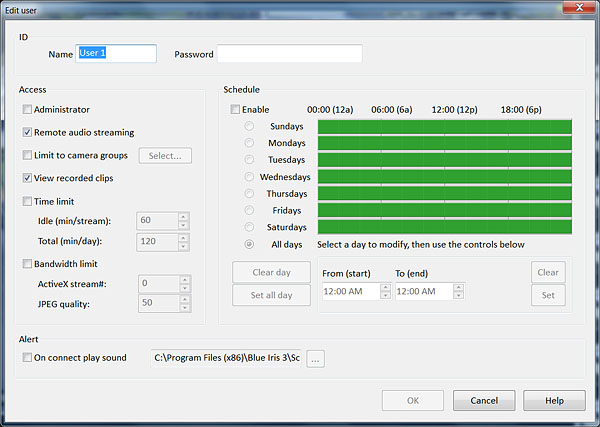
Another powerful feature that’s stronger than the competition is its User configuration. Here you can define what camera groups a user can see, when they can see it and time and bandwidth limits by user.
Conclusion
The software is stable, have used it for over a year, the support is excellent. When I purchased new cameras, they were very helpful in providing support for cameras that did not previously exist. For under $50, I don’t think you’ll find better NVR software. It does run on Windows, but you can access it from any device with a browser including Macs and IOS/Android tablets and phones.
The only downside is that it handles the video motion detection in the software and this requires a decent sized processor. You can do tricks to minimize the CPU use, but if you have multiple megapixel cameras, I would recommend a computer with at least an Intel i3 or i5 processor. My experience shows that the software does use fewer resources than other products like Milestone XProtect but is not as light on the processors as ExacqVision which does in-camera motion detection but doesn’t support nearly as many cameras and costs considerably more.
- Pre:Exacqvision start nvr software 2014/9/3
- Next:synology dsm 4.2 surveillance 2014/9/3