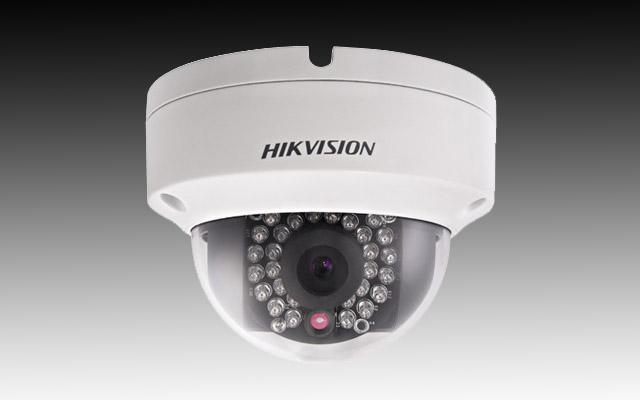
Hikvision DS-2CD2132-I 3MP IR mini dome review
I reviewed the popular bullet version of this camera a few months ago and now I’m covering the IR mini dome version. Again with IR illuminators, WDR, Smart IR and digital noise reduction. They are small for an IR dome and work well in specific situations.
Main Features
1. 1/3” 3 Megapixel CMOS sensor
2. H.264 dual-stream encoding
3. 2-Axis (pan/tilt) adjustments
4. 30fps @ 1080P (1920 x 1080) or 15fps @ 3MP (2048 x 1536)
5. 2.8mm, 4mm, 6mm and 12mm fixed lens
6. Day/Night IR Cut Filter
7. IR LED advertised working distance 30m
8. IP66 Rated Outdoor Dome
9. Powered by PoE
10. Smartphone apps available
Overall, this camera has good image quality, good low light performance, well-organized menus and very small. The IR illuminators are bright and have good coverage. As a twist, I tested both their 2.8mm for nice wide shots as well as their 12mm lens.
This is a typical dome with a pigtail with a power and Ethernet jack that comes out the back of the camera. To make the install clean, you’ll need to drill a whole about 1″ diameter to slip the jack inside. It comes with a weatherproof connector should you need it. In order to take advantage of it, you need to cut the Ethernet plug, slip the weatherproof connector through and then crimp on a new RJ45 plug. This may seem like extra work, but it provides the smallest weatherproof adapter I’ve seen, meaning a smaller hole.
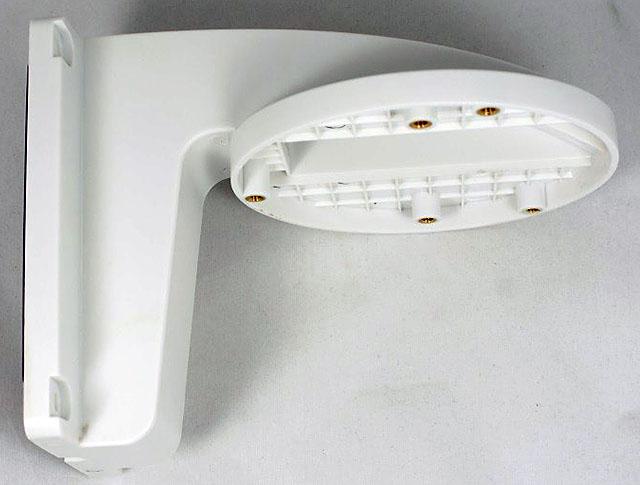
Unlike the bullet, aiming this camera is not easy. First to note is that this is a 2-axis dome. This means the lens can only tilt up down and pan side to side. Since the lens can’t rotate, installs have to be perfectly horizontal like on ceiling. In theory, you can surface mount it on a wall, but you would lose the ability to pan because as you pan the image will tilt. Hikvision does make a 3-axis dome that I will cover soon in another article.
If you want to mount the camera on a wall, I would strongly suggest the wall mount made specifically for this camera and looks like this.
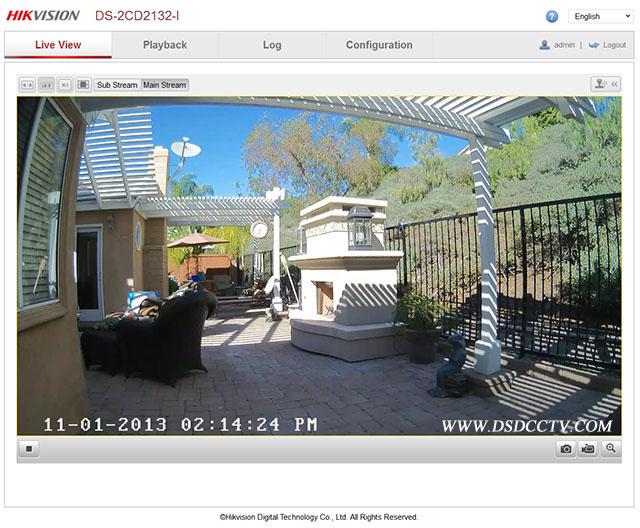
This is what the web interface looks like when you first log in. There’s options to take a snapshot, manually record, chose a stream and you can chose the aspect ratio which should be automatic, but it’s not. For example, if you chose 1080P, then you have to click on 16:9, if you chose 3MP mode, then click on 4:3. The default is sort of in between.
As with the bullet, the camera comes with a fixed IP address at 192.0.0.64. They include a program on a CD called SADP that you run, finds the cameras and you can change the IP address to one that’s appropriate for your home network.
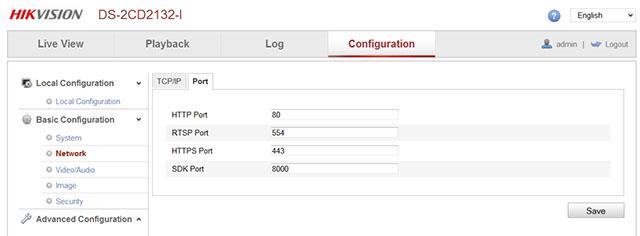
I’ll go over some of the setup screens of interest. After setting the IP address in SADP, you can change it again under Network, but since that’s done, the next step may be configuring the ports if you want to access the cameras from the internet. What I like to do is make them sequential, for example, I would make the HTTP port 5000, RTSP port 5001, HTTPS port 5002 and SDK port 5003 and then in my router I would setup port forward range from 5000-5003. Makes it easier to track which ports go with which camera.
The next screen you’ll want to visit is the Video/Audio settings. Please do not get confused, even though there’s an option for audio, there’s no audio capabilities in this model. But most importantly, this is where you set the resolution, frame rate, bit rate and such. I’m a big fan of the 4:3 format so I run it in 3MP mode, but the camera runs very well in 1080P which is in the 16:9 format. If you have a version from another country, Europe, Asia, you may see frame rates max at 25 for 1080P or 12 for 3MP, this is easy to fix by changing the “video standard” option in the screen I’m showing after this one to 60hz for U.S. standards, 50hz for others.

Here’s the Image settings where you can tweak the image contrast, sharpness and such as well as set noise reduction, WDR options, white balance, exposure settings. One bit of advice is WDR is not free. The price you pay at night is more noise. The higher you make this number, the more noise you’ll see at night. I set this to about 6-10% and that’s a good balance for me. I would suggest not going over 20%. Also, I would recommend you set noise reduction to 100% as it works very well at that level.

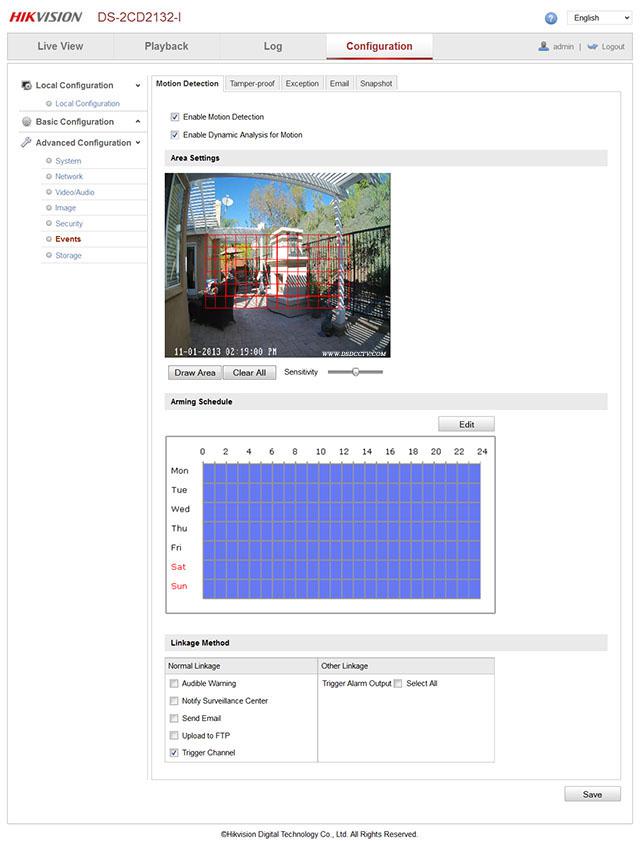
Events is where you set in-camera motion detection. The reason for this is if you have NVR software, for example Milestone XProtect that leverages in-camera motion detection or if you want to use the NFS method I mentioned in a previous article.
You click the draw area button to draw the area you want to detect motion detection in. It can be multiple sets of boxes, in my example, I just drew one large box. You have to select trigger channel to enable it and set the arming schedule by clicking Edit to change it.
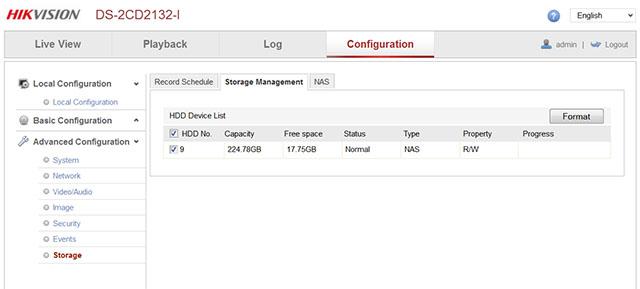
If you do want to use the write to NAS (NFS) feature, you provide the IP address and directory under the NAS tab and then format the space under Storage Management screen shown below. This has worked well for me but some have had issues. Word is that the next major firmware release, 5.1 will make it more stable for different NFS solutions.
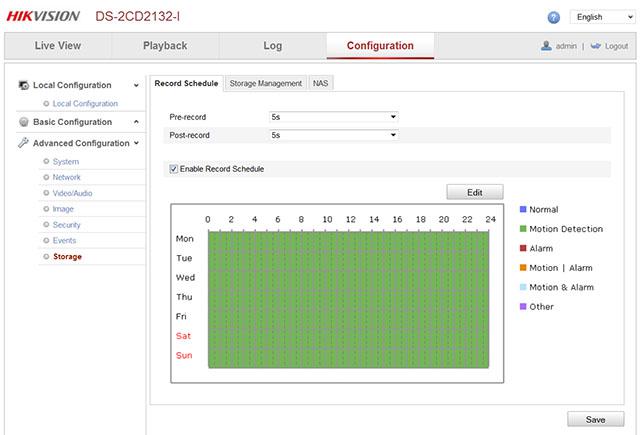
After setting events and storage you think it should all work, but one more step. You have to setup the recording schedule to “Motion Detection” if you want it based on that, or Normal if you want 24/7 recording regardless of motion. There are choices for Alarm, but this model does not come equipped with alarm inputs.
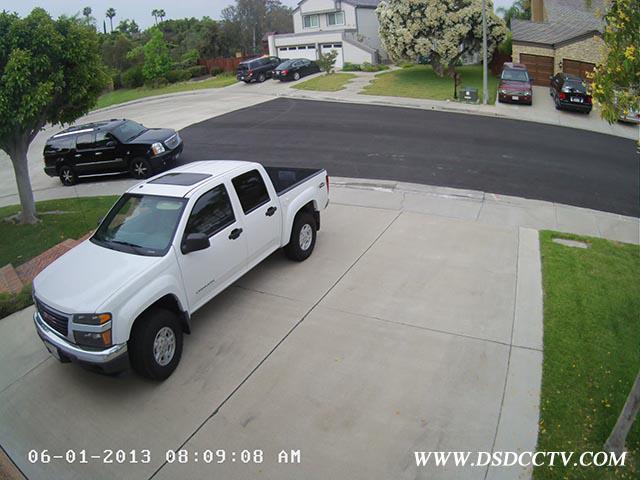
Now onto the images. I mounted the camera with the 2.8mm wide angle lens in the usual spot, under the eave of my garage. As before, you can click on the image to see the full size, 3 megapixel image straight from the camera. Also as before, I set the max exposure time to 1/30th which is a good compromise between low light performance and movement.
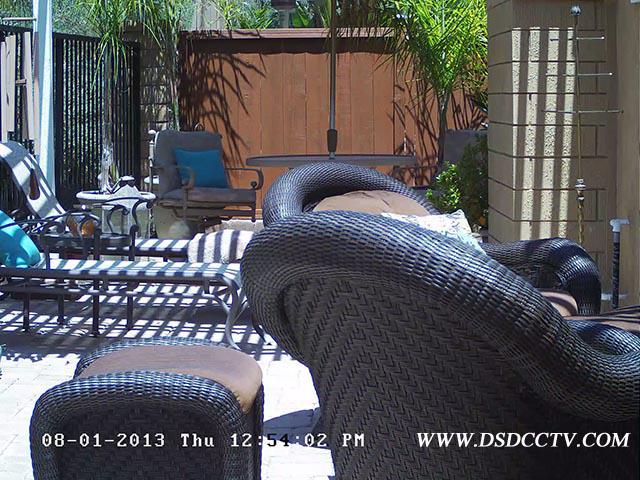
This is a day shot, color balance is quite good and it’s a clear and sharp image.
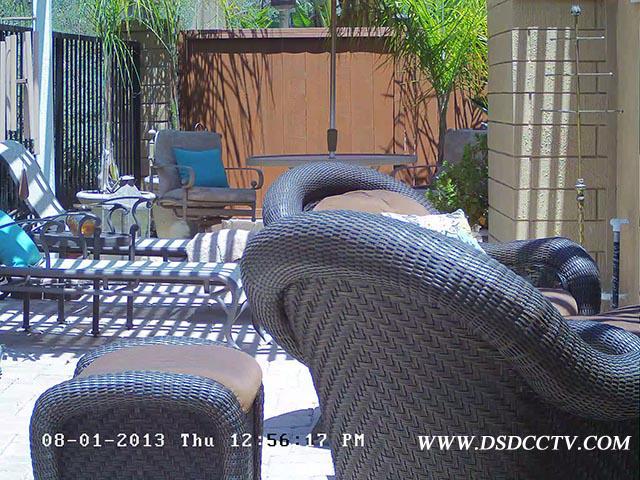
I put the 12mm version in my backyard for a different mix of colors and contrast and also test out WDR. This shot has WDR turned off.
This is with WDR set to 20% and you can see more details in the shadows.
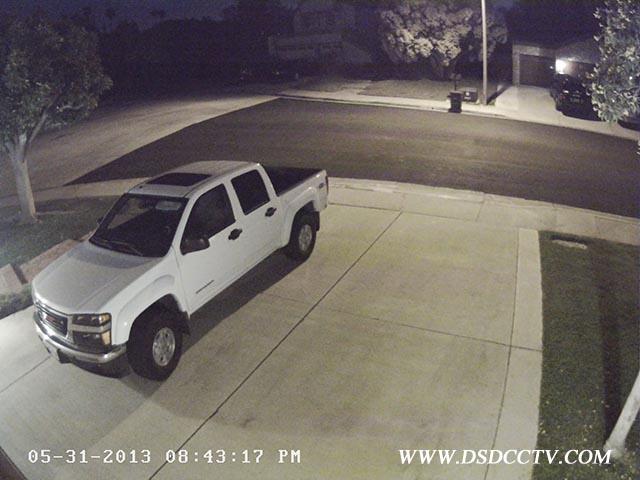
At night, the 2.8mm camera did pretty well with existing light from the street lamp across the street and two LED bulbs in porch lights at the front of my garage. These are Cree 60W equivalent bulbs I got at Home Depot that work very well, cost around $12 each. Putting this in B&W did not yield a better image, so I left it in “day” mode. I have videos below that demonstrate both color and B&W mode better than a still picture.
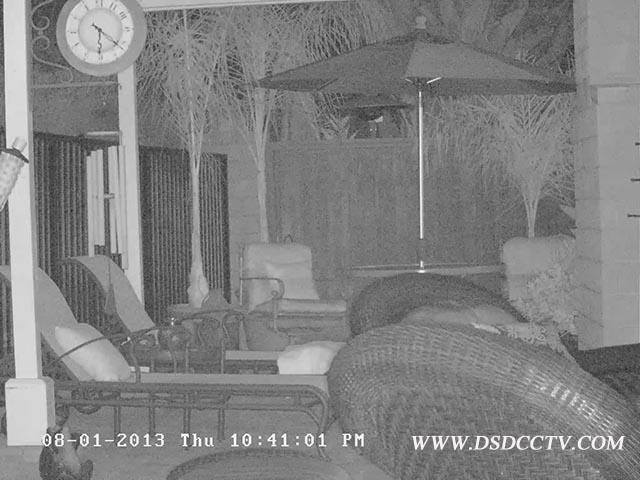
In the backyard, where light is scarce you can see the effect of the IR illuminator in dark scene. The 12mm camera does have a good range to match it’s 12mm lens. This image is taken with WDR turned off.
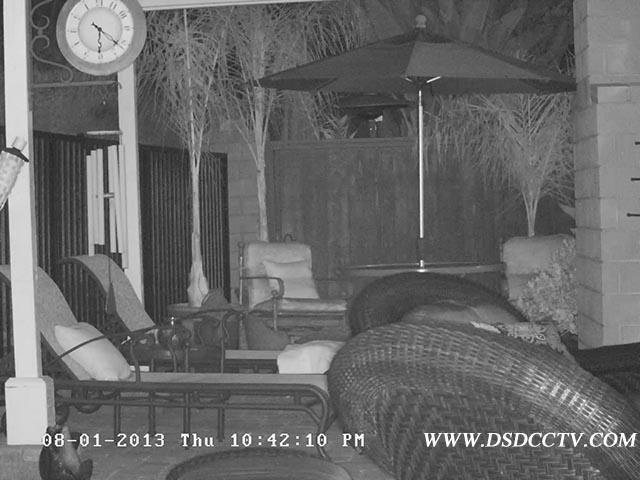
With WDR set to 20% again, you can see more detail in the shadows at the expense of more noise.
One thing to note with the 12mm lens is that with limited 2-axis adjustments, I would not recommend this lens. The reason is you can not tilt the lens high enough to see the horizon, not an issue for a wide angle lens, but with the telephoto lens, it basically looks down. I tried mounting it in my driveway but all I saw was the rear tires of the car. So make sure you understand this before jumping into the 12mm lens and consider the bullet which has more mounting and pointing options or the 3-axis Hikvision dome which is larger and can be aimed higher.
I uploaded day and night videos to YouTube. I also added a color night time video to show you how well this may work for you at night if you have enough light. To see them at the full 3 megapixel resolution, you must click on the gear icon and select original quality and then click on the icon with 4 corners to see the video full screen. The videos were extracted using BlueIris.
- Pre:Hikvision DS-2CD2032 3MP IR bu 2014/9/3
- Next:Hikvision DS-2CD2732F-IS 3MP I 2014/9/3