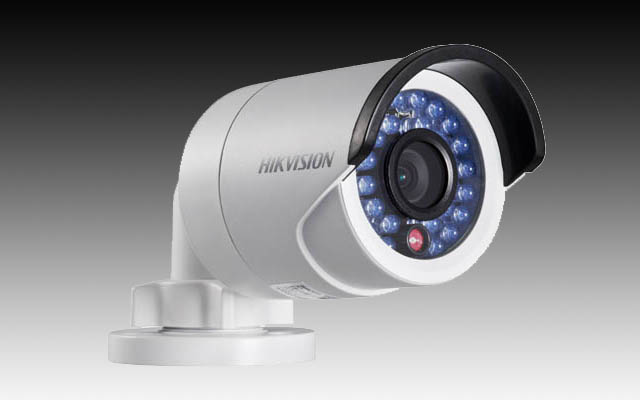
Hikvision DS-2CD2032 3MP IR bullet review
Here’s a very good low priced 3 Megapixel IR Bullet from Hikvision, with good IR illuminators, WDR, Smart IR and digital noise reduction, but’s just specs, the really amazing part is how clear and sharp the image is, how tiny they are and how well they work.
Main Features
1. 1/3” 3 Megapixel CMOS sensor
2. H.264 dual-stream encoding
3. 30fps @ 1080P (1920 x 1080) or 15fps @ 3MP (2048 x 1536)
4. 4mm, 6mm and 12mm fixed lens
5. Day/Night IR Cut Filter
6. IR LED advertised working distance 30m
7. IP66 Rated Outdoor Bullet
8. Powered by PoE
9. Smartphone apps available
Overall, this is an impressive camera with very good image quality, good low light performance, well-organized menus and very, very small. The IR illuminators are bright and have good coverage. As a twist, I tested their 12mm lens which may be difficult to get.
This is a typical modern day bullet with a pigtail with a power and Ethernet jack that comes out the back of the mount. To make the install clean, you’ll need to drill a whole about 1″ diameter to slip the jack inside. It comes with a weatherproof connector should you need it. In order to take advantage of it, you need to cut the Ethernet plug, slip the weatherproof connector through and then crimp on a new RJ45 plug. This may seem like extra work, but it provides the smallest weatherproof adapter I’ve seen, meaning a smaller hole. Aiming the camera is very easy. There’s a collar along the base that you loosen and this lets you point the camera as needed and then just tighten the collar to hold it in place, very simple, no tools needed.
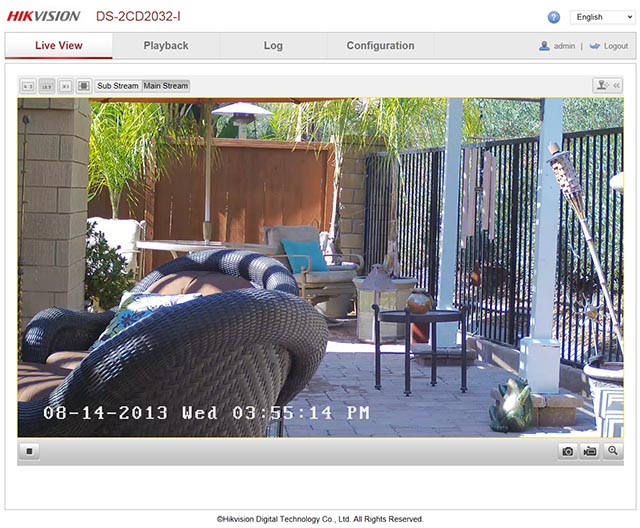
This is what the web interface looks like when you first log in. There’s options to take a snapshot, manually record, chose a stream and more.
These cameras come with a fixed IP address at 192.0.0.64. This can be annoying to change but they provide a tool to make this very easy called SADP.
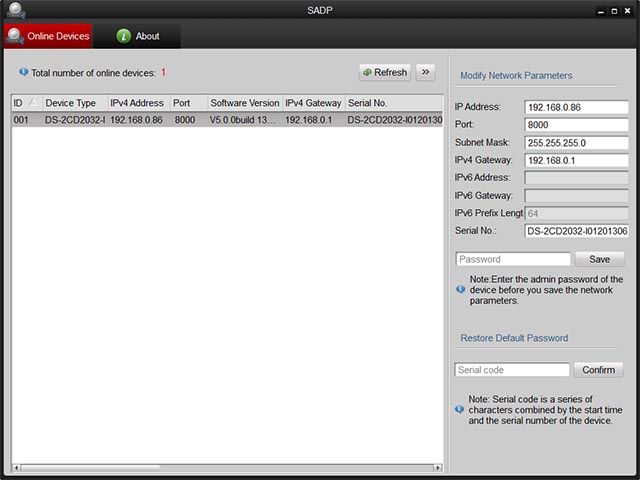
It will find the cameras, click on the camera, it will put the parameters on the right, change it to an IP address that works in your home network, type in the password (12345 by default) and click Save.
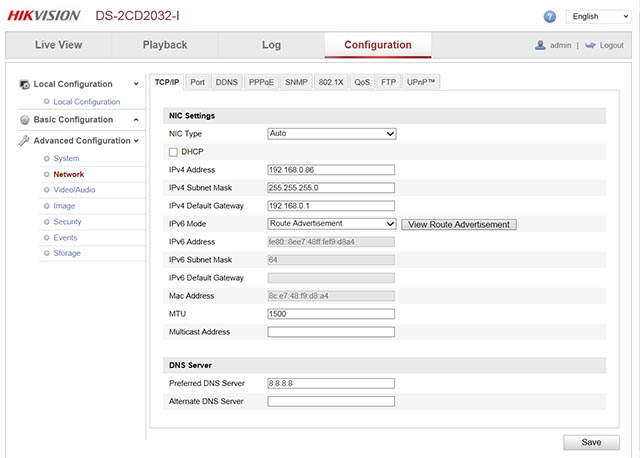
Here’s some of the setup screens. Once you connect to the camera via a browser, you can select Network and make any finer adjustments here as well as setup DDNS or other options you may want to tweak.
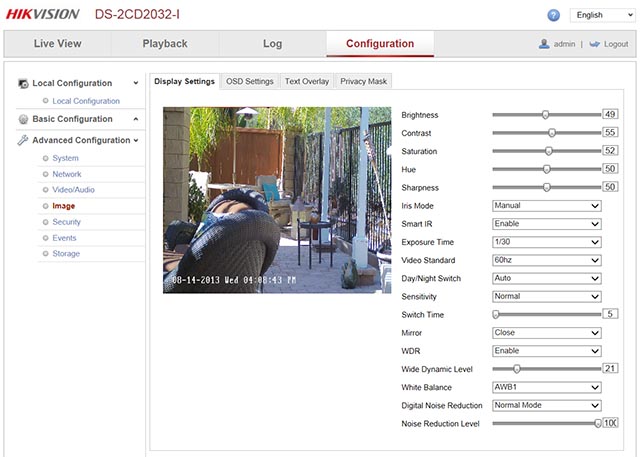
The next screen you’ll want to visit is the Image settings. There are two sets of menus, Basic and Advanced. Use the Advanced settings as there are more choices.
Below are the Display Settings where you can tweak the image contrast, sharpness and such as well as set noise reduction, WDR options, white balance, exposure settings. One bit of advice is WDR is not free. The price you pay at night is more noise. The higher you make this number, the more noise you’ll see at night. I set this to about 6-10% and that’s a good balance for me. I would suggest not going over 20%. Also, I would recommend you set noise reduction to 100% as it works very well at that level.
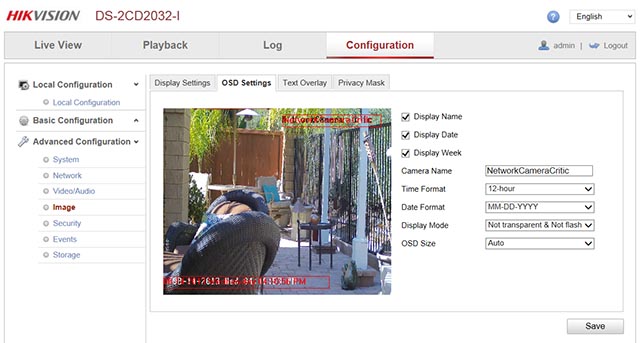
Another question I get asked on these camera is the onscreen time and camera 1 that displays by default. Under the Advanced Configuration, Image is the OSD Settings tab. Here you can chose if you want the camera name and time displayed or not and if you do, you can drag/drop the red time or name box to whatever portion of the screen you want. One cool thing about the on screen display is that it changes characters from white to black depending on the background.
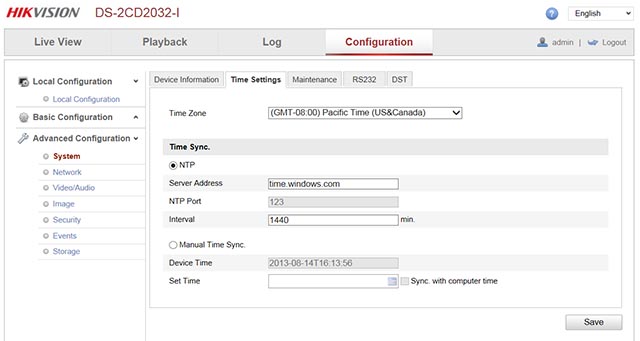
To set the time, go to Advanced Configuration, Systems and the Time Settings. Here you can specify the time zone and the NTP server. Also, the DST tab allows you to set the daylight savings time weeks and offset.
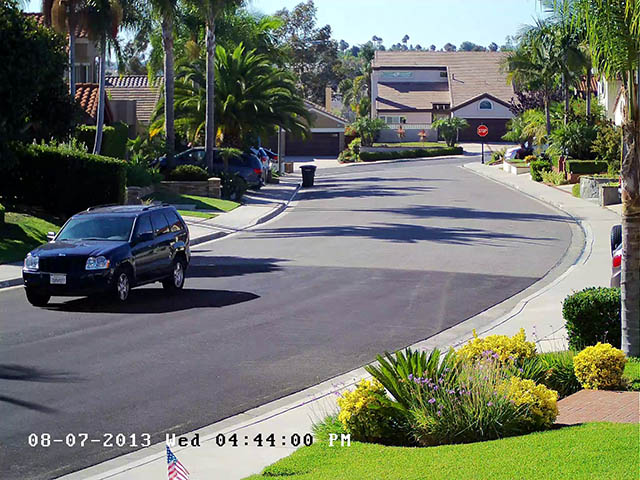
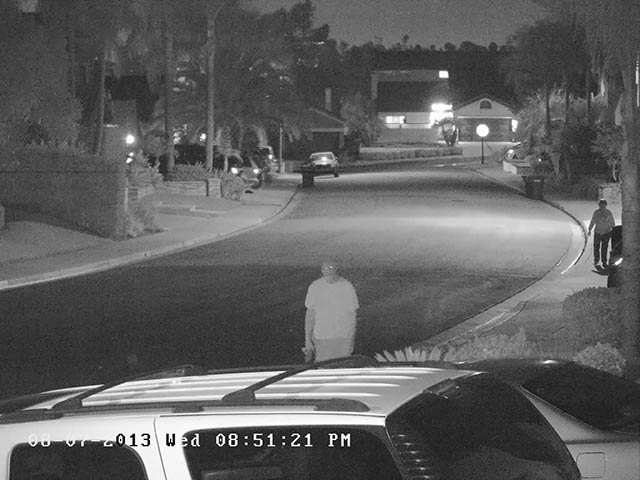
Now onto the images. I mounted the camera in the usual spot, under the eave of my garage but this time aimed it down the block as this camera has the 12mm telephoto lens. As before, you can click on the image to see the full size, 3 megapixel image straight from the camera. Also as before, I set the max exposure time to 1/30th which is a good compromise between low light performance and movement.
This is a day shot, color balance is quite good and it’s a very clear and sharp image and you can read the plate number 80-90′ away.
At night, even though this area was too far for the IR LED’s to provide much value, it did really well with low light sensitivity. There was some noise but it was not overwhelming. The people in this image were too far away to identify at night but the IR LED’s did reach out to the closest person at about 60′-70′ away but not the woman that’s about 100′ away.
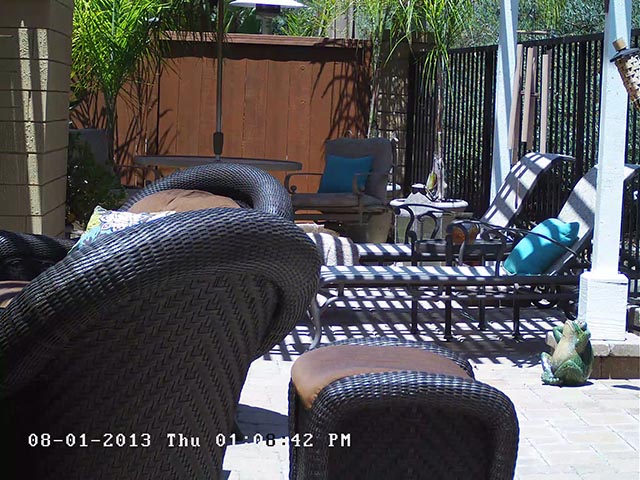
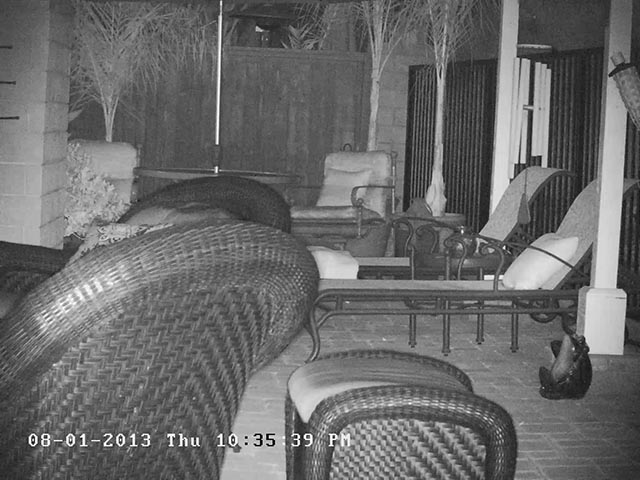
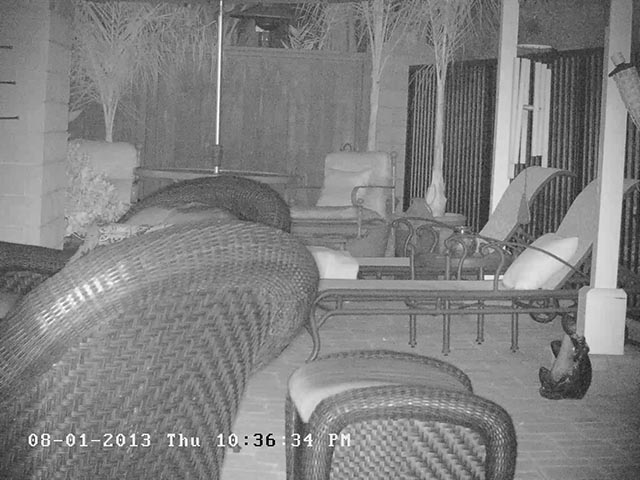
I mounted the camera in my backyard. Again, with the 12mm lens it covered the narrow space well. My backyard is about 62′ wide and 15′ deep, and the fence in this image is 50′ away. This was with WDR off and shadows are dark with little detail like the wicker back of the closest chair.
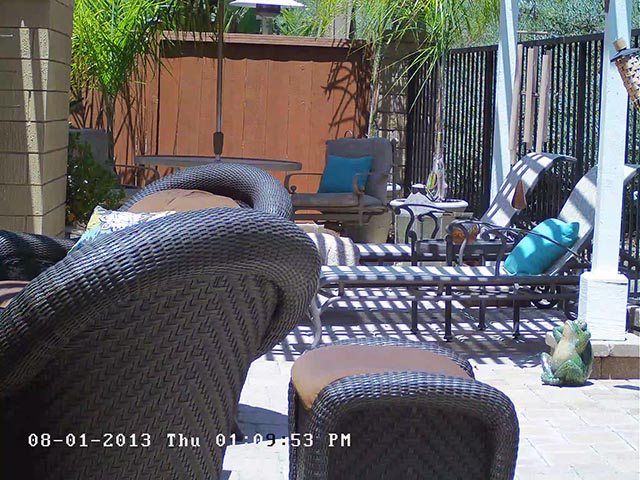
I changed WDR to 20%. Now you can see good detail in the shadows, the weave on the chair for example.
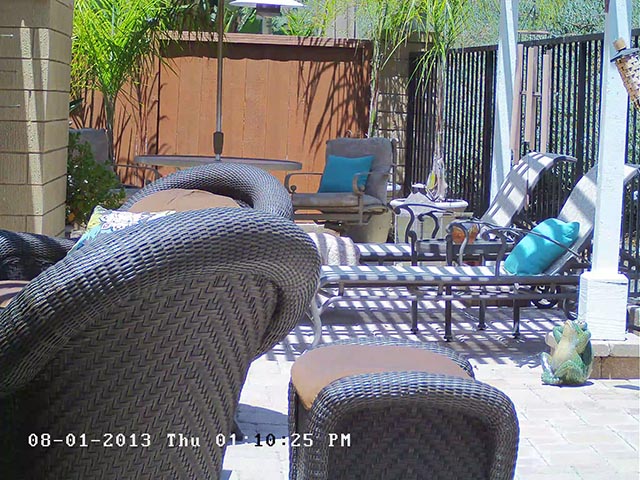
I also set WDR at 50% where you can see even more detail, but the image starts to wash out, not much value over 20%.
At night, with WDR off the image looked good, just the right amount of contrast, good detail, good IR coverage, even at 50′ away, you can see the detail in the grain of the wood on the fence, in the wicker weave of the chairs.
With WDR set to 20%, it’s too much and additional noise is introduced. I find that 6-10% at night provides a good clear image with some WDR benefits.
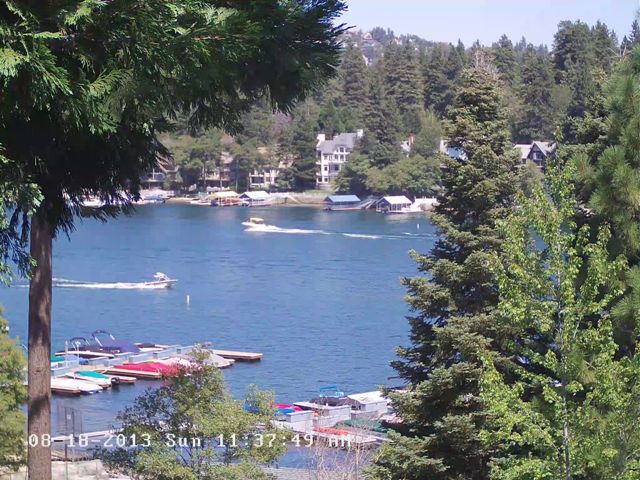
Lastly I mounted the camera indoors looking out a window at our lake home. Not much need for IR illumination since the lake is too vast an area and at night it’s just pitch black. So I took two day shots, the first is with WDR turned off
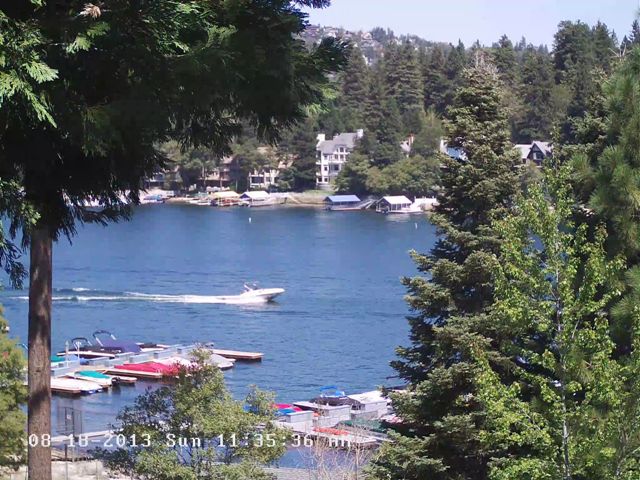
I set WDR at 9% as I found that optimal for me, shows a little more detail in the trees.
I uploaded day and night videos to YouTube. To see them at the full 3 megapixel resolution, you must click on the gear icon and select original quality and then click on the icon with 4 corners to see the video full screen. The video was extracted using BlueIris.
- Pre:Dahua IPC-HDW2100 1.3MP IR min 2014/9/3
- Next:Hikvision DS-2CD2132-I 3MP IR 2014/9/3