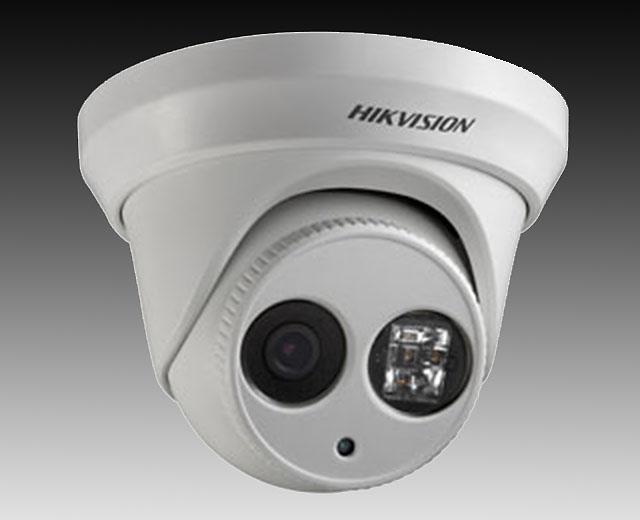
Hikvision DS-2CD3332-I 3MP outdoor eyeball/turret/mini dome camera review
Here’s an camera that is called by different names, even on the manufacturers website. Sometimes it’s called a mini dome, a turret but most in the industry refer to this as an eyeball camera. Sort of a cross between a bullet and dome. Has the ease of installation and easier aiming of a bullet, but the round more compact shape of a mini dome without some of the negatives associated with domes.
Main Features
1. 1/3” 3 Megapixel CMOS sensor
2. H.264 dual-stream encoding
3. 30fps @ 1080P (1920 x 1080) or 20fps @ 3MP (2048 x 1536)
4. 4mm or 2.8mm fixed focal lens
5. Day/Night IR Cut Filter
6. IR LED advertised working distance 30m
7. IP66 Rated Outdoor Eyeball
8. Powered by PoE or 12V
9. 3D DNR & DWDR & BLC
10. Smartphone apps available
You may be asking, where does an eyeball camera fit in. As compared to the Hikvision mini dome I recently reviewed, this camera does not have the plastic dome that protects the front of the camera, which makes the mini dome more discrete by not knowing where it’s pointed and protects it from being shifted and damaged, so why chose the eyeball style over the mini dome?
First, this camera can be adjusted in 3-axis, meaning it can be mounted in any orientation and be aimed as you wish where the mini dome is a 2-axis camera and must be mounted level facing up or down, not for example, surfaced mounted on a wall or on a slanted eave. Also, not sharing the lens with an IR illuminator behind the same a piece of glass or dome means zero chance of IR light bleed that may occur in IR mini domes. The other problem just about all domes have that an eyeball does not is glare on the dome from reflections, so a potentially cleaner image. And lastly, you don’t have to remove the dome cover to install the camera or aim the lens, making it easier to install.
So why not the Hikvision bullet camera? Eyeballs once aimed and tightened down are much harder to knock out of position, say by a suspect poking at it with a broom handle. Also, it’s more compact looks gives it a more discrete look than a bullet.
Like the Hikvision mini bullet and mini dome, this is a no-frills camera with a fixed lens, no SD card slot, alarm I/O or audio capabilities. But it does really well at being a camera.
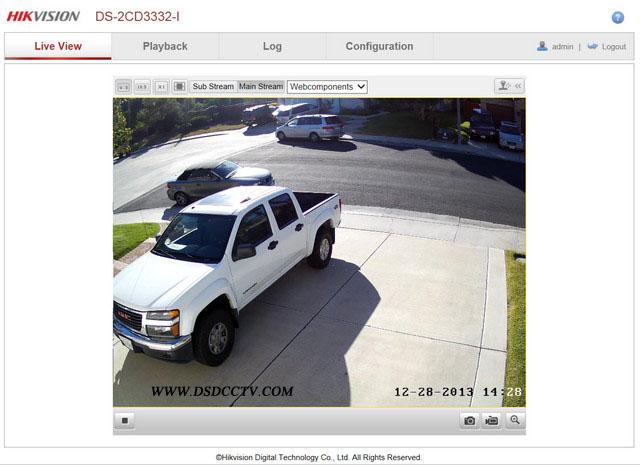
If you are familiar with previous Hikvision cameras you’ll notice changes to the menus as this camera has the 5.1 firmware installed. The initial screen looks pretty much the same except for three differences I noticed. The first is you can’t select the language in the upper right. The second is when you chose 4:3 or 16:9 display format, it fits the entire image on the screen in a smaller size. In the older version of the firmware, it displayed it larger so you had to scroll. The last is you can chose to use Webcomponents or QuickTime to display the video.
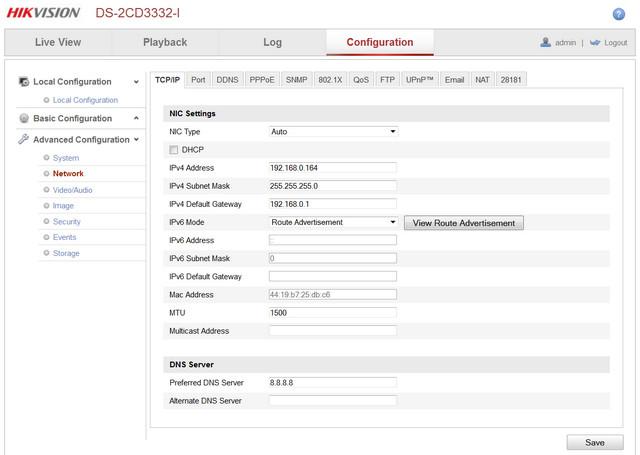
You can set the IP address with the SADP program that is included in the CD. If you have a Mac, this may not be possible, you can change your Mac to a fixed IP to something like 192.0.0.128 and then connect to the camera as 192.0.0.64 and go to the Network menu and change the IP to your home subnet here.
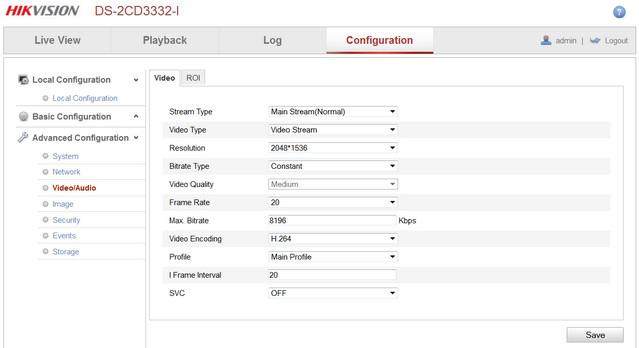
You can set the resolution, frame rate (now up to 20fps for 3MP), and bitrate in the Video/Audio settings (sorry, no audio capabilities on this camera). You can set it to 1080P at 30fps if you wish, but for me, I like to get all pixels possible so all images shown later are in 3MP mode.
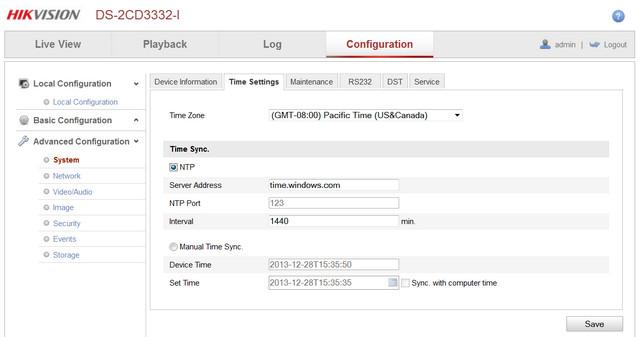
The next thing you may want to do is set the time. I set all my cameras up to use the Windows Time Service at time.windows.com. The reason is so that when an event occurs, my PC, my NVR software, my cameras all have the same time down to the second.
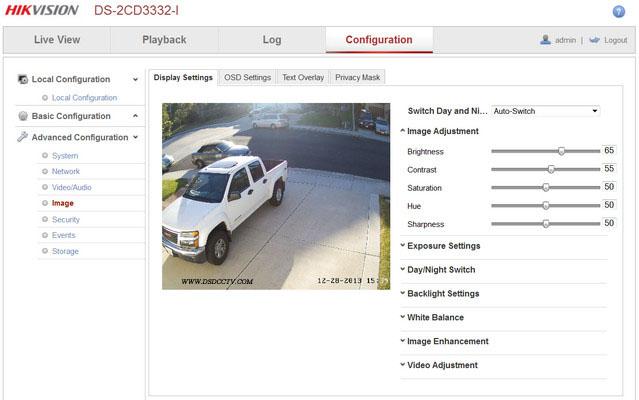
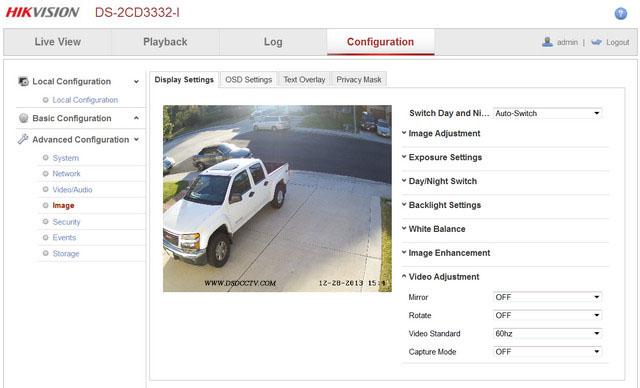
The next step is to setup the camera in the Images menu. This is probably the area that changed most significantly in the look and style. Most of the choices are the same, but placed in sort of submenus.
The first one is Image Adjustment and that’s where you tweak how the image looks like brightness, saturations, hue, sharpness and such.
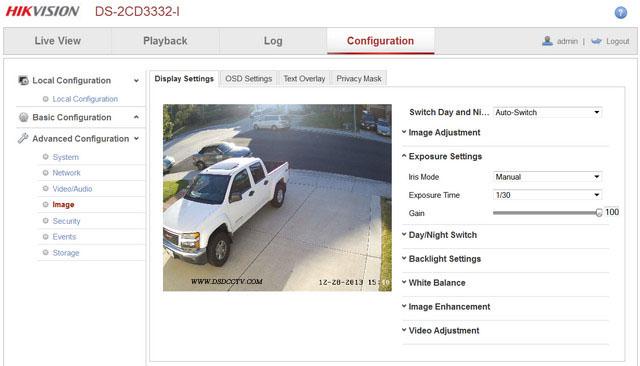
The next sub-menu is for Exposure Settings. Here I set the maximum exposure to 1/30th. Iris Mode is irrelevant as this is a fixed iris model.
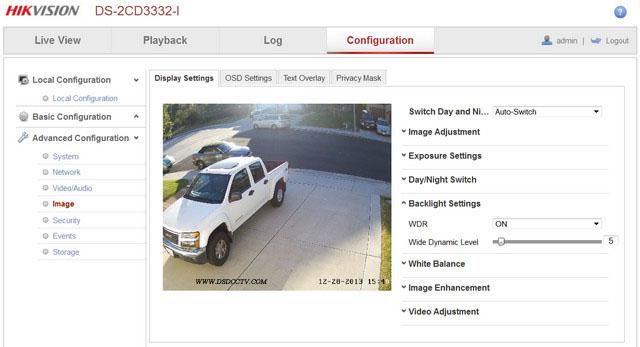
WDR is set under the Backlight Settings option. WDR worked very well as it did on other Hikvision cameras. I did find that it did not have a profound effect on noise at night as it did in previous firmware versions.
The Video Adjustment sub-menu is also an important menu to visit. This is where you setup if your country uses PAL or NTSC (USA) standard. You set the Video Standard to 60hz for NTSC and 50hz for PAL. It will work either way, but 60Hz allows you to use 30fps and multiples of that and 50hz has a maximum of 25fps and multiples of that.
Also, you can rotate the image 90 degrees. This allows you for example, to see an image as 1080 x 1980 instead of 1980 x 1080. Very useful say in side yards of your home to capture a long narrow area or indoors in a long corridor.
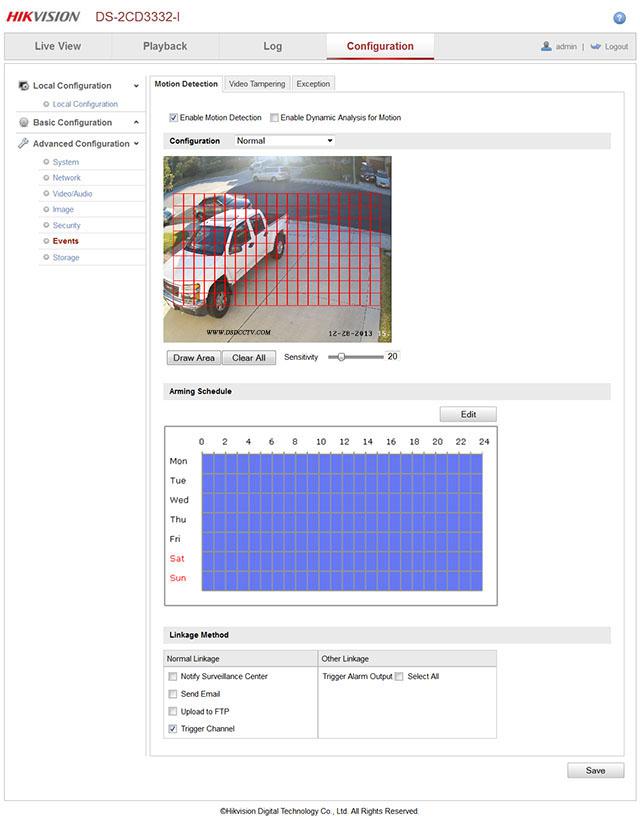
To setup motion detect events, in my case for my NVR software to use to record, the Events menu option lets you chose the motion detect area as a series of squares. Can be separate squares or contiguous like I have it below.
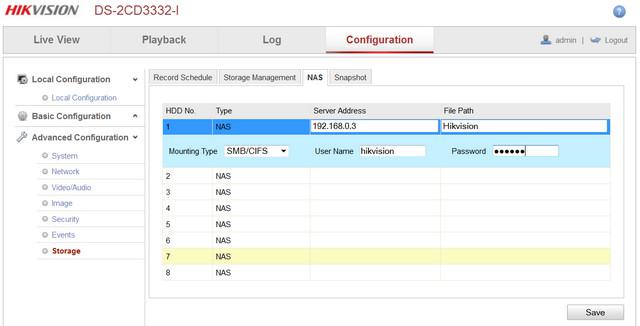
One new long awaited feature is the ability to have it record to network disk (NAS) via SMB/CIF which is a common Windows type mount found in inexpensive NAS devices. I was not able to get this to work with my NAS, but some people I talked to have. I would expect them to iron out any bugs and have this working more consistently in a future firmware release.
Images
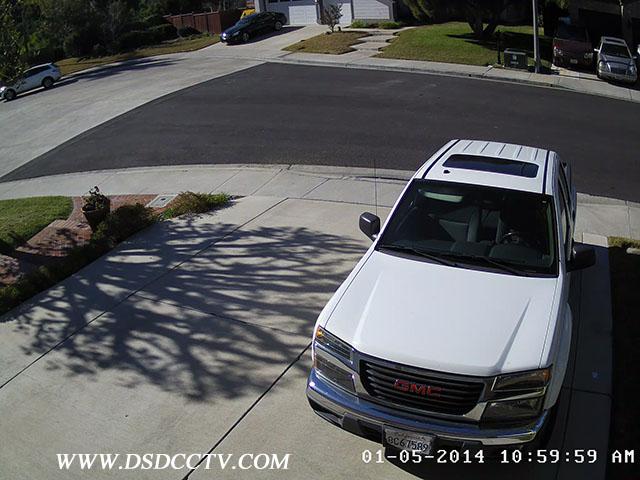
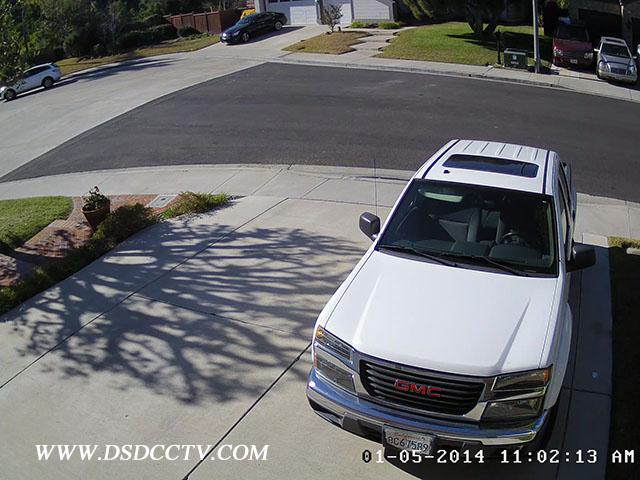
Now onto the images. I mounted the camera with a 4mm lens in the usual spot, under the eave of my garage. As before, you can click on the image to see the full size 3 megapixel image straight from the camera. Also as before, I set the max exposure time to 1/30th which is a good compromise between low light performance and movement.
This is a day shot with WDR turned off, color balance is quite good and it’s a clear and sharp image but the sharp contrast in the image makes detail in the shadows hard to distinguish.
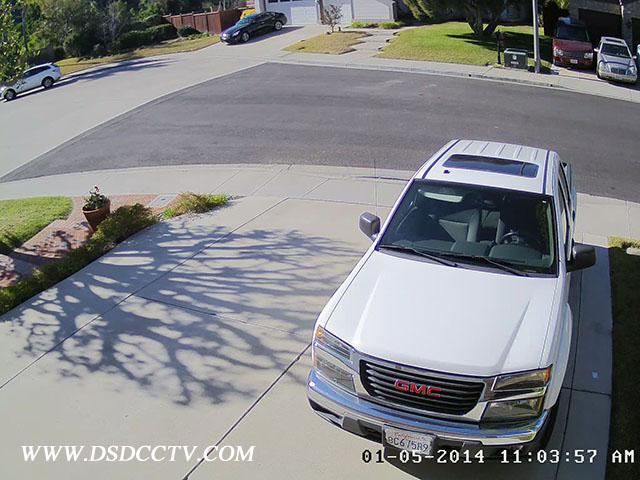
With WDR set to just 20% you can start to see more details in the shadows of the truck and tree
You can keep going and setting it to 50% would give you even more shadow detail as shown below but may make the image look more washed out. For example, now you can see the detail in the shadow of the fence across the street on the left. A lot of this is personal preference.
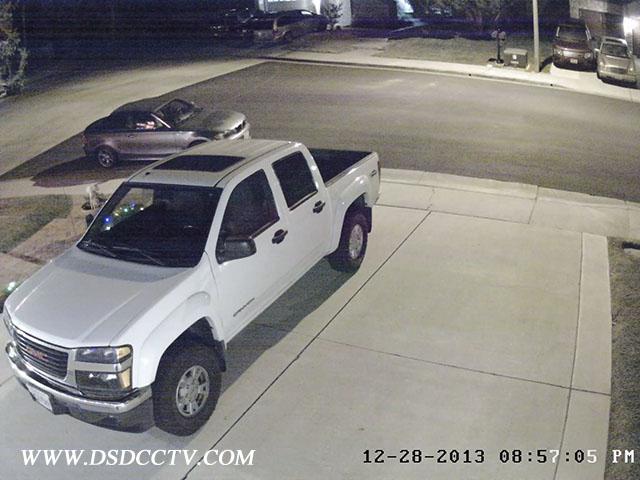
At night the image quality from available light and the built in illuminator was very good.
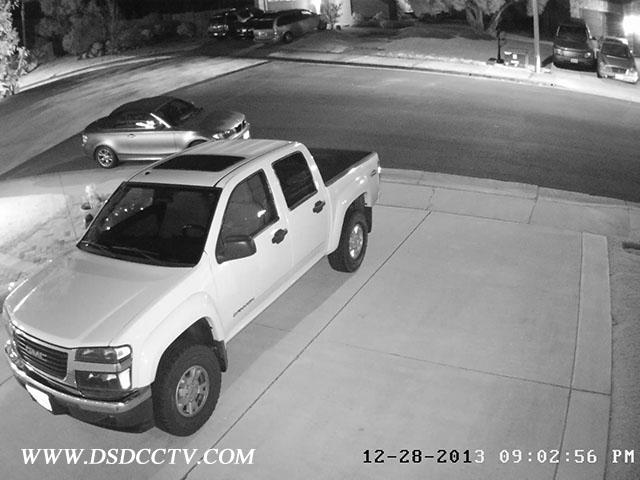
So much so that if you have lighting like I do here from a single street light and 2 porch lights you can just leave it in color day mode all the time.
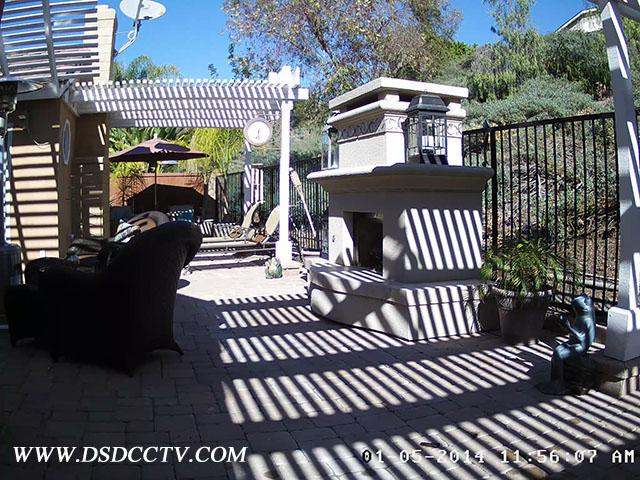
In the backyard, where there’s a different mix of lighting, I took this daytime image with WDR off. You can see the sharp contrast from the patio cover and shadows from the chair make it hard to see detail.
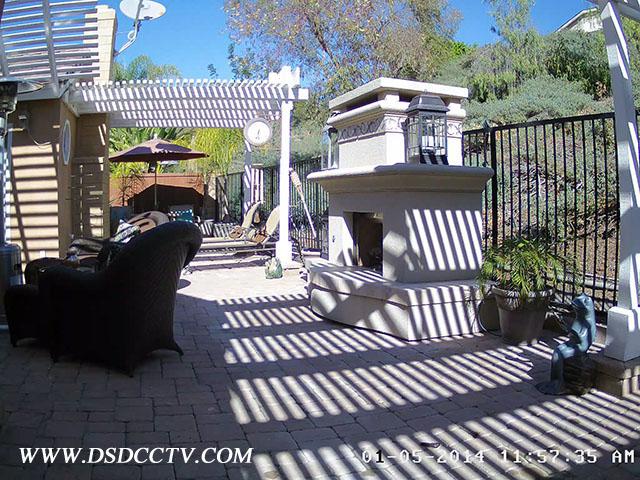
With WDR set to 20%, you can see a huge difference in the shadows.
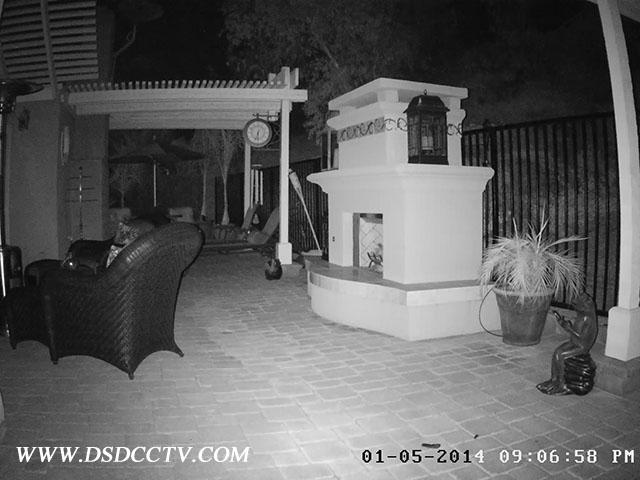
At night, with WDR turned off, the single IR LED did really well. While it had a hot spot in the center, it still lit the edge well.
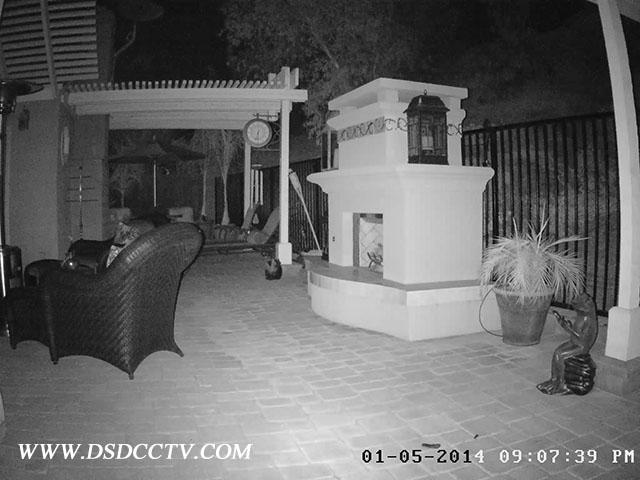
Setting WDR to 20 did a good job of making the lighting look more even without the additional noise that it did on previous firmware releases. I would feel comfortable leaving WDR set at 20 day or night which I didn’t feel that way before.
I uploaded day and night videos to YouTube. Youtube does not seem to show 3MP anymore but you can still see them in 1440P mode, you must click on the gear icon and select 1440P quality and then click on the icon with 4 corners to see the video full screen. The videos were extracted from Milestone XProtect NVR software.
This camera is small and has such great clarity, low light performance, good color accuracy. I was able to find this camera for as low as $169.99 with free shipping, both available from , it’s definitely worth trying one out.
One thing I had trouble with is how to remove the plastic ring from the base of the camera so you can mount the camera. Turns out the harder I squeezed to turn it, the less likely it was to move. With a very light touch and a quick twist, it came right off. There’s a screw there that tightens down the adjustments. Loosen that until the camera is aimed as you wish and then tighten it down and put the plastic ring back on to hide the screws.
The other thing to note is the Smart IR feature may cause the image to appear darker than normal. It’s set on by default, but you can find that option under Image –> Day/Night Switch –> Smart IR.
The 5.1 firmware for the camera is available here on
The pluses for this camera are;
1. Price & Value
2. 3-axis dome adjustments
3. Very good low light performance in color
4. 3MP, 1080P or 720P resolution
5. Day/Night IR Cut Filter
6. Ability to record to NFS or CIFS and playback from the camera
- Pre:Hikvision DS-2CD2732F-IS 3MP I 2014/9/3
- Next:Hikvision DS-2CD2532F-I 3mp ou 2014/9/3