synology dsm 4.2 surveillance station review
I’ve been asked about what’s a good reasonably priced NVR that supports a wide range of cameras. I thought about it and most that come from surveillance cameras companies work mostly with their brand although some support a few brands, it’s not wide enough to cover all. So I had a chance to install Synology’s latest operating system, DSM 4.2, mostly for my previous review on Hikvision’s ability to write to NFS, but then curiosity got the better of me and purchased 3 Synology Surveillance Station license (first one if free) and put it through it’s paces over the past few weeks.
First you have to understand what Synology is. It’s dubbed as a “smart” NAS as you are able to install apps on the NAS in a similar way people add apps to their smart phones. It displays an icon list of apps and you click on the icon and it installs the app. Surveillance Station is one such app and you get to use it for free for 1 camera. Additional cameras cost $49.99 from Synology but other resellers may offer it for less.
When you first log on to the NAS via a web browser, it displays a screen like this
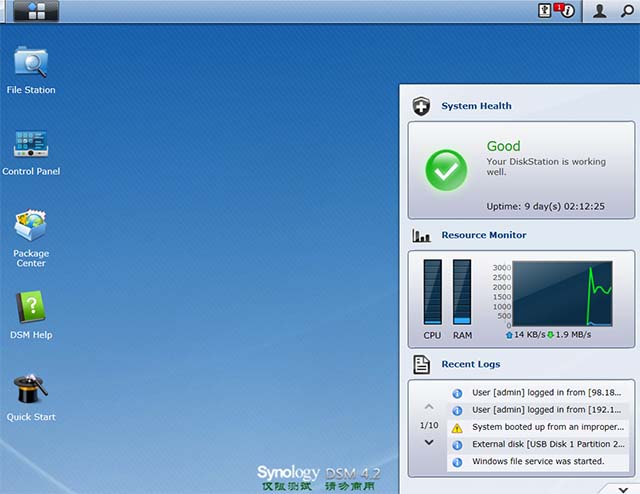
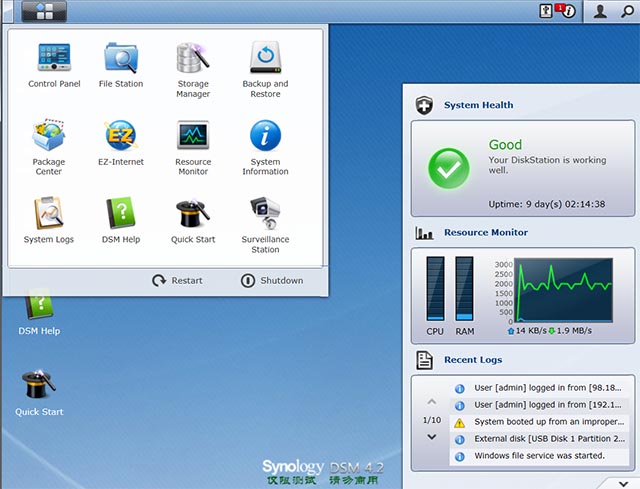
Clicking on the 4 square icon at the very top left lists the installed apps and clicking on Suveillance Station opens a new window. Important to note that while the NAS devices have weak processors, the CPU utilization with 4 cameras, 2 with camera based motion detection and two generic camera via ONVIF with NAS based detection, CPU use never really got above 10-20%. You can monitor NAS performance from this main screen.
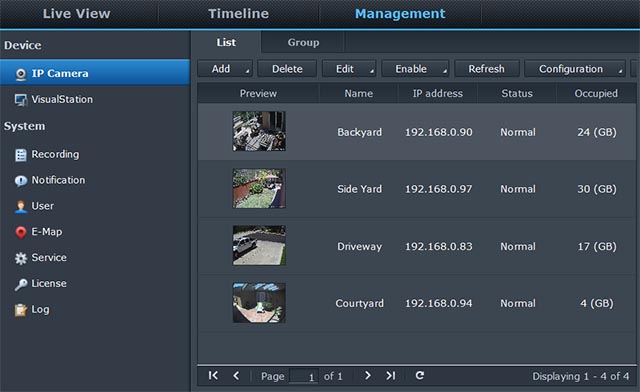
This is the first screen in Surveillance Station. Why they chose to enter on the Management tab is a mystery as most NVR solutions enter on the Live View screen.
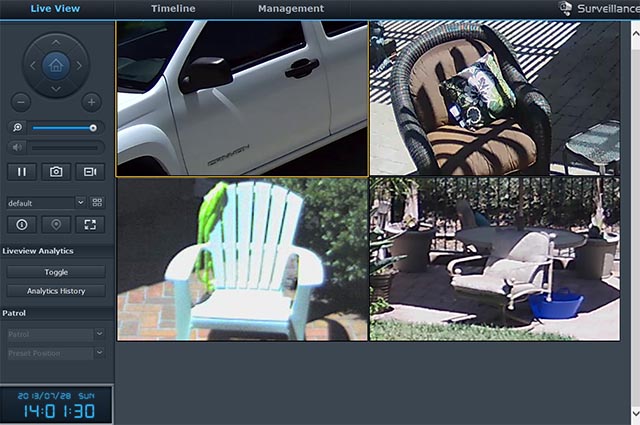
You can see there’s basically 3 tabs for Live View, Timeline and Management. So I’ll start with the simplest by clicking on Live View. As you can see, I have a simple layout of 4 cameras, but you can chose from several layouts. Double-clicking on one camera image displays only that one camera, double-click again to return to the standard layout. You can create multiple layouts by selecting it from the drop down with the word “default” on the left. Clicking the the icon to the right of that allows you to edit and create new layouts.
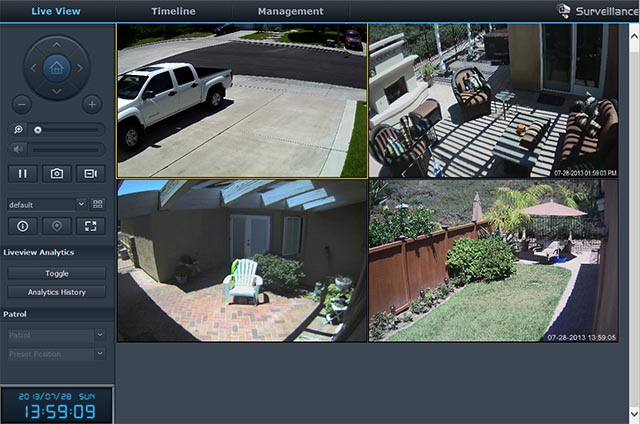
The active image has a yellow boarder, you can use the zoom slider or a mouse wheel to zoom in/out of an image (applies to playback too) and you can use the mouse to drag the image around, pretty intuitive. You can see from the picture below I zoom in to each camera’s image.
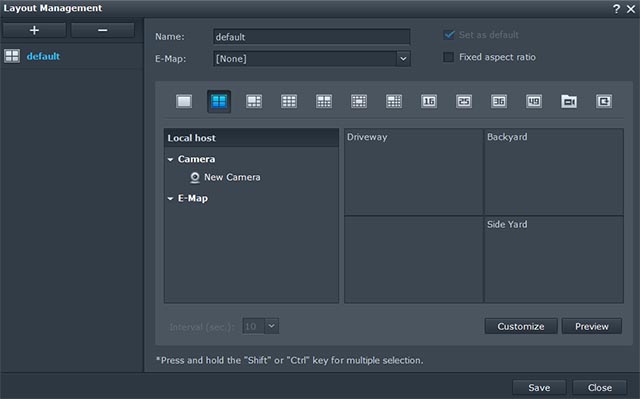
Cameras don’t automatically get added to the layouts, you have to add this manually in this screen by dragging available cameras to the square. You can’t add the same camera twice so you have to drag it out of the box to add a new on in it’s place.
To view recordings, you click on the Timeline tab on top. There’s a slider on the right that you move to find recorded video (green bars). This is in Sync mode where it shows all cameras synced together. You can unsync them by clicking the icon that is currently blue in the lower left. This creates a line for each camera that you can work independently of each other
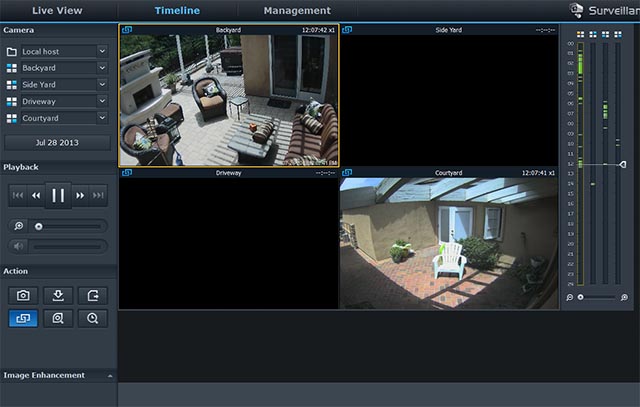
The other icons are the camera for snapshots, the down arrow for downloading video, the eye for a smart search, and the clock for time seek (search by time).
The timeline on the right with the green lines represents recordings made. When zoomed out by default, it represents a 24 hour period but you can move the slider below it to zoom in to get finer detail of recording times.
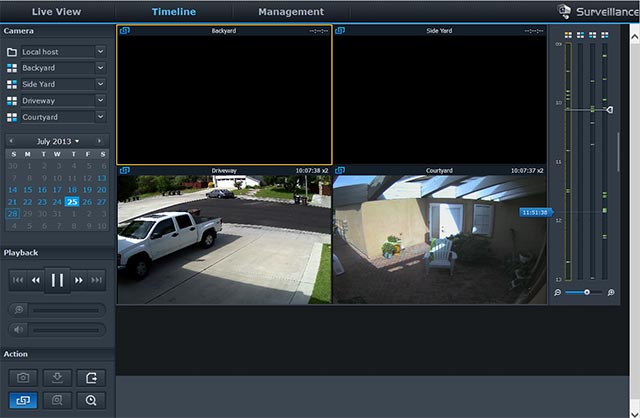
You can see there’s a calendar where you can chose different dates to search. You can also use play/pause to control playback as well as click on the double arrows next to the play button to control speed like 1x,2x, 4x, 8x as well as slow motion, 1/2x, 1/4x, 1/8x.
Clicking the eye icon for Smart Search puts you in this screen. From here you can select from a wide variety of search types as shown below. Then draw the area to be searched and click search.
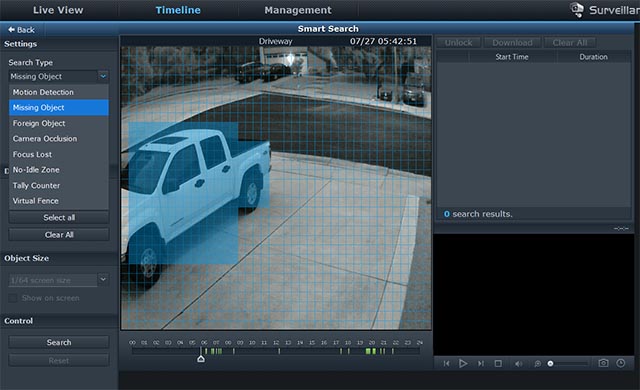
It goes from recording to recording looking for events that match your search criteria. It’s slow as it has to analyze each recording but faster than doing it by hand one at a time. When it finds a match, it shows a blue square where motion was detected and puts it on the list on the right as a video found.
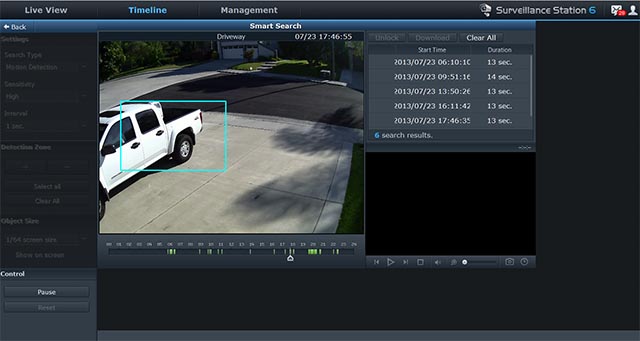
After all the videos are found, you can double-click on each one to view it in the playback box.
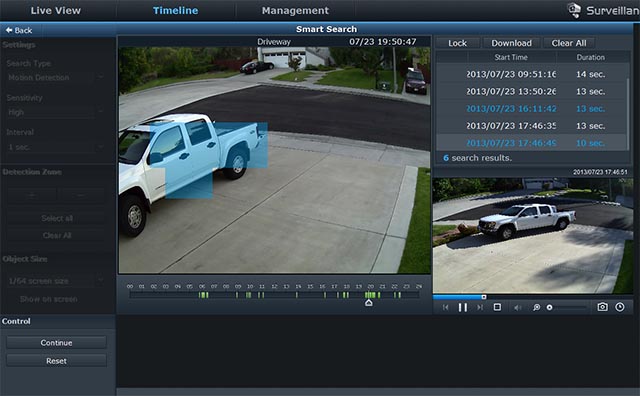
It works as expected and can help speed up looking for the needle in the haystack.
Circling back to the Management tab, this is how cameras are added. Beyond the first one, you’ll need to purchase additional license keys. To add a camera, in the Management tab, click on IP Camera on the left side of the screen and then click on the Add button. This is the screen you will see.
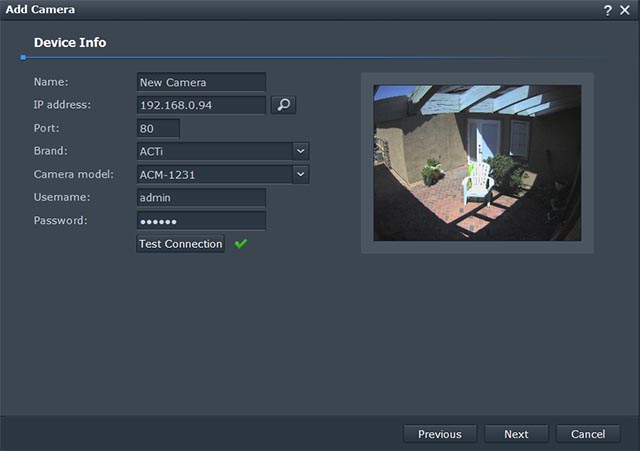
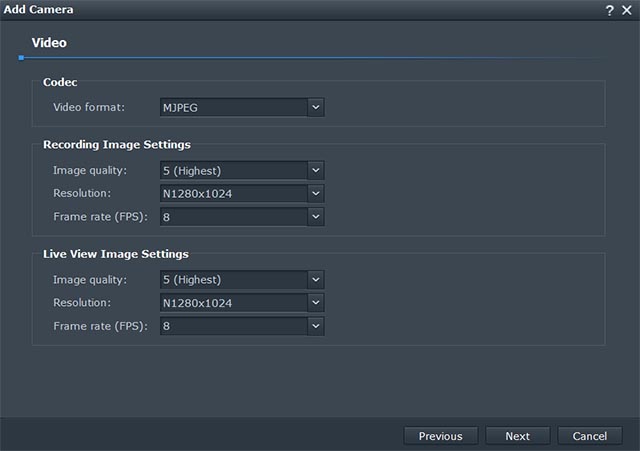
I filled out the values and clicked the “Test Connection” button to make sure it’s correct. Click on Next takes you to this screen where you set the resolution and video format. Don’t try an set the recording and live view settings as different as it doesn’t work, they have to be the same, but may be a limitation of my camera, not this product.
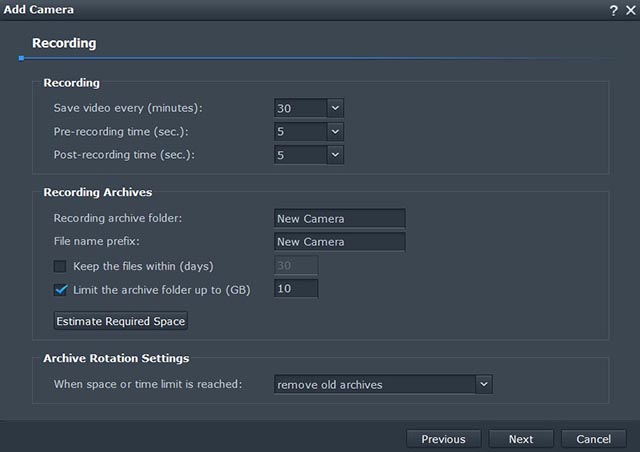
Clicking “Next” takes you to the recording options
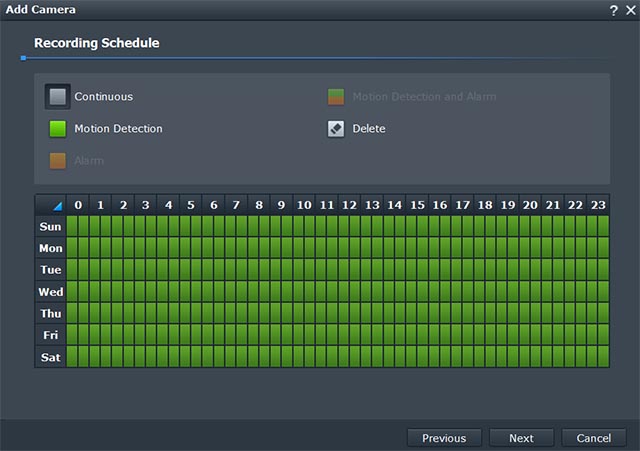
Clicking “Next” takes you where you can set a recording schedule, for example if you only want it to record while you are at work.
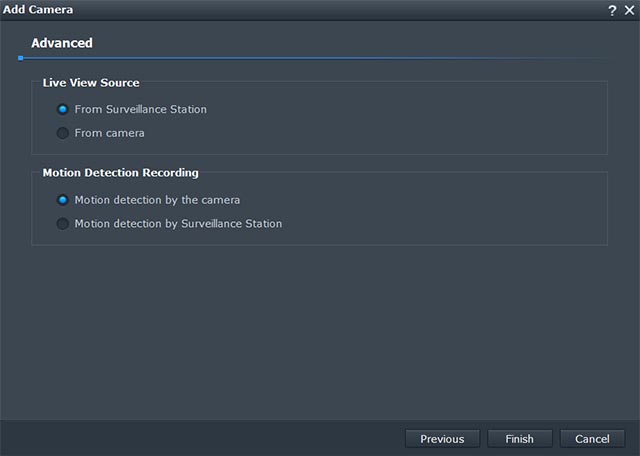
Clicking “Next” takes you to the final screen in the Add camera wizard. This allows you to chose if you want the camera to do the motion detection and provide the Live View feed or you want Surveillance Station to do this. If it’s a generic ONVIF camera that’s not on their supported camera list like Dahua, then you have no choice but to let Surveillance Station do the motion detection. Clicking on the “Advanced” button lets you pick the motion detect parameters to complete this.
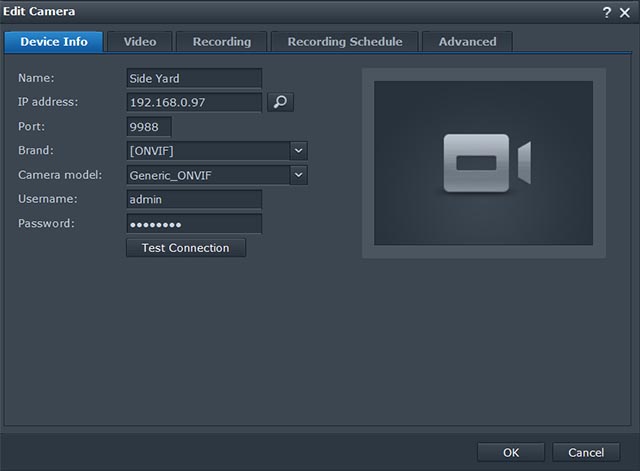
If you make a mistake or want to change something, you can select the camera and click Edit and make the changes here. Go from tab to tab to make any changes you want.
Conclusion
After using Synology Surveillance Station for a few weeks I’ve come to a few conclusions. Having a NAS at home to do backups of multiple PCs, for having servers process setup that you may need and multi-tasking as an NVR is a cost effective NVR solution vs. dedicating a PC for this or having a dedicated NVR.
There are some quirks you should be aware of, none are critical but can annoy some people;
1. 1080P max resolution – I have a 3MP camera in the mix and it cropped it to 1080P
2. It can be slow as it’s web based on moving video from the NAS to your PC can create a few second wait between viewing videos
3. Has quirks on playback where it sometimes stops after viewing a few events and you have to hit play again
Some of the pluses of Synology Surveillance Station are;
1. Web based interface is identical no matter where you are
2. Free Android and IOS app to view each camera one at a time and view recordings from list
3. Combining multiple functionality of a NAS with Apps on one device may save you money
4. Updates are free (no annual maintenance fee)
This is a good choice if you want an NVR that supports a lot of different brands and models of camera, you are OK with 1080P resolution as the maximum and you can take advantage of NAS features or other apps available on the device.
More information and specs are available on their website
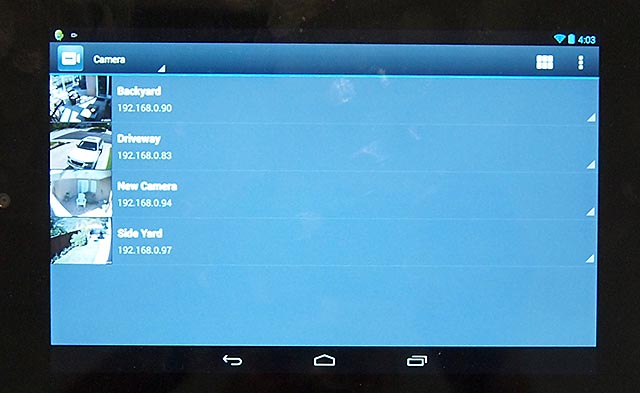
UPDATE: This what their free DSCam Android app looks like (they also have an IOS app). These are pictures of my Google Nexus screen taken from my camera.
This is the initial screen showing the 4 cameras. Does not have layouts, just shows a list of cameras -
Tapping on a camera displays that camera in full screen (my camera is 4:3 and my Google Nexus is 16:9 so it preserves the aspect ratio). You can zoom with typical hand gestures.

To view recordings you tap on top bar and selected recordings. It gives you a list of recordings as shown below. Tapping on a line plays the recording.
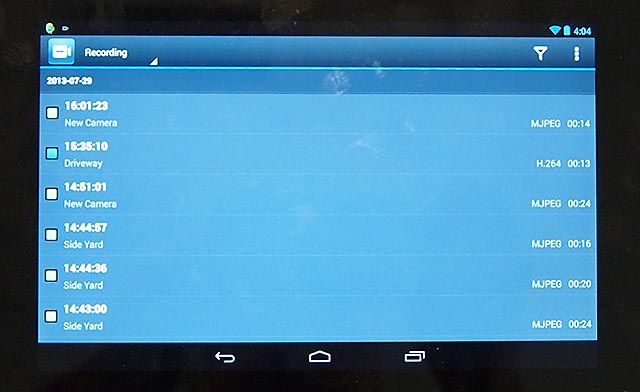
My only comment is that it works. I’ve seen better. I would expect to see all cameras at once on one screen. I would have expected to at least see thumbnails on the list of recordings and have options to filter by camera and time period. Looks like it was written to be optimized for a small smartphone screen but today’s 5″ Android phones and tablets, I would expect something a little more complete.
- Pre:Blueiris nvr software review 2014/9/3
- Next:Dahua IPC-HDBW3110 1.3MP CCD I 2014/9/3