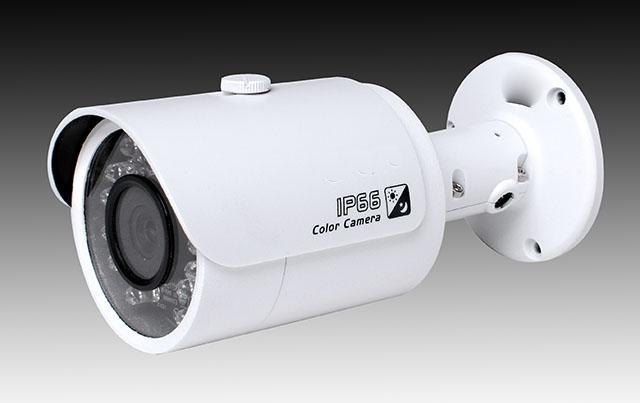
Dahua IPC-HFW2200S 1080P HD IR mini bullet camera review
Dahua is now offering it’s “Lite” series and this is their flagship camera in this new series. It uses a 3MP CMOS sensor but at the moment displays a maximum of 1080P at 30 fps. So what makes this camera “Lite” is the low price because feature/functionality, this cameras is on par with others priced higher. The camera delivers with good image quality, good responsive interface in a well built compact mini bullet.
Main Features
1. 1/3” 3Megapixel progressive scan CMOS sensor
2. H.264 & MJPEG dual-stream encoding
3. 30fps@1080P(1920×1080)
4. 3.6mm fixed lens (6mm optional)
5. Viewing Angle 72.5°(44°)
6. Wide Dynamic Range (WDR)
7. 2D Noise Reduction
8. Back Light Compensation (BLC) and High Light Compensation (HLC)
9. Day/Night IR Cut Filter
10. IR LED working distance 30m
11. IP66 Rated Outdoor Bullet
12. Powered by PoE or 12V
13. ONVIF Profile S
14. Smartphone apps available
For those that are Dahua fans, you are probably wondering how image quality compares to their other mini bullets, the IPC-HFW3200S and IPC-HFW4300S. The answer is that it’s in between. Has some of the traits from the 3200S like sharper contrast image, but not quite as contrasty but more so than the 4300S. While the more expensive models have 3D noise reduction, I found the 2D noise reduction here to work well, sort of a Dahua trait of having better than average noise reduction. The older more expensive models do have a slight edge in low light performance, but that’s not to say this is a slouch and certainly a great bang for the buck camera.
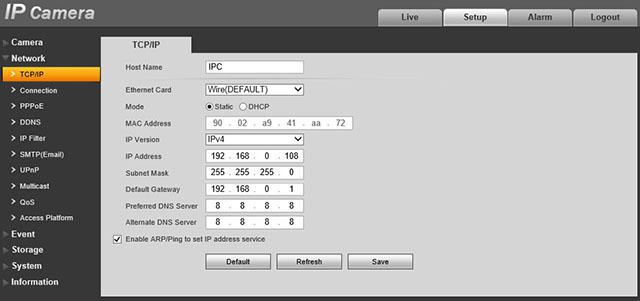
The same config tool that Dahua has been using for a long time is what is used to initially find the camera and change the IP address that is compatible with your network. The default address is 192.168.1.108 and in my case, I changed it to 192.168.0.108 to work with my network.

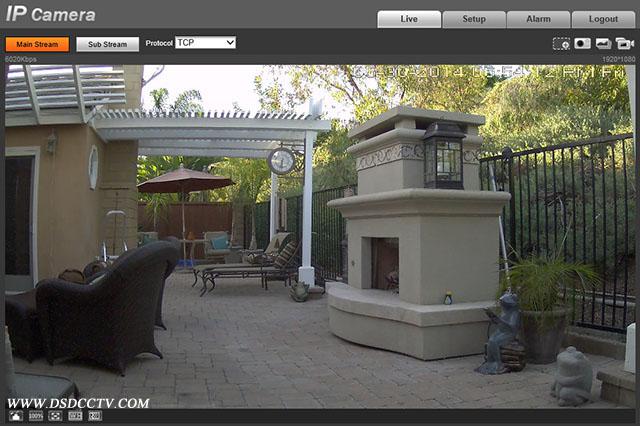
This is what the web interface looks like when you first log in. There’s options to take a snapshot, manually record, chose a stream and more. If you have a previous model Dahua, all will seem familiar.
To go to the configuration screens, click the Setup tab on top. One of things you may want to check is the Network tab to make sure your networks settings were setup correctly by the ConfigTool.
To set the time and keep it in sync with a time server, use the System -> General menu option and the Date&Time setting. You can set the date & time format, set the daylight savings time if your area requires that and the NTP (time server) to use to synchronize the clock.

Under the Camera menu on the left, Conditions is where you find the camera image settings. This is probably where you will spend more time fiddling than elsewhere.
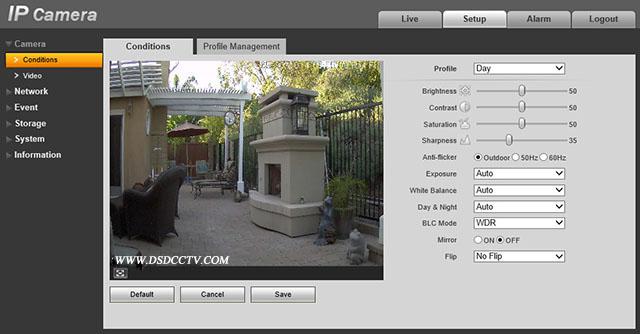
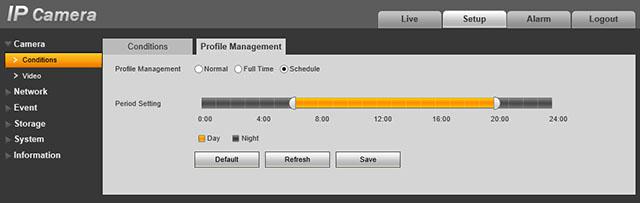
Moving across the tabs to Profile Management allow you set different options for day vs. night. In this screen you can chose a schedule and pick which time a profile takes effect. This is handy for setting different modes or contrast for day vs. night. This does not set the Day/Night IR cut filter, that is separate.
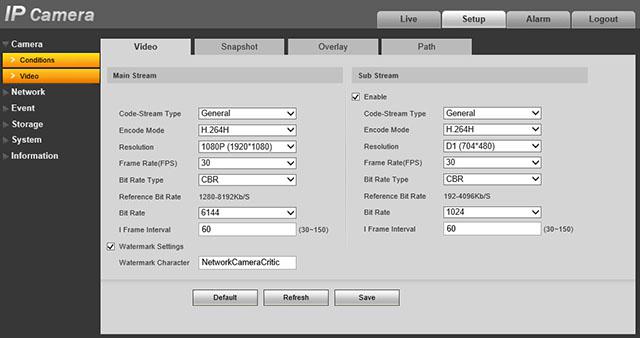
Resolution and frame rate are chosen in the Camera Video screen. This camera will do up to 30fps in 1080P mode but can be set down to 704 x 480 with a few choices in between.
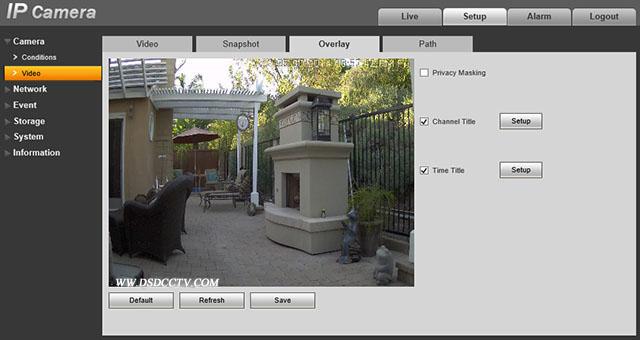
Moving to the right across the tabs, the Overlay is where you put the time and name overlay funtions as well as privacy masking if you chose.
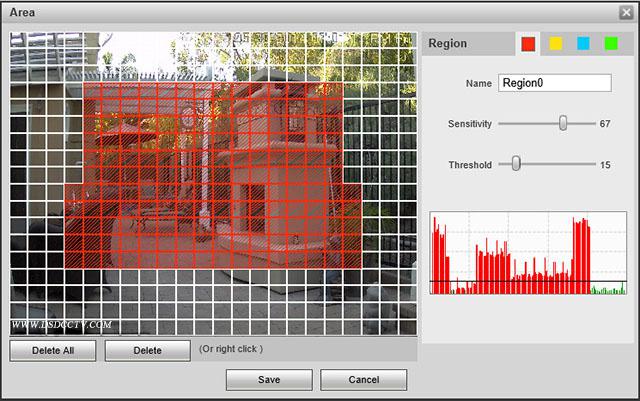
If you want the camera to record on motion, there’s a few things you have to set. First is under Event, Video Detect. You have to enable this feature.
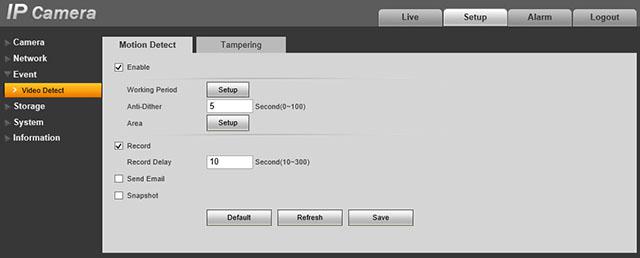
Then click on Setup next to Area to define the motion detect area. This is different that previous Dahua cameras I’ve tested. You can draw in the motion detect area, play with the sensitivity and threshold settings and see the results in the moving graph. I purposely cranked up sensitivity so you can see what happens. The red in the graph shows that motion has been triggered with the settings.
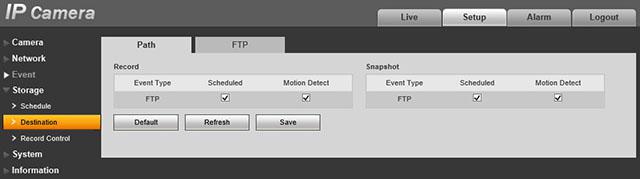
If you want the camera to FTP event videos, go to the Storage, Destination screen, select the FTP tab and enter your FTP details. I used this feature to create the videos used here, worked very well. What interesting is that YouTube took the .DAV files as-is. Dahua comes with a CD that contains player software to play .DAV files on your PC. What nice about their latest player is when you click on one video for an hour, it will show you all the videos for that hour on the left side of the display, you just select the video you want to play. This makes the FTP solution more usable.
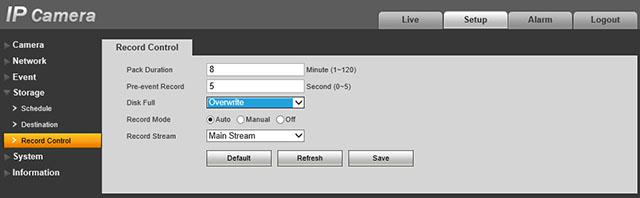
Next go to the Record Control screen to select options, like what stream to record and how many seconds of pre-event video to record.
Now onto the images, how well does this camera perform. I mounted the camera at two places, one at the front of my garage, under the eave, and in my backyard because they represent different lighting situations. This camera has the 3.6mm lens which is fairly wide and covered most of front of my home.
As with my other reviews, click on the images below to see the full size image, straight from the camera.
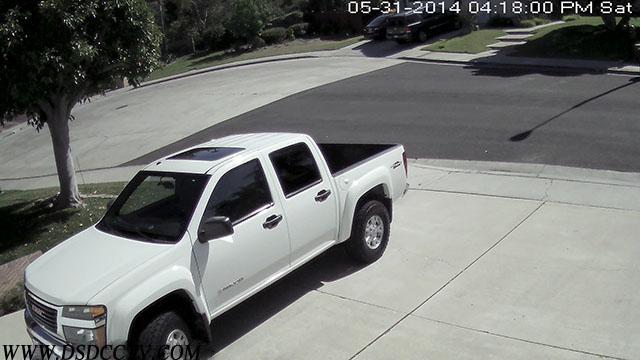
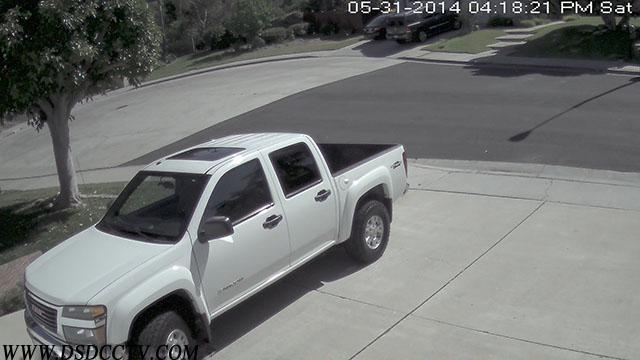
This is a daytime shot in my driveway. The detail, color, contrast is pretty good.
Turning on the Wide Dynamic Range (WDR) feature reduces the contrast significantly that lets you see more in to the shadows but makes the image look dull. Sort of a trade off between having a pretty picture and having one with more detail in shadows, for example, getting facial features when someone’s face is partially obscured by the shadow created by the brim of a hat.
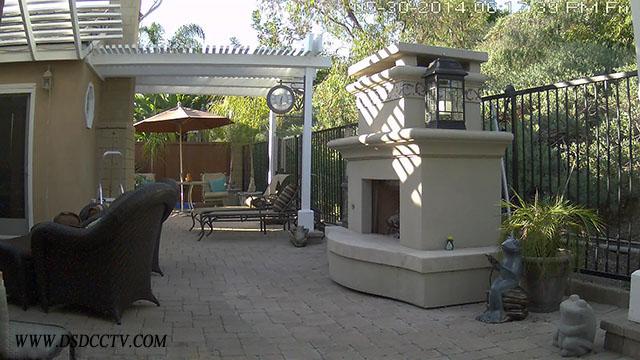
This is shot taken at dusk in my backyard. Good color balance, crisp display.
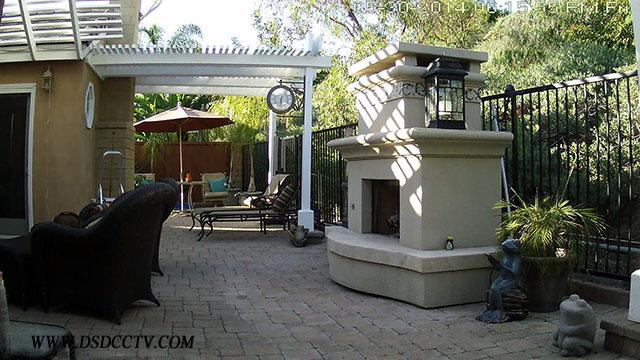
The same with WDR turned on shows more detail in the shadows
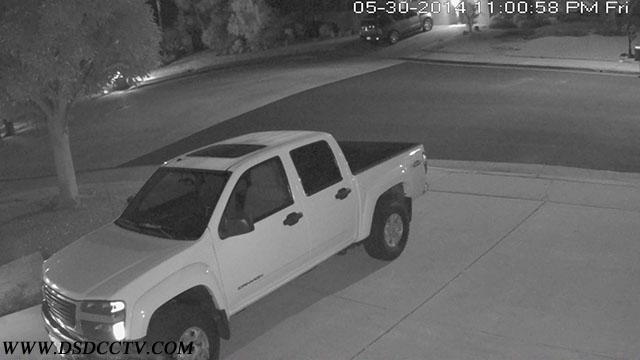
At night, the image quality is pretty good, in this case with WDR turned off, exposure at AUTO.
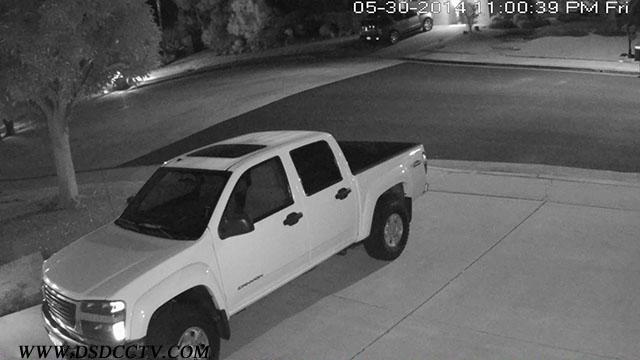
With WDR turned on, you get more detail in the dark shadows, for example, the tire detail, the seat detail.
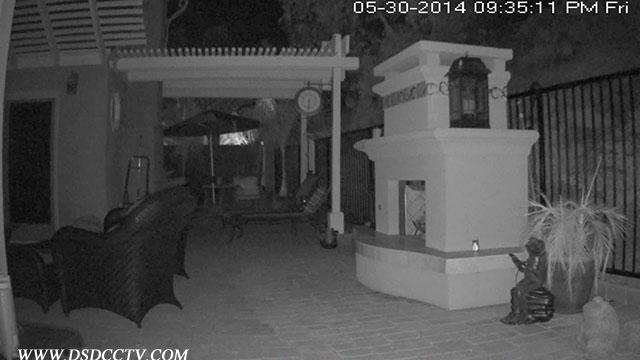
In the backyard where it’s very dark, you get a nice spread from the IR illuminators but not much more than about 30′ seems well lit.
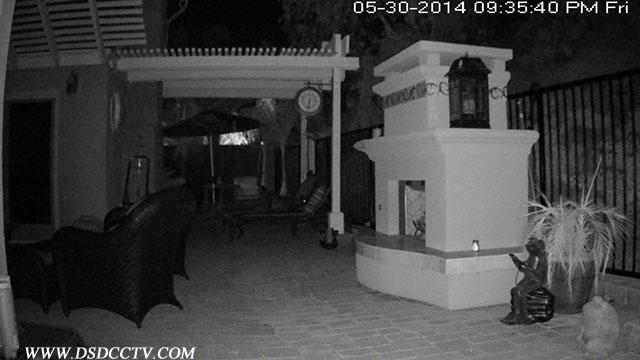
Turning on WDR gets more detail in the shadows, allows you to see further out.
I uploaded day and night videos to YouTube. To see them at the full 108P resolution, you must click on the gear icon and select 1080P resolution and then click on the icon with 4 corners to see the video full screen.
- Pre:Dahua IPC-HFW3200C 1080P bulle 2014/9/3
- Next:Dahua IPC-HFW2100 1.3MP mini b 2014/9/3