Hikvision ds-2cd6412fwd-30 1.3mp covert camera review
Ever want to make a camera less visible, hide it from view, be discrete? For example, maybe condo rules prohibit you
from having a camera, or you want cameras in your home, but you don’t want them to stick out for aesthetic reasons.
The Hikvision DS-2CD6412FWD-30 may be for you. The camera electronics are in a box about 4 x 3″ and 1 1/4″ tall,
the camera itself is about 2″ long. While the concept is not new, the Axis P12 has been out about year, but the price
point makes this an affordable choice.
Main Features
1. 1280 x 960 resolution (1.3MP)
2. Electronic Day/Night
3. 120dB WDR
4. Micro SD/SDXC, up to 64GB
5. video streams
6. Hallway mode
7. Motion, Face, Line Traversal detection
8. Alarm I/O
9. Audio Mic In/Line In (3.5mm jack)
10. Audio Line Out (3.5mm jack)
11. PoE or 12VDC
12. Working Temperature (-22F to 140F)
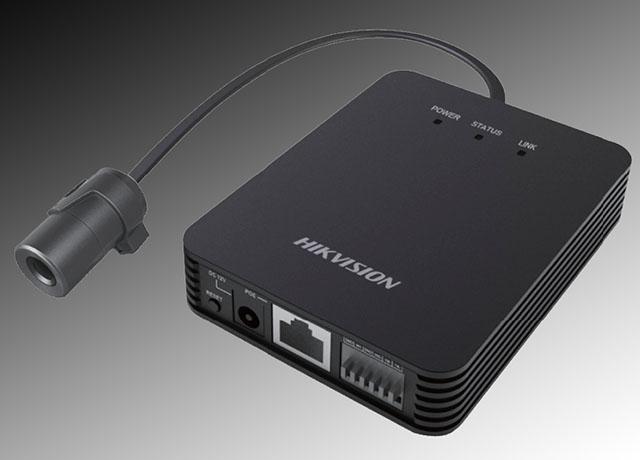
What comes in the box is the camera electronics in a small black box with jacks for Ethernet, 12V, audio, alarm and
the camera. The camera itself is on a 25′ wire with an RJ12 plug. Also in the box is 2 different types of rings to hold
the camera, one with camera tripod threads and a wall/ceiling mount. There’s also a quick release bracket to hold
the camera electronics in place.
The idea is you mount the electronics out of the way where it’s not seen.Then you mount the camera which is the
sensor & lens where needed.This camera came with the 2.8mm so it provided a really nice wide view.If you mounted
it in a door, it would not look out of place as it would look like a peep hole. Indoors you could mount by drilling a hole
in drywall and all you would see is about 1″circle.You could even reduce the visible part to just the lens which is about
1/3″ in diameter. If it’s being used in a home with aesthetics in mind, this is one of the smallest cameras available and
can be mounted flush with the wall.
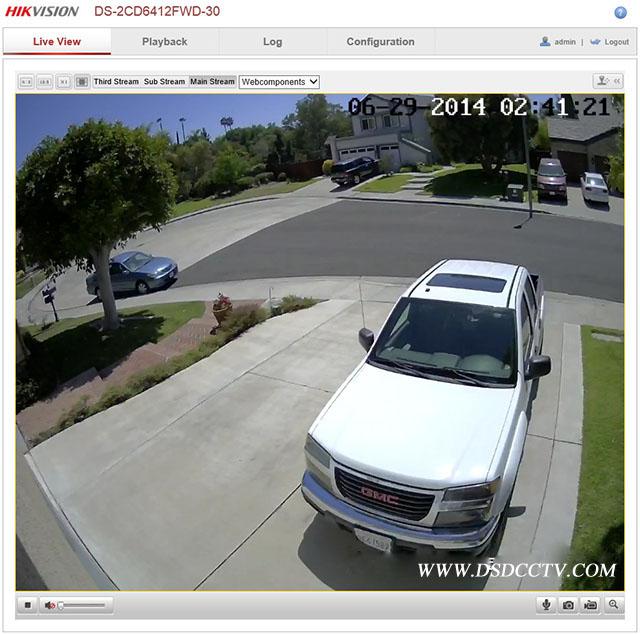
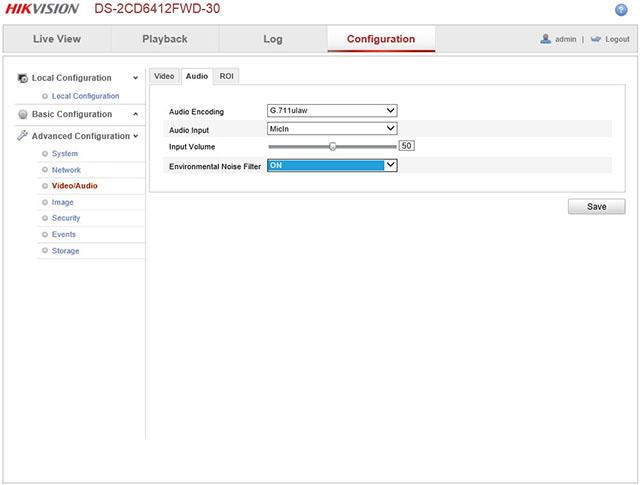
This is the initial screen when you log into the camera.What this camera adds over non-audio cameras is audio controls
for volume at the bottom. To use the audio feature, you would have to buy a microphone and/or amplified speaker.
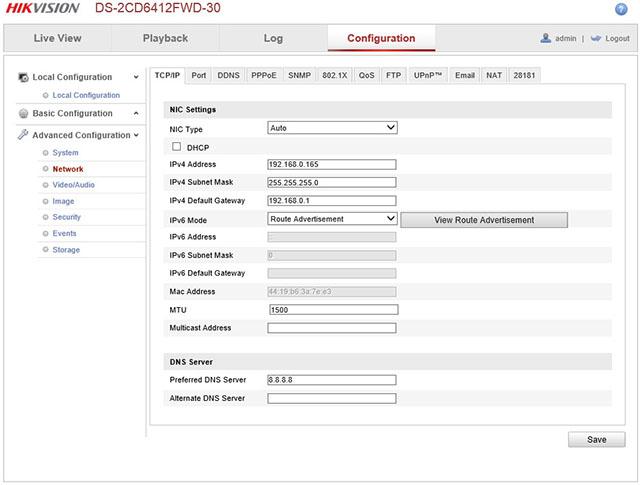
By clicking on the Configuration tab and then Network menu under Advanced Configuration on the left, you can set
the IP address for your home network. You can use the included SADP program to find the camera initially and set
the IP address to something suitable for your home network.
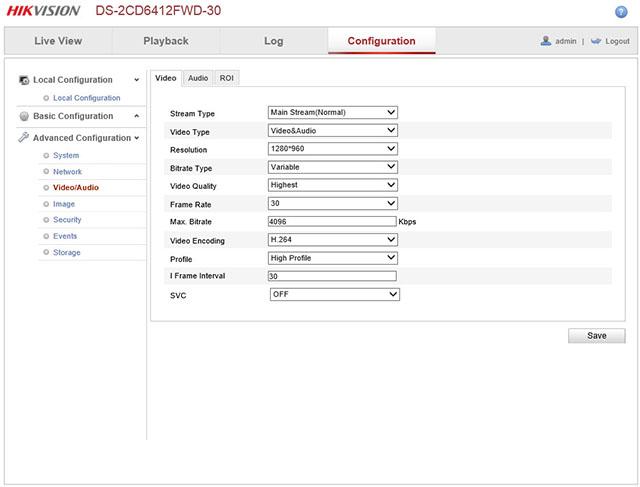
The Video/Audio menu is where you can set video and audio options. In the first tab, Video, you can set the resolution,
frame rate, compression, i-frame and such.
The Audio menu item shows your options for the microphone and encoding choices. Most important is the volume.
I had to set it fairly high to get the sensitivity I wanted.
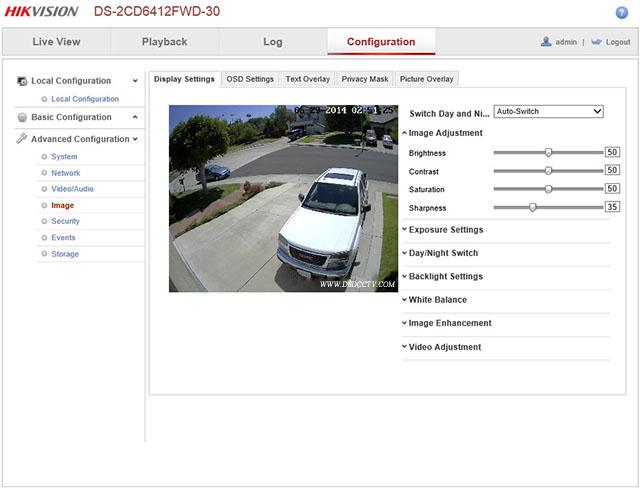
You control the image options in the Image menu option. It has a list of categories on the right with choices when you
click on the category. The first one is Image Adjustments and lets you set the brightness and contrast and such. I left
everything at factory defaults but set sharpness down a little as sharpening artifacts can be distracting to me.
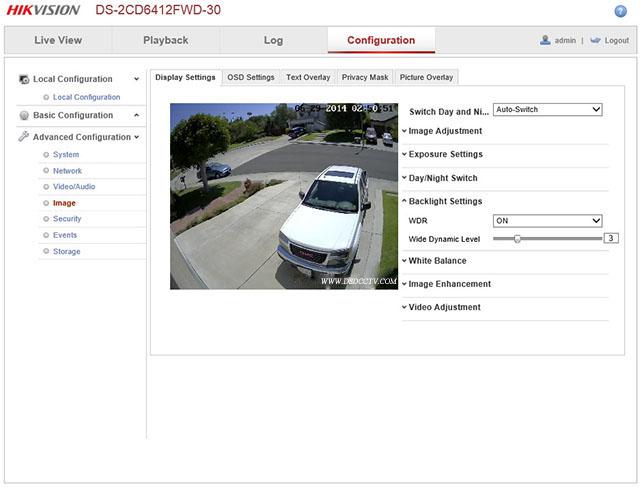
Indoors, if you have some high contrast, like a bright window area, you have two choices. If the window overwhelms
the image and makes it seem dark, consider using the Backlight Settings where you can use backlight compensation
(BLC) or wide dynamic range (WDR) to adjust the picture to your liking. This camera has wider than normal WDR
because it’s primarily designed to be used in kiosks, like a ATM machine where the person is outdoors and may be very
brightly backlit.
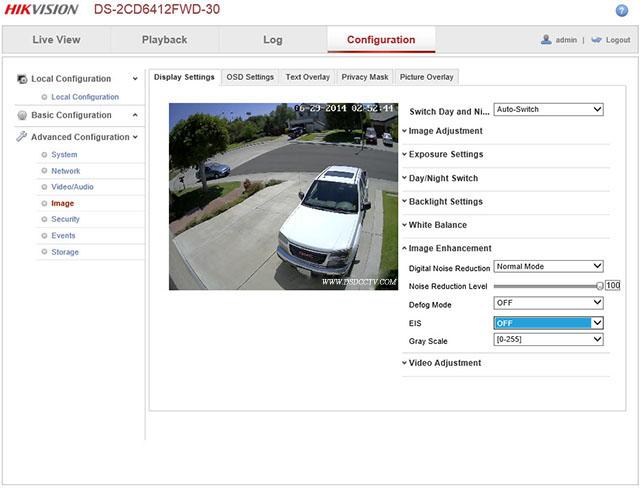
In the Image Enhancement category, you have several options. I typically set noise reduction on Hikvision cameras to
100 with no ill effect but in this camera, doing so makes things quite blurry at night, so I would recommend 50. Defog
mode is new and was not able to try it, but the idea is that if the scene is foggy or hazy, it will clear up the image. EIS
stands for Electronic Image Stabilization and this would come in handy if the camera is mounted in a moving object, for
example, in a bus, the camera can correct for camera shake.
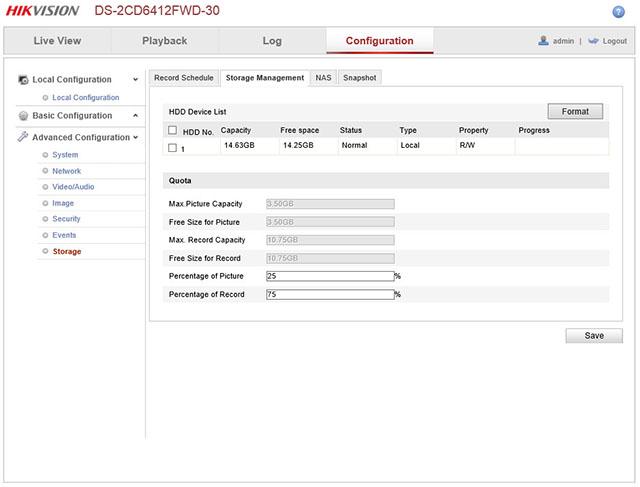
I used the in-camera recording feature to record the videos used here. I inserted a microSD card in the slot and went
to Advanced Configuration, Storage, Storage Management to format the card. Then I went to schedule and set it to
record 24/7 on video motion detection.
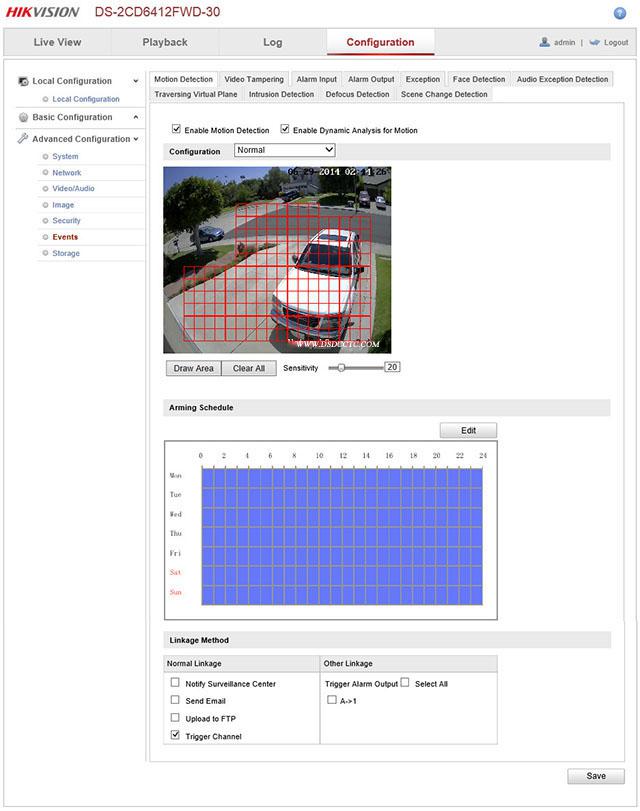
There are several choices for triggering recording. You can trigger are recording using the alarm input by wiring an
alarm devices like a pressure sensitive matt, PIR motion detector, but in this case I setup video motion detection.
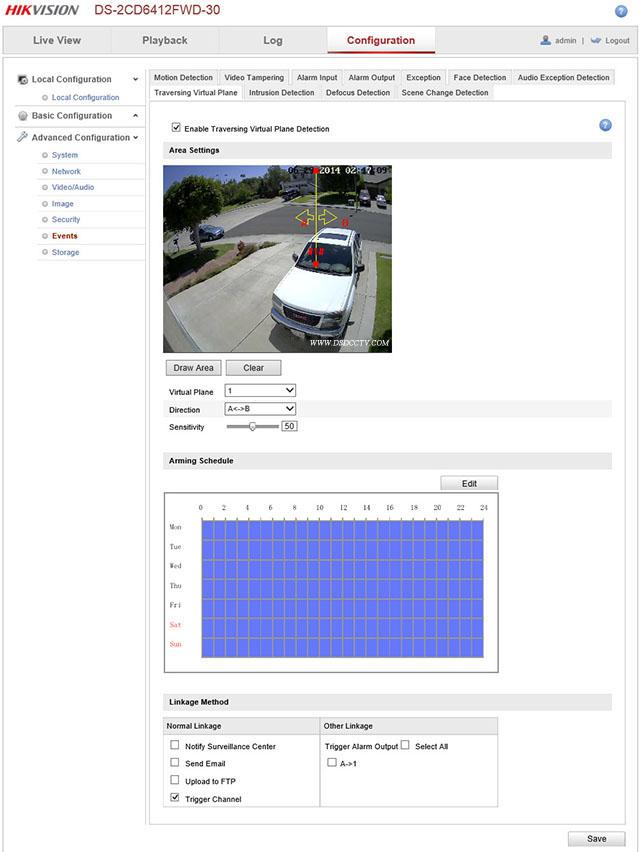
You basically draw the area you want to check for motion and enable it. If you are recording to SD card, you check
the box that says Trigger Channel. There’s an “Expert” mode that has offers more options.
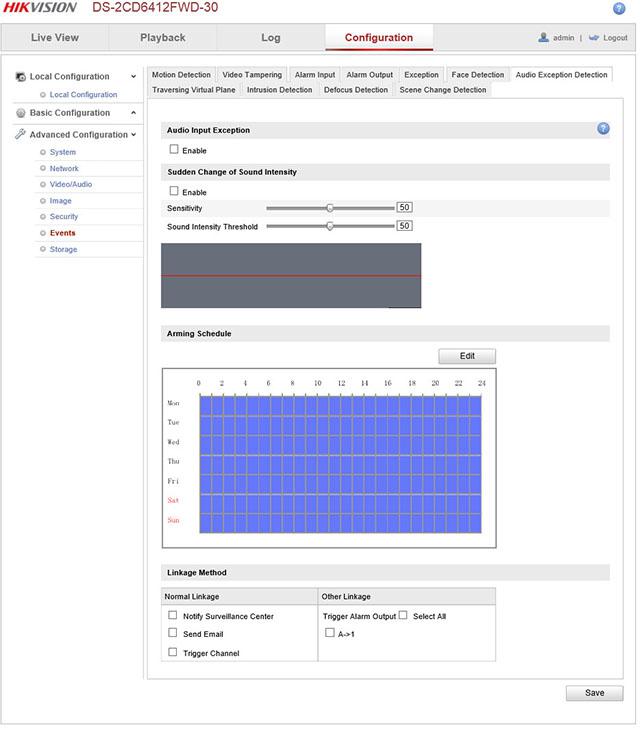
In addition to video motion detection, you can enable audio motion detection that listens on an external microphone
for noise. Sometimes this is more useful in cases where the camera can’t see what it going on yet, but can hear
the noise and start recording mainly for the audio.
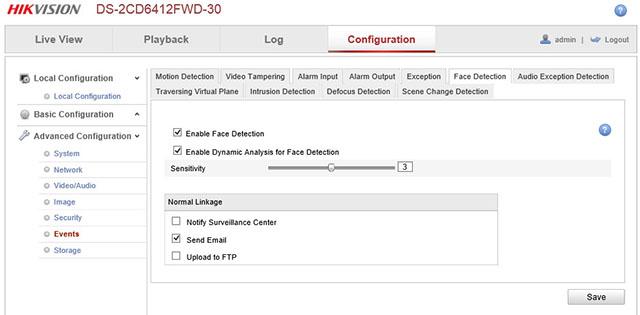
Face Detection is a new feature for Hikvision cameras and is available on this model with it’s 5.1 firmware release. It
detects the precense of faces and you can trigger it to send an email or FTP if a face is detected. There’s no provision
to record to SD based on Face Detection.
Another alternative to video motion detection is to trigger recording based on someone crossing a line, either in a
single direction or bi-directionally. This would be useful in recoding when someone enters a building or exits a
building or car crosses a threshold.
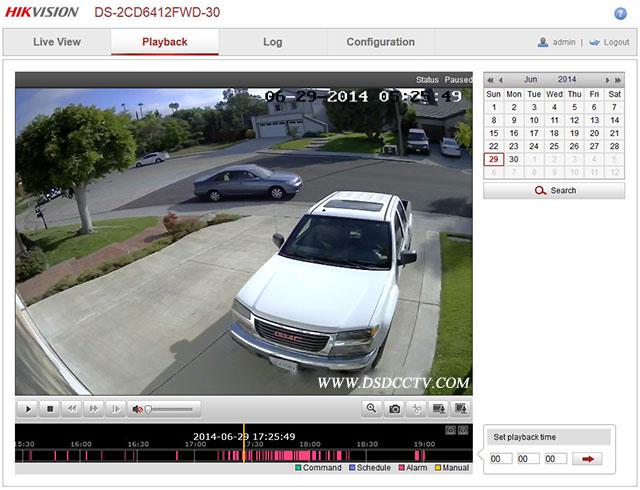
If you set everything up correctly, the camera should start recording video when motion is detected. If you recorded
to the SD card, you’ll see events denoted by a red lines on the timeline of the Playback tab. You can slide the timeline
to the time you want to look at it, use the calendar on the right to select a date, and use the plus/minus signs on the
right side of the timeline to adjust how much time to display at once on the timeline.This is an actual recording that
was captured when a car drove by.
To export video, click on the small filmstrip looking icon just above the timeline on the right. You select the start and
end time you want to search for and it will display a list of clips to export to your PC. You have to export entire clips
and it writes them by default to your c:/users/yourname/Web/DownloadedFiles directory by date. It could be me, but
I found exporting video did not work with IE 11 and had to use Firefox to export files.
Images
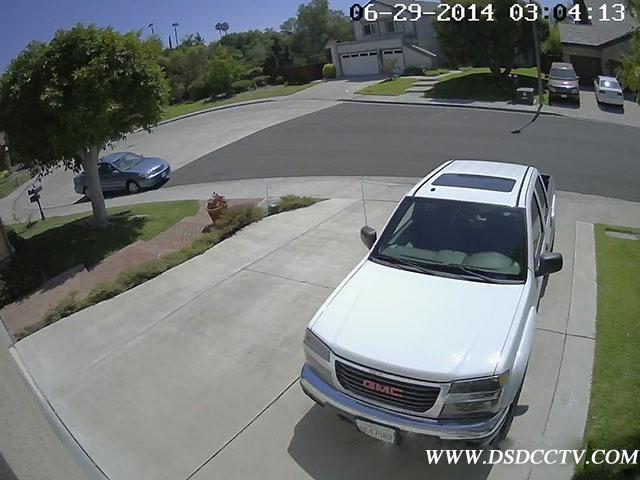
Now onto the images. I mounted the camera with the 2.8mm wide angle lens in the usual spot, under the eave of my
garage. As before, you can click on the image to see the full size 1.3 megapixel image straight from the camera. Also as
before, I set the max exposure time to 1/30th which is a good compromise between low light performance and
movement.This is a day shot with taken in the harsher afternoon light with the sun towards the camera and the image
held up very well.
At dusk, the colors get more intense, but the image looks well balanced. The noise reduction is showing some signs in
the tree and grass. I had noise reduction set on the high side which does this.

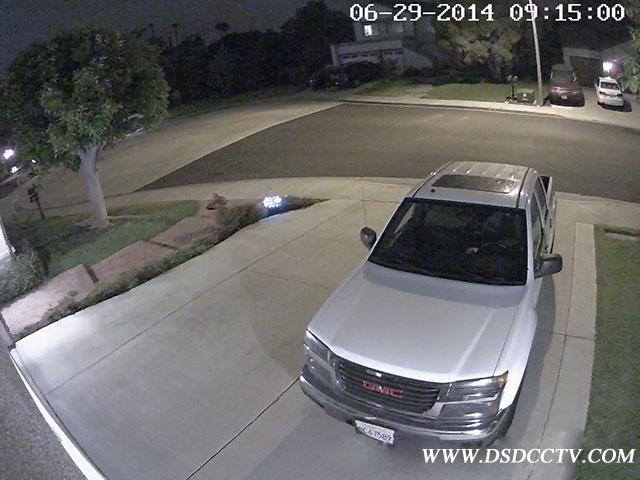
At night, in B&W mode, the image looks quite good considering there’s no IR, it’s just the ambient light from the
street light across the street and 2 9W LED bulbs in porch lights by my garage door.
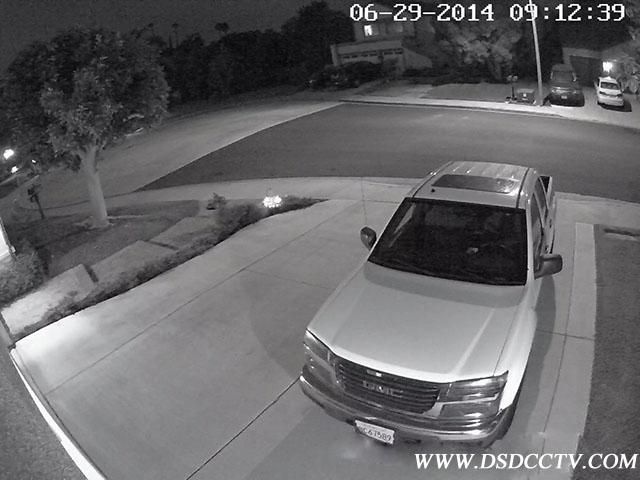
But it does not matter if the image is B&W or color as this camera has “Electronic Day/Night” meaning it does not
have a mechanical IR cut filter.This is the same shot taken in color and as you can see,not much difference in the
brightness of objects. This camera does very well in low light, better than the 3MP cameras if you turn their IR
LEDs off. In this image, I set noise reduction to 50 which was the best compromise of reducing noise while not
blurring everything.
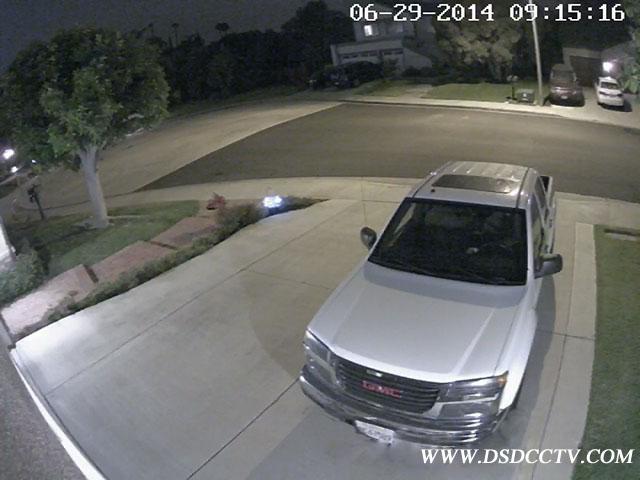
If you set noise reduction at 100 like I’ve recommended on Hikvision cameras before, you get a pretty blurry image.
Can’t even read the license plate numbers.
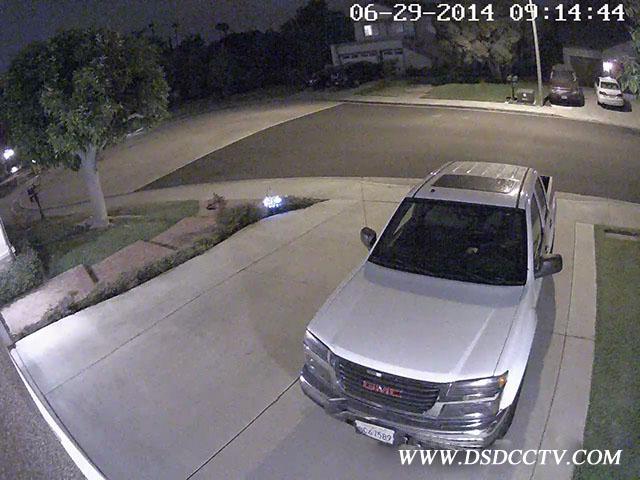
The other extreme is setting noise reduction to zero. You get a pretty noisy image but sharper detail. You have to
experiment to see what works best for your situation.
I did not bother putting the camera at the back of my house with is total darkness because this camera does not
have an IR illuminator or is even IR sensitive at night, it would just be black. If you use this camera, make sure you
have enough light, but not much is needed to get superb results. Just so you know how I mounted this by
my garage, I used the included wall mount bracket and worked pretty well.
- Pre:Hikvision DS-2CD2432F-IW 3mp i 2014/9/3
- Next:DSD Clients 2014/8/11