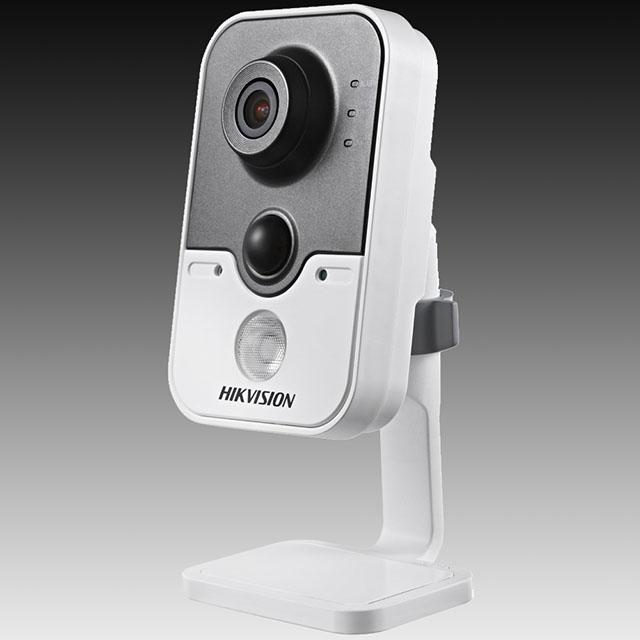
Hikvision DS-2CD2432F-IW 3mp ir cube camera review
For those that need a simple indoor camera, easy to set on table or even mount on a wall or ceiling, provides great
video quality at 1080P or 3MP, WiFi and PoE, IR illuminator, PIR motion detector, in camera recording and built in
microphone and speaker, this may be the camera for you.
Main Features
1. 1/3” 3 Megapixel CMOS sensor
2. H.264 dual-stream encoding
3. Internal Microphone & Speaker
4. MicroSD card slot for up to 64GB internal recording
5. 30fps @ 1080P (1920 x 1080) or 20fps @ 3MP (2048 x 1536)
6. 4mm fixed focal lens (79° viewing angle)
7. 2.8mm & 6mm optional
8. Day/Night IR Cut Filter
9. IR LED advertised working distance 10m
10. Powered by PoE or 12V
11. 3D Digital Noise Reduction
12. Digital Wide Dynamic Range & Backlight Compensation
13. Smartphone apps available
Two very popular request I get is to have a camera with not just 2 way audio, but an actual microphone and speaker
built into the camera.Also popular on many people’s wish list is a PIR motion detector that senses a live heat signature
and is very accurate as compared to video motion detection that analyzes changes in pixels and can be easily triggered
by a shadow, light or a breeze blowing magazine or plant. These two features are not unique as I’ve reviewed the AV
Tech and Axis cube cameras that also have this functionality.
What makes this camera more unique is that its a day/night camera,meaning it has an IR cut filter to change to IR
mode at night and has a bright IR LED that provides nearly invisible lighting indoors as you’ll see later.Many of the
competitors like AVTech and Axis are day only cameras that rely on a very bright but annoying white LED to provide
night vision. IR is much better and more practical in real life and can be used more discretely.
The other feature this camera has is the ability to record to an microSD card and has full playback capabilities
comparable to good NVR solutions with a calendar and timeline that can be scrubbed to find the event you are looking
for. Alerts can be sent via e-mail if needed.
The camera comes with a stand as shown in the picture above. You loosen the gray collar and it allows you to aim
the camera as you wish. I used it sitting on a shelf, but the mount is very nice.You can remove the plastic cover at
the base, and you can use screws to attach it to a wall,ceiling, angled or straight and the plastic base cover snaps back
in to give it a nice clean look.
I tested it with both PoE and WiFi. PoE works as you would expect and is the absolute best way to use this
camera if hardwiring is an option for you. I tested this with WiFi and as you can imagine, the further you are from your
WiFi source, the lower the frame rate gets at 3MP or 1080P.
I found that to get the full frame rate, you need to be fairly close to your WiFi router/access point. For me about one
room away was the limit. It still connects further away, but the video starts getting choppy. Recordings to the SD card
remain smooth as it’s independent of the network, but if you were recording to an NVR PC,WiFi may not be the best
solution and I would recommend PoE.
Even when on WiFi, I use a PoE wall plug adapter to power the camera. I did test it with a 12V power supply and it
worked just as well. The advantage of a PoE power supply is you can go further distance form the power source
without any significant power loss. Also I’ve had less issues with PoE injectors than with very inexpensive 12V adapters.
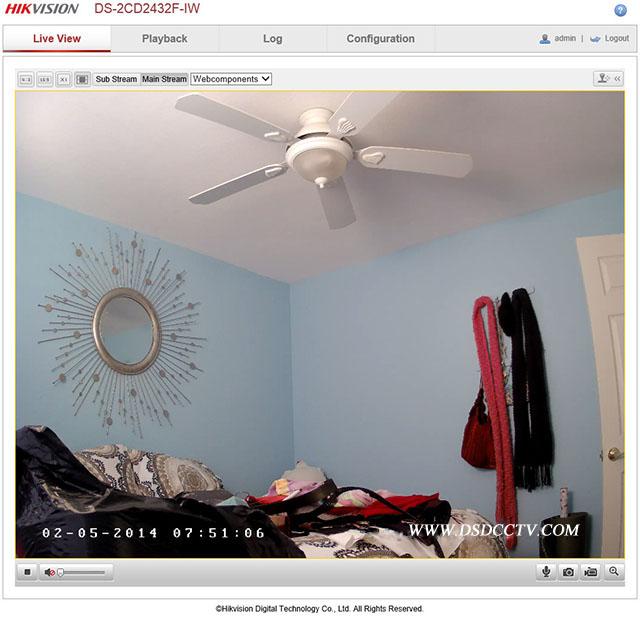
The camera also has a quirky feature in that you can connect to WiFi and PoE at the same time,each with separate IP
address.This is the initial screen when you log into the camera. What this camera adds over non-audio cameras is
audio controls for volume at the bottom.
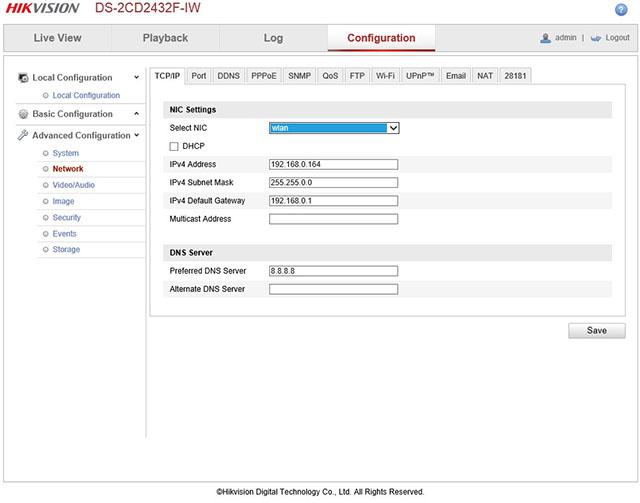
Under the Network menu under Advanced Configuration, you can set the IP address for the wired lan and the WiFi
in the“Select NIC”drop down menu.You set the IP address of each as you wish.The camera must first be connected
via Ethernet to configure as is common with many WiFi cameras. You can use the included SADP program to find the
camera initially and set the IP address to something suitable for your home network.
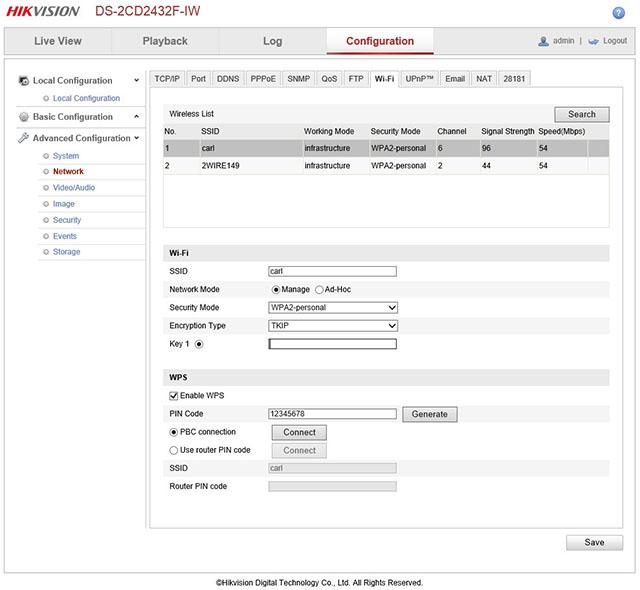
WiFi options are set under the WiFi tab. You can have it search your area for WiFi networks by clicking the Search
button. Click on the network you want to connect to and provide a password if needed.You can connect to regular
WiFi router type network (Manage) or connect directly to a device,like to a PC without going through a router.
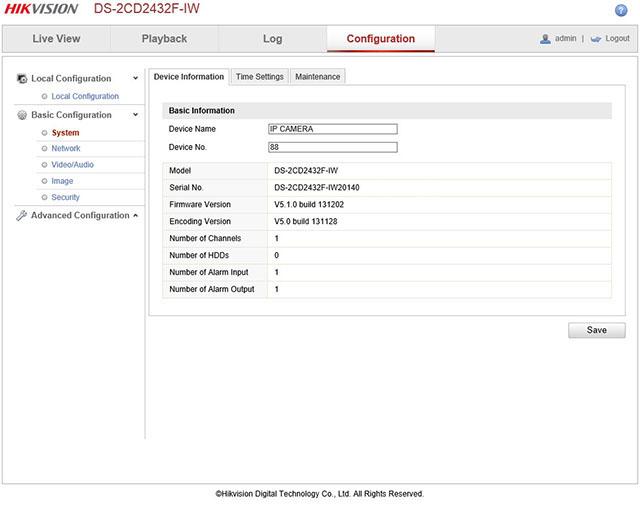
This is the System menu option that shows what version of the firmware you are using in the Device Information tab.
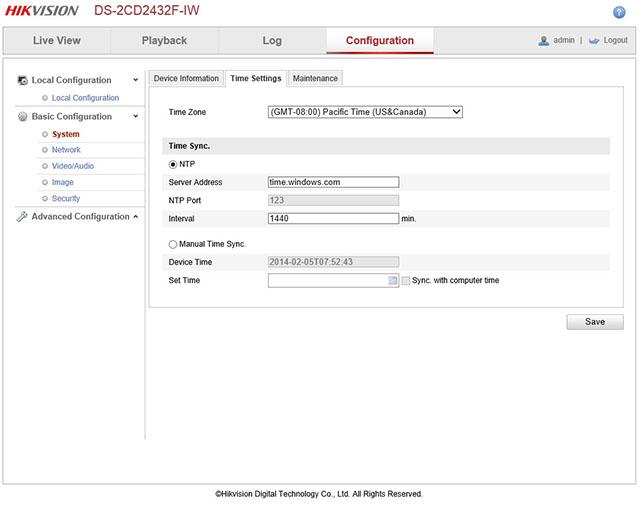
In the same menu option you also have the Time Settings tab where you can set the date/time or use an NTP time
server to automatically sync the time to your chosen time zone. To set daylight savings time, you need to go to the
same menu option under the Advanced Configuration.
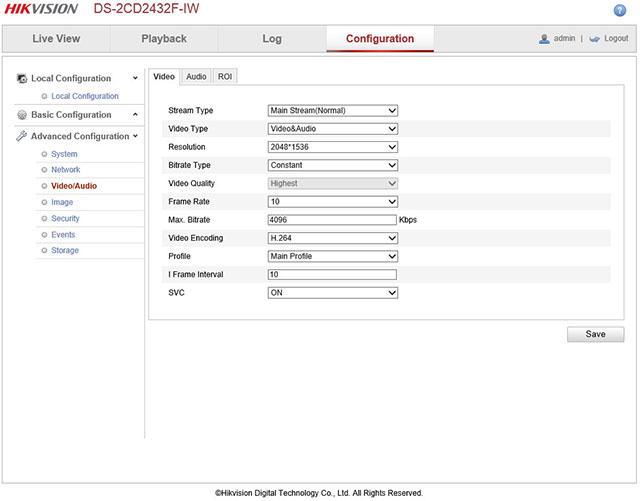
The Video/Audio menu is where you can set video and audio options. In the first tab, Video, you can set the
resolution, frame rate, compression, i-frame and such.
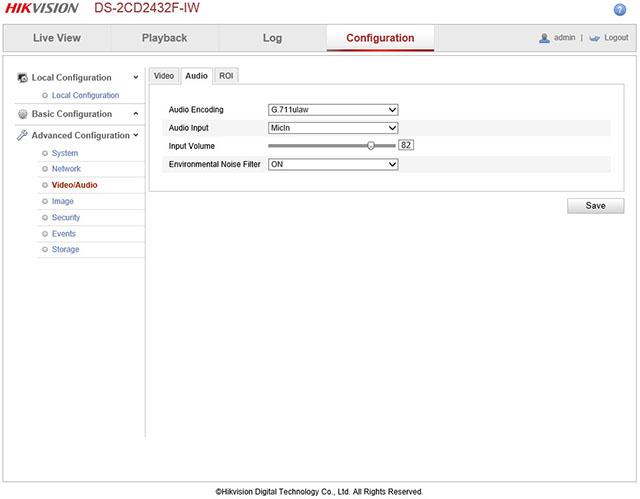
The Audio tab shows your options for the microphone and encoding choices. Most important is the volume. I had to
set it fairly high to get the sensitivity I wanted.
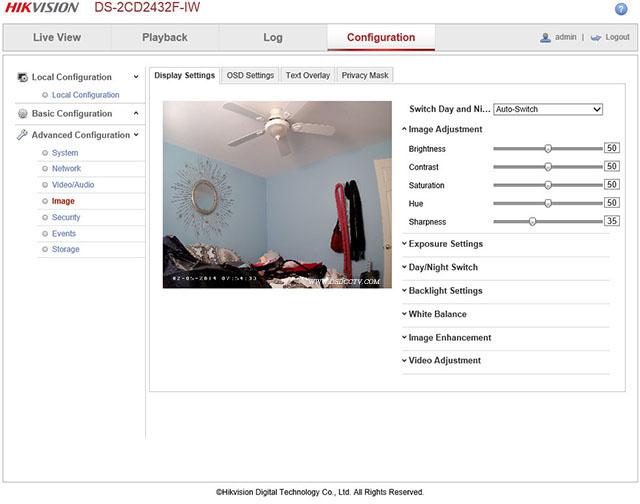
You control the image options in the Image menu option. This came with V5.1 firmware which has a list of categories
on the right with choices when you click on the category. The first one is Image Adjustments and lets you set the
brightness and contrast and such. I left everything at factory defaults but set sharpness down a little as sharpening
artifacts can be distracting to me.
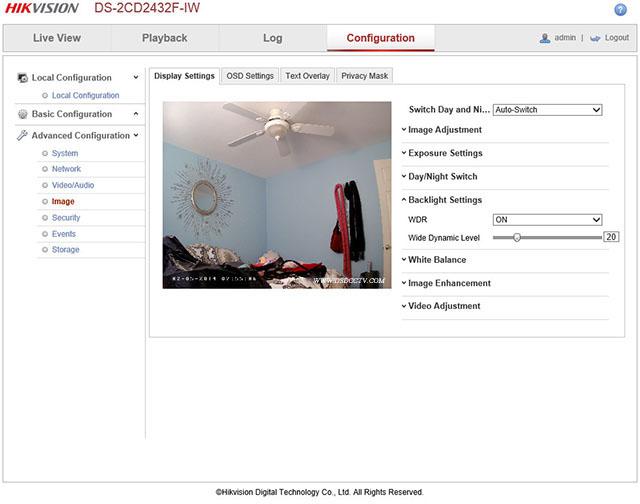
Indoors, if you have some high contrast, like a bright window area, you have two choices. If the window overwhelms
the image and makes it seem dark, consider using the Backlight Settings where you can use backlight compensation
(BLC) or wide dynamic range (WDR) to adjust the picture to your liking.
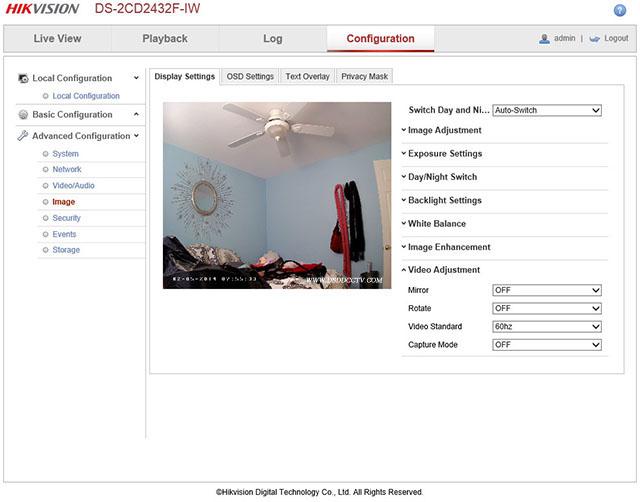
In the Video Adjustments category, you can set the video standard to the country you are in, 50Hz for most of the
world, 60Hz in the USA. This is where you would use mirroring to flip the image upside down if you need to mount
the camera upside down, although don’t see a reason as the camera can be oriented any way you like. The rotate
option is good if you have say a long hallway and you want to rotate the image 90 degrees to have a portrait style
layout instead of the traditional landscape mode.
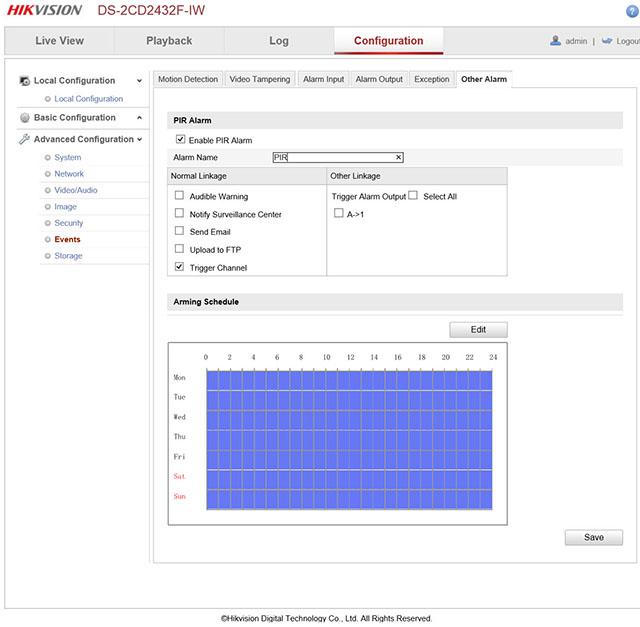
Then Events menu option is where you set how you want to record. You can use traditional Video Detection as
shown below or Other Alarm for PIR motion detection.
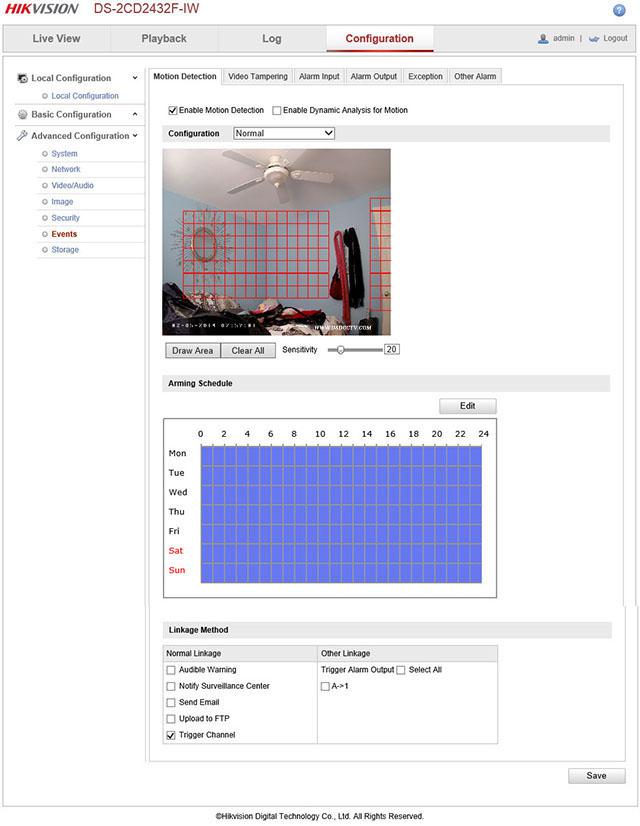
To use the PIR motion detector that is built-in, you need to go to the “Other Alarm”, check Enable PIR Alarm, check
Trigger Channel and set a schedule and click the Save button. This is a far better way of doing motion detection than
the method above. Where you would want Video Detection is if the camera is facing out a window as PIR won’t work
though glass.
If you set everything up correctly, the camera should start recording video when motion is detected. You’ll know
because you’ll see events denoted by a red lines on the timeline of the Playback tab.You can slide the timeline to
the time you want to look at it, use the calendar on the right to select a date, and use the plus/minus signs on the
right side of the timeline to adjust how much time to display at once on the timeline. This is an actual recording that
was
captured when a car drove by.
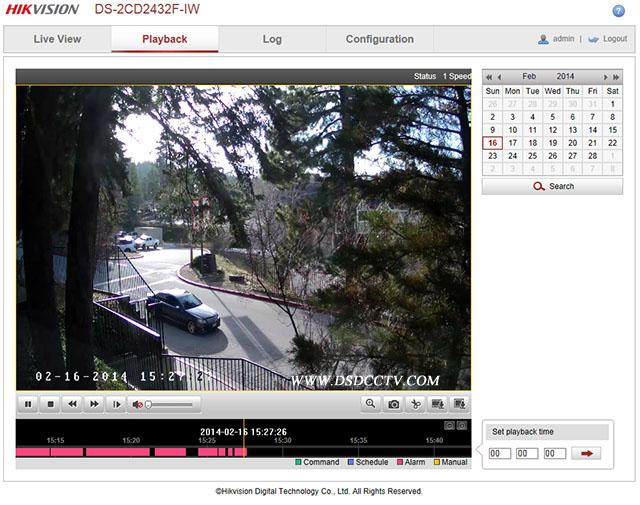
To export video, click on the small filmstrip looking icon just above the timeline on the right. You select the start and
end time you want to search for and it will display a list of clips to export to your PC. You have to export entire clips
and it writes them by default to your c:/users/yourname/Web/DownloadedFiles directory by date. It could be me, but
I found exporting video did not work with IE 11 and had to use Firefox to download files.
Images
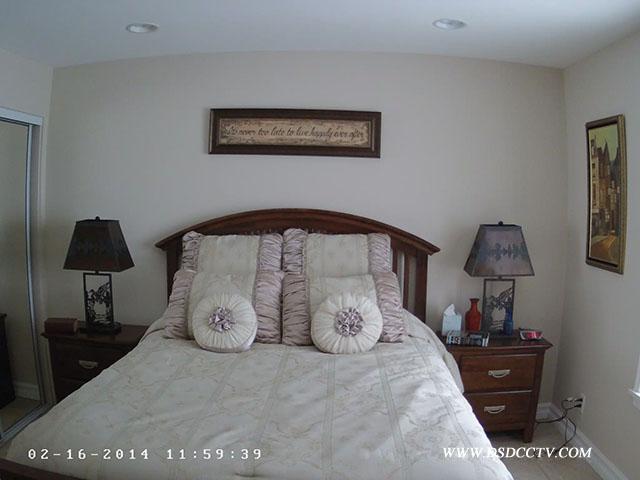
Now onto the images. I placed the camera in a typical indoor situation, on top of a dresser in a bedroom. As before,
you can click on the image to see the full size 3 megapixel image straight from the camera. Also as before, I set the
max exposure time to 1/30th which is a good compromise between low light performance and movement.This is a
day shot with WDR set to 10% which provided a nice effect, color balance is quite good and it’s a clear picture
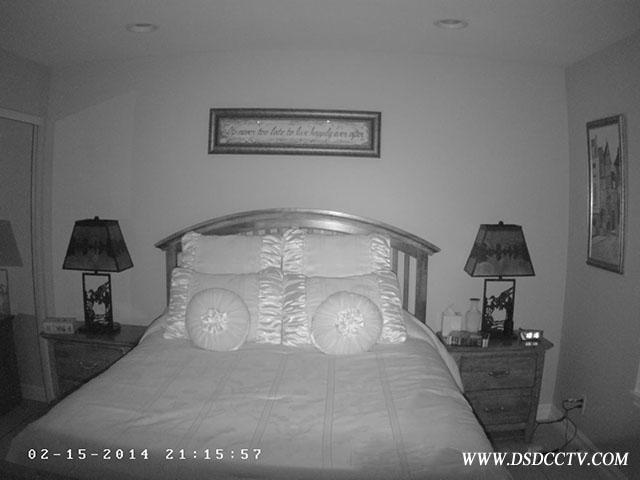
At night, the single illuminator does a very good job of providing even coverage of the room. The center is a little
brighter, but that’s common. What’s good to note is the section of bed closest to the camera is about equality lit to
the far end of the bed. Part of the dresser crept into the picture at the bottom.
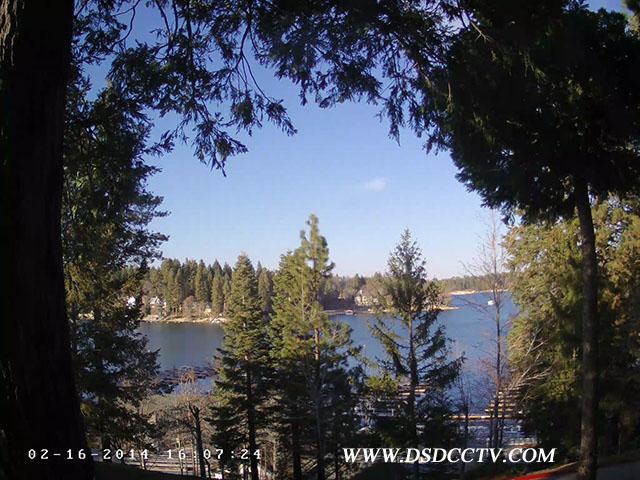
Another use people have for indoor cube cameras is to view and possibly record outside a window. This image was
taken at about 4PM which in Winter time and the lower sun will be contrasty.

I set WDR to 20 and it did bring out some more detail in the shadows. A scene this contrasty would need more WDR,
but you have to weigh the rest of the day to set this properly. In my case, I do use a camera at this location to
remotely check on the weather (snow, rain, fog).
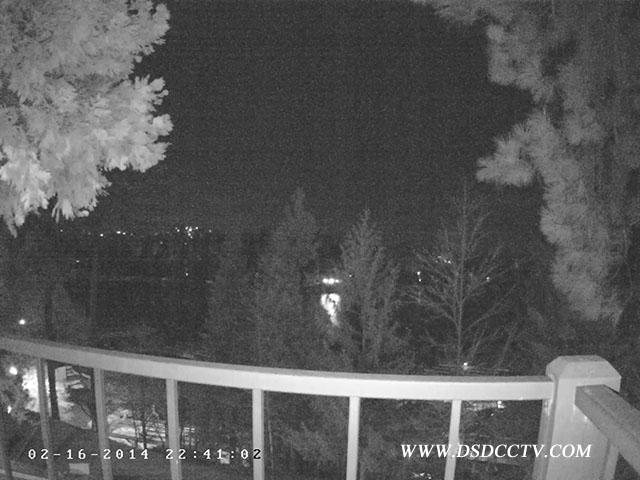
At night, I put the camera on the balcony. The reason is that if you tried to have the IR LED on and look out a
window as I’ve done above, you would just see the reflection back and does not have much value. If you want to
have this camera outside, but make it more discrete and weatherproof, putting it inside a birdhouse would be ideal.
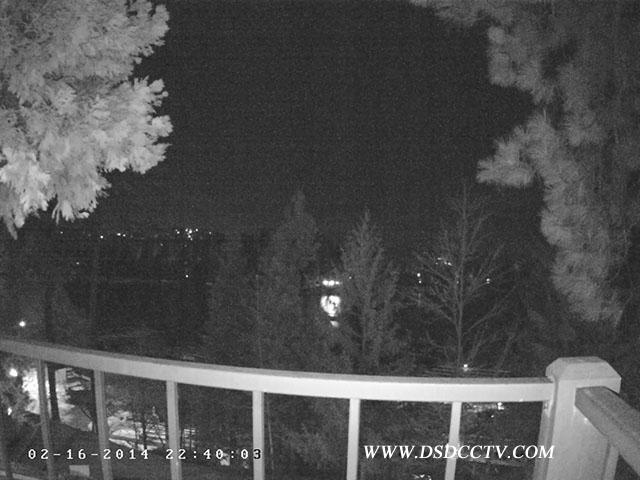
With WDR set to 20, you start getting more detail into the darkness, but at the expense of more noise.
I did a little video to show how switching from WDR set at 50 to having WDR looks like in a recording. Sorry, not that
many boats in the winter to make the video more interesting.
- Pre:Hikvision DS-2CD2532F-I 3mp ou 2014/9/3
- Next:Hikvision ds-2cd6412fwd-30 1.3 2014/9/2