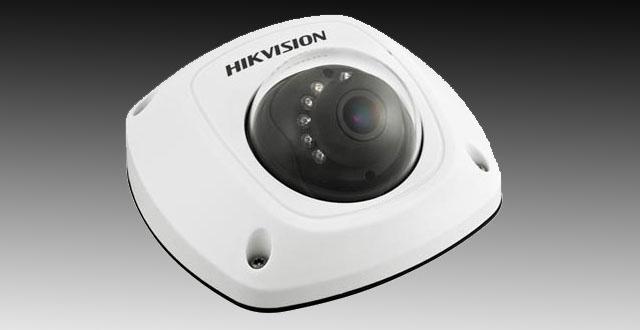
Hikvision DS-2CD2532F-I 3mp outdoor ir mini dome review
This is by far the smallest IR Mini Dome I’ve ever reviewed. The actual dome measures about 1 3/4″ and the entire camera sits in the palm of my hand without touching any fingers, that’s small. Small usually means sacrificing features and quality, but in this case, this may be one of the better Hikvision cameras I reviewed.
Main Features
1. 1/3” 3 Megapixel CMOS sensor
2. H.264 dual-stream encoding
3. 3-Axis lens adjustments
4. MicroSD card slot for up to 64GB internal recording
5. 30fps @ 1080P (1920 x 1080) or 20fps @ 3MP (2048 x 1536)
6. 4mm or 2.8mm fixed focal lens
7. Day/Night IR Cut Filter
8. IR LED advertised working distance 10m
9. IP66 rated & vandal-proof
10. Powered by PoE or 12V
11. 3D Digital Noise Reduction
12. Digital Wide Dynamic Range & Backlight Compensation
13. Smartphone apps available
The camera is small and discrete enough to be used indoors or out and has a clean modern look. What’s amazing to me is what’s inside. First the lens is so small they provide a tool to help adjust the lens along it’s 3-axis range of motion. Then they wrap 10 IR LEDs around the lens. Also included is a microSD card slot that can hold up to a 64GB card. I used this during my testing and the recorded video was smooth, no lost frames, playback was very easy to work with and went from event to event with minimal delay between recordings.
Feature wise this camera sits in between the lower end DS-2CD2132-I that is not a 3-Axis camera, which practically can only be mounted facing down, like on a ceiling and does not have an internal SD card slot and the DS-2CD2732F-IS that has all the features of this camera plus alarm inputs and outputs, two way audio, varifocal lens and more powerful IR illuminators.
At the time of this writing, only the 4mm lens version of this camera was available and that’s what I tested. Recently, the 2.8mm lens version was announced and should available by the time you read this. Lens choice is personal, but consider the wider angle the lens, the less pixel density of a suspect or object. In practical terms, in my driveway, in 3MP mode, I reached what I consider the minimum pixel density to identify someone at a distance of about 25′ from the camera. With a 2.8mm lens, that shrinks to about 15′. Based on industry standards, a suspect’s face should at least be 85 pixels tall. Indoors, where space is limited by walls, having the 2.8mm lens, from a corner can provide complete coverage of a room.
This camera came with the 5.1 firmware already loaded. This firmware provides some cool features like the ability to write to a NAS via an SMB/CIFS mount and the ability to turn off the IR LEDs and still have normal day/night operations. The bugs I ran into with the firmware are that NAS connectivity is spotty. Has worked for some and not others. The other problem I ran into is that it won’t work on a Mac as prior firmware releases have. You can downgrade the firmware to prior versions if you have a Mac. I expect these issues to be resolved in the next firmware release, but the downside to firmware releases is they fix one thing, break another, so apply with care.
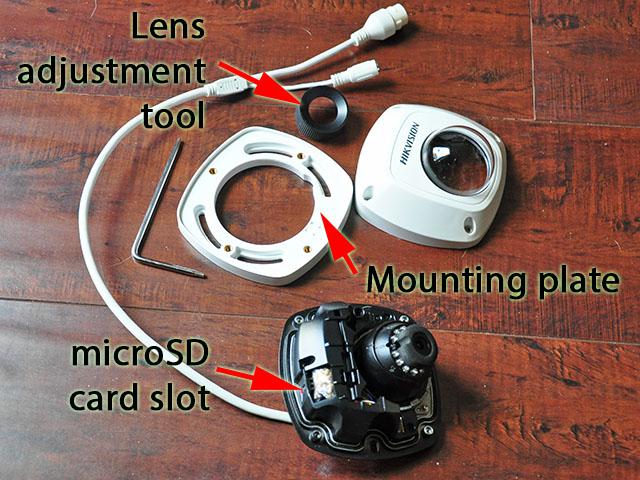
A quick look at the parts. Has the same waterproof RJ45 pigtail used on other Hikvision for PoE and camera connectivity. Also has the 12V connector if you chose not to use PoE. The backing plate is used to install the camera by screwing the backing plate to where you want it mounted, then attaching the camera to it with 2 screws. The lens adjustment tool is provided to help aim and rotate the lens. It’s so small it’s hard to aim it otherwise. The microSD card slots is in the back of the camera as shown.
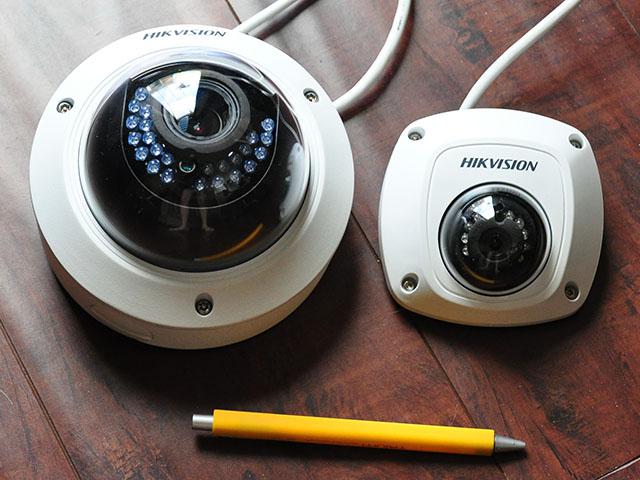
Here’s the relative size of the camera next to a pen and next to a Hikvision DS-2CD2732F-IS.
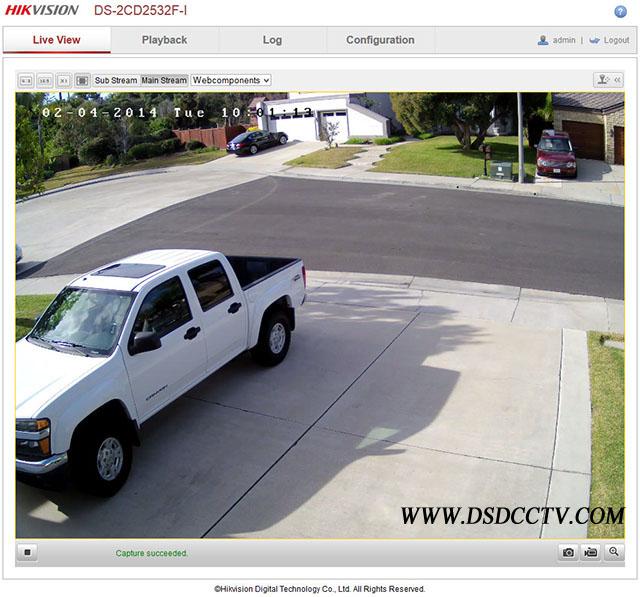
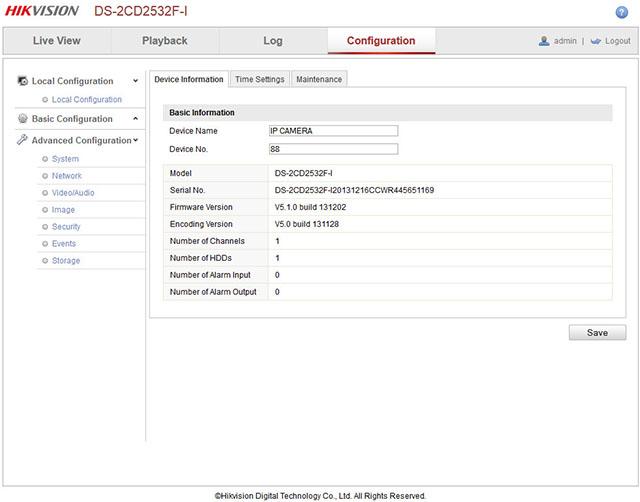
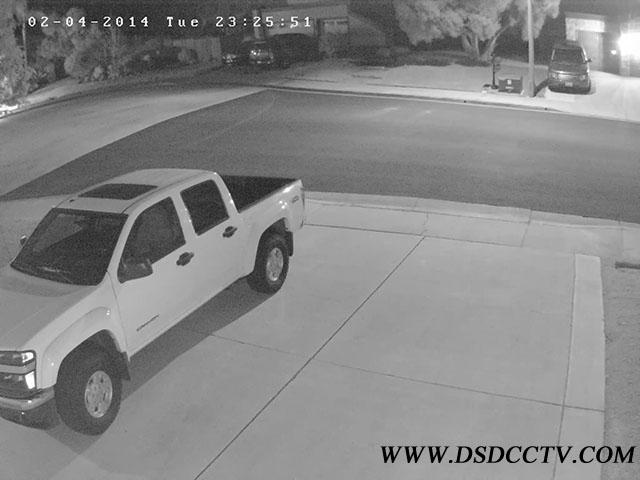
Also, what’s interesting is this camera is an English version, meaning the day of week is now in English as you can see in the initial screen below. It also uses the English firmware releases. My best guess is these were destined for the European market. This does not mean it’s warrantied or supported by Hikvision USA, but the USA version is also available, albeit for a price premium. If you are not sure which version you are getting, ask the reseller as some are more upfront about this than others.
Under Advanced Configuration, System, Device Info, you can verify the cameras firmware release.
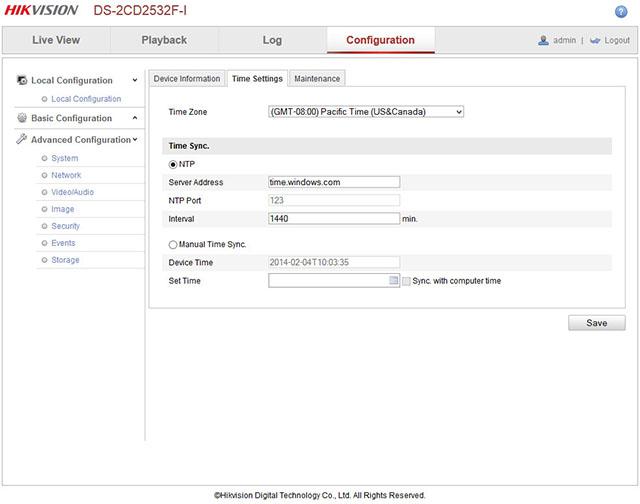
The next tab over, Time Settings is where you set the time zone and if you want it to sync up with a time server (NTP). I always use a time server to make sure the cameras are in sync when I review video.
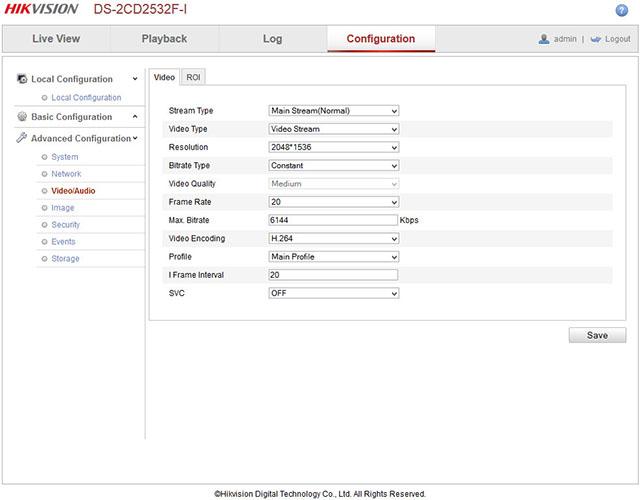
Video settings is where you change the resolution, frame rate, bit rate. For those that don’t understand bit rate, it’s basically how much do you want to compress the video. The lower the number means higher compression is used to achieve that goal, higher number means less compression. To me, 4096 does a decent job, 6144 is significantly better and somewhere in between is where I typically set most of my 3MP cameras.
Stream type is where you chose which stream you want to change settings for. For example, when viewing the camera remotely, I like to use the second stream to reduce bandwidth use.
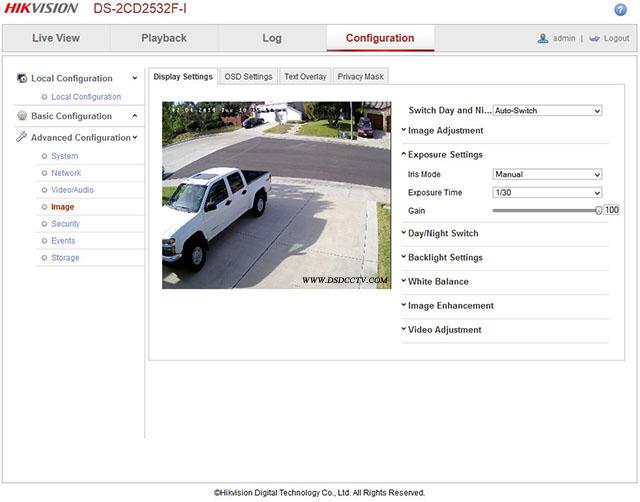
Where I spent a lot of time tweaking is in the Image menus. This is where you adjust the camera settings to get the best image quality possible for specific locations. The Image Adjustments is what has the most impact. You can see I turn Sharpness down a bit. The reason is that sharpening may make a prettier picture, but sharpening artifacts can reduce the ability to identify an object or suspect so I prefer to do sharpening after the fact in Photoshop or other tools. At night sharpening enhances noises so if you wish to reduce noise at night, consider reducing sharpening.
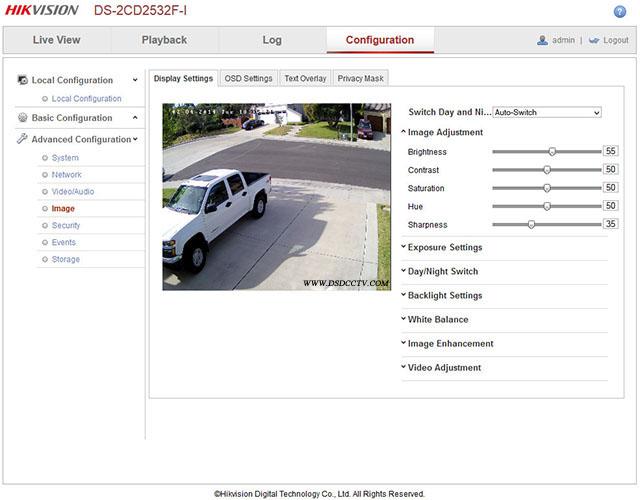
Then next item in the Image menus is Exposure Settings. For testing I always set this to 1/30 to reduce motion blur at night. Gain comes by default at 100 but found no benefit of reducing this number. It reduced noise slightly but at the expense of image brightness.
Backlight Settings in the Image menus is where you can chose between backlight compensation (BLC) or wide dynamic range (WDR). BLC is used when your image is very dark because of backlighting, like the sun is making everything into a shadow. WDR works differently by brightening shadows and darkening overly bright areas to provide more balance. The downside to WDR is that at night, it may introduce more noise into your image. This camera actually does very well with shadows at night without WDR as you’ll see.

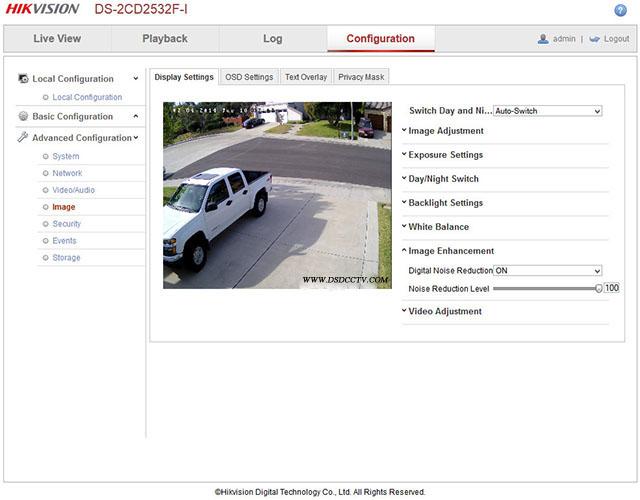
One more menu I want to show you. Under Image Enhancement, I would recommend you set the noise reduction slider to 100. I did not notice any ill effects from doing so and did make a difference in noise reduction at night.
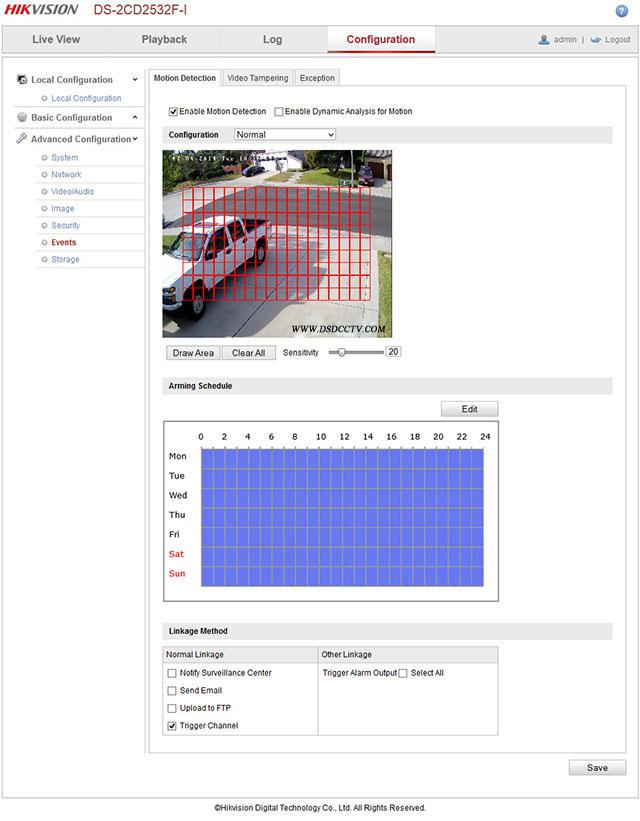
To setup motion detect events to record to the microSD card or NAS, the Events menu option lets you chose the motion detect area as a series of squares. Can be separate squares or contiguous like I have it below. To record, you have to select the Trigger Channel check box at the bottom.
I set sensitivity at 20 and that works for me. Setting it to zero is the default meaning it won’t record. Setting it to 40 was way to sensitive and got way to many false alerts. Adjust this to what works for each camera location.
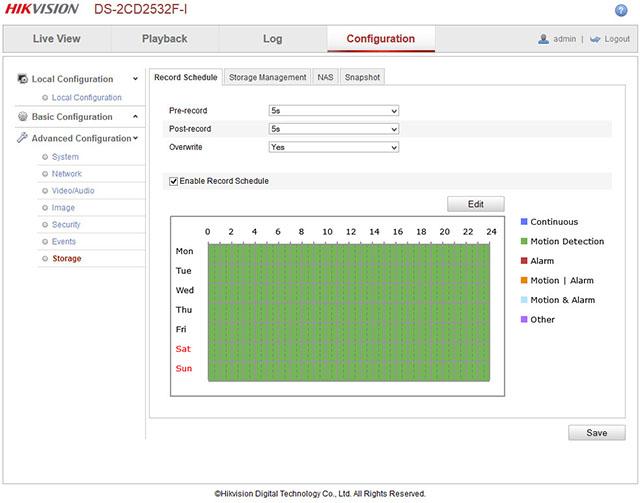
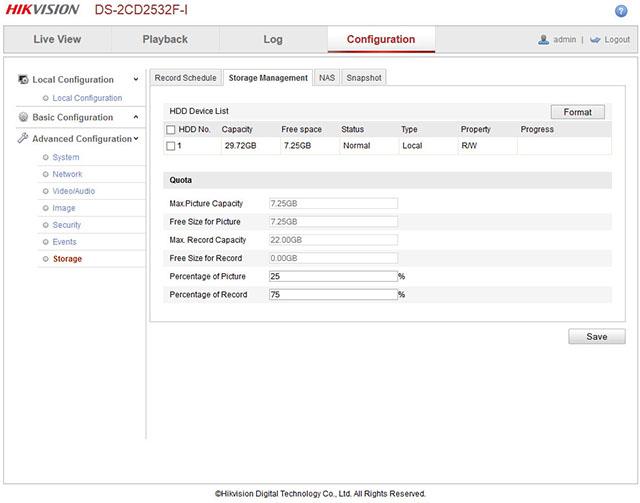
Next, go to the Storage menus and Record Schedule and select how much pre and post event video to record as well as make sure the recording schedule is all green like this. If not, click the Edit button and set 00-24h for each day you want to record.
Then in the Storage Management tab, if you have an SD card installed in the camera (take the dome cover off and it’s in the back of the camera near the bottom), you can select the card and click the Format button to format the card. In my case, you can see I’m using a 32GB card to test with and I have 7.25gb left but it’s full because I chose 75%. You can set how much of the card you want to use. These are the defaults settings but in real world, I would make pictures percentage much lower and record percentage higher.
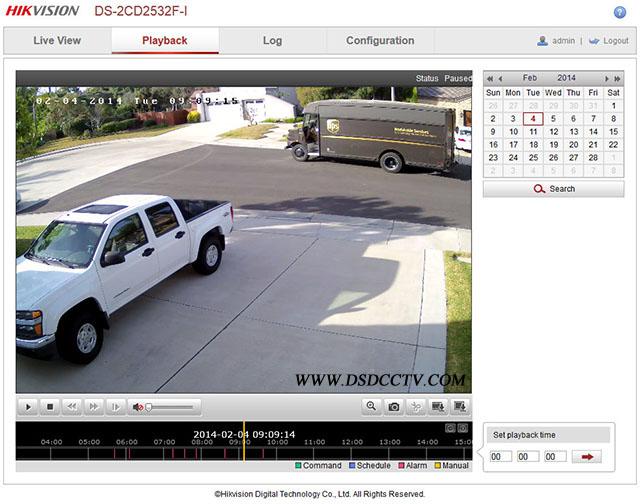
If you set everything up correctly, the camera should start recording video when motion is detected. You’ll know because from the above menus you’ll see the card or NAS filling up and you’ll see events denoted by a red lines on the timeline of the Playback tab. You can slide the timeline to the time you want to look at it, use the calendar on the right to select a date, and use the plus/minus signs on the right side of the timeline to adjust how much time to display at once on the timeline. This is an actual recording that was captured when the big brown truck drove by.
To export video, click on the small filmstrip looking icon just above the timeline on the right. You select the start and end time you want to search for and it will display a list of clips to export to your PC. You have to export entire clips and it writes them by default to your c:/users/yourname/Web/DownloadedFiles directory by date. It could be me, but I found exporting video did not work with IE 11 and had to use Firefox to download files.
Images
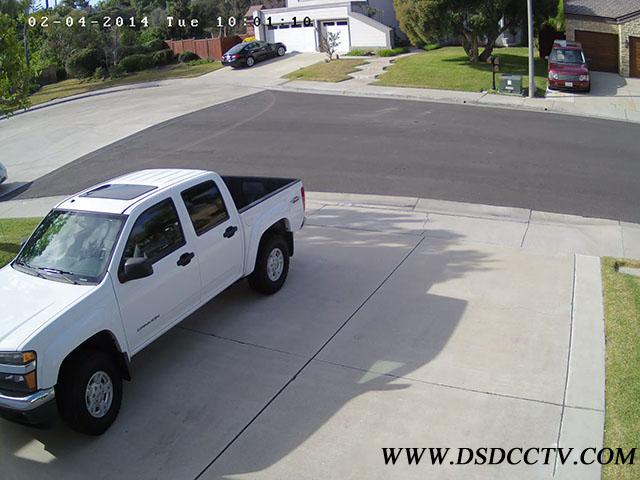
Now onto the images. I mounted the camera with a 4mm lens in the usual spot, under the eave of my garage. As before, you can click on the image to see the full size 3 megapixel image straight from the camera. Also as before, I set the max exposure time to 1/30th which is a good compromise between low light performance and movement.
This is a day shot with WDR set to 10% which provided a nice effect, color balance is quite good and it’s a clear picture
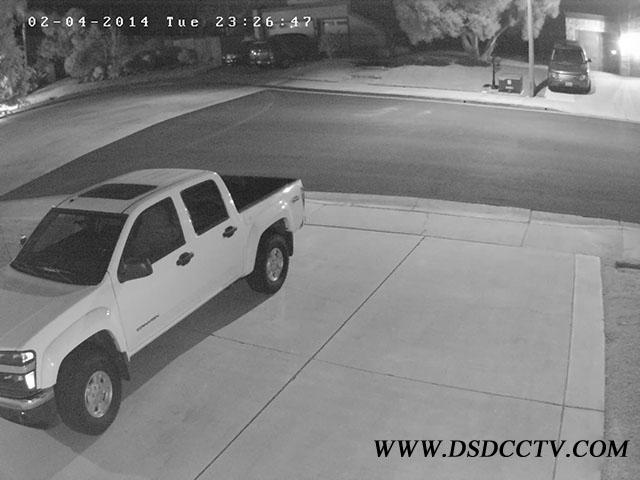
Then at night I was not expecting much, smaller and lesser IR LEDs, 10m advertised working distance but wow, this camera is seeing detail across the street I could not see with any other camera. Don’t know what they did on this camera, but the low light sensitivity is awesome. This is with WDR turned off. There is a little more noise than in other Hikvision camera models, but the detail is there and it’s quite good.
Setting WDR to 20 helped a little in the dark shadows, but really with WDR turn off, it’s better than many cameras with WDR turned up. You do get a little more noise with WDR on at night.
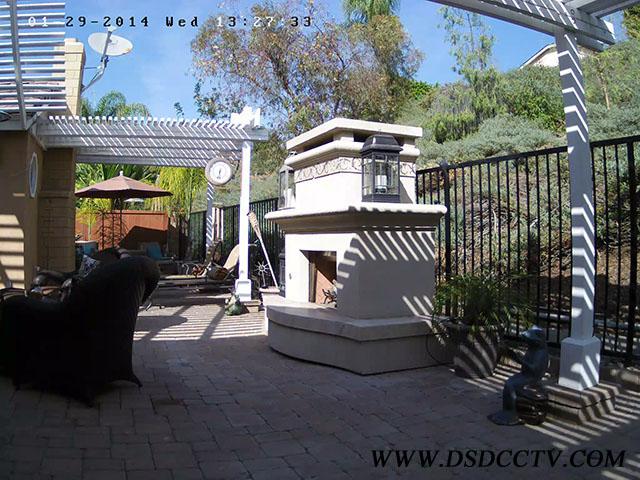
In the backyard, where there’s a different mix of lighting, I took this daytime image with WDR off. You can see the sharp contrast from the patio cover and shadows from the chair make it hard to see detail.
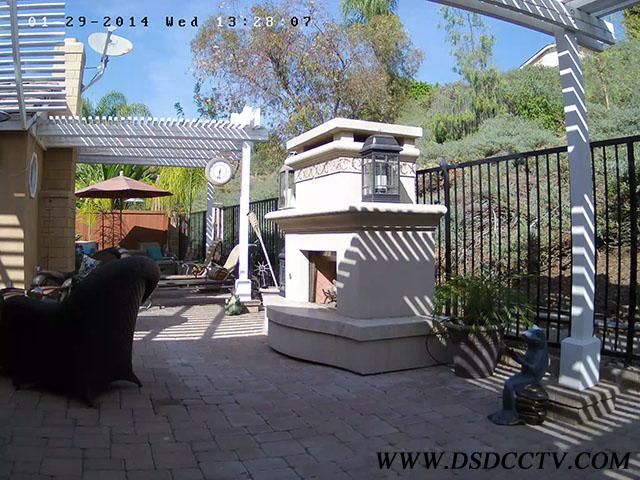
With WDR set to 20%, you can see a difference in the shadows.
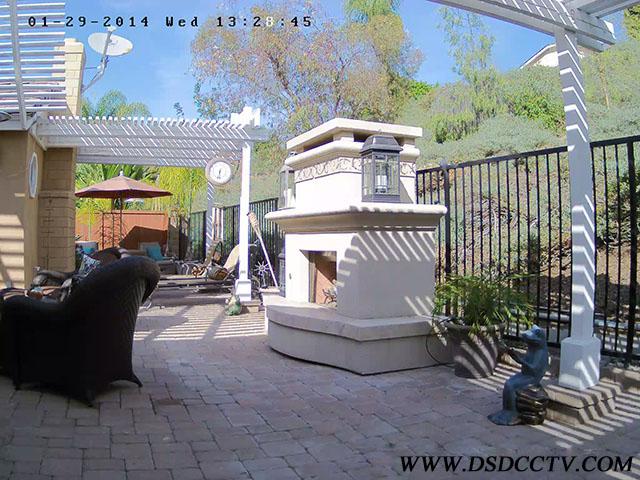
With WDR set to 50, the details in the shadows is now very good but I can tell that noise reduction is kicking in more and blurring some of the detail in the bushes. My recommendation is to use WDR sparingly and only when needed like in this high contrast situation.
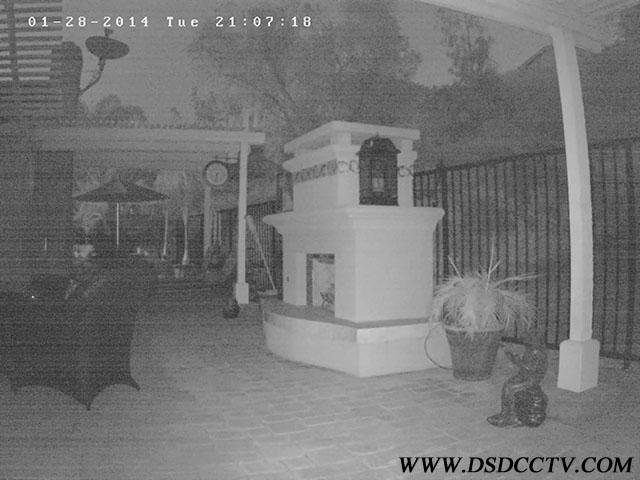
At night, with WDR turned off, the lower output from the IR illuminator is evident from the higher noise but there’s actually segments of this image that look better than on other cameras with more powerful LEDs. In comparison to the last Hikvision camera tested, the DS-2CD3332F-I, it had less noise, crisper contrast, but didn’t see as well into the dark corners. They both are good but in different ways. I feel this camera with a small amount of light, like a porch light may do better.
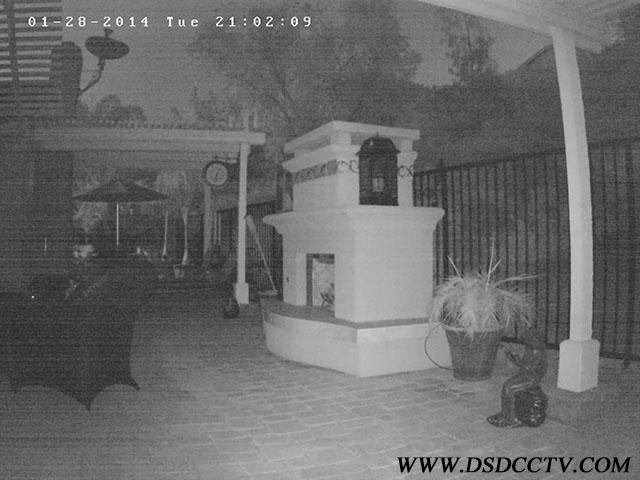
Setting WDR to 20 did not really add much value at night.
I uploaded day and night videos to YouTube. Youtube does not seem to show 3MP anymore but you can still see them in 1440P mode, you must click on the gear icon and select 1440P quality and then click on the icon with 4 corners to see the video full screen. The videos were exported from the SD card recorded to directly from the camera.
- Pre:Hikvision DS-2CD3332-I 3MP out 2014/9/3
- Next:Hikvision DS-2CD2432F-IW 3mp i 2014/9/3