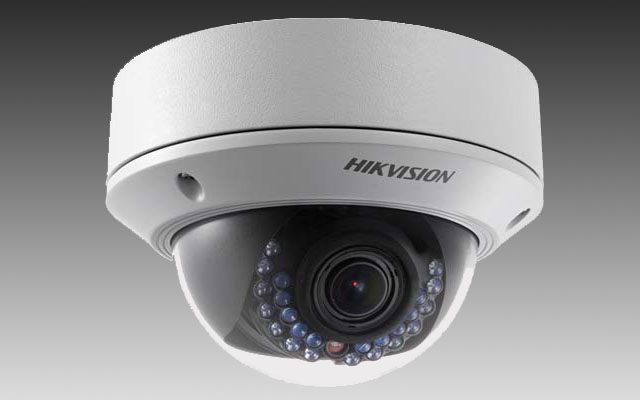
Hikvision DS-2CD2732F-IS 3MP IR varifocal vandal dome review
Where the previously reviewed Hikvision IR mini dome is a very basic camera with limitations, the Hikvision DS-2CD2732F-IS has all the bells and whistles. It’s a full 3-Axis dome, has a microSD card slot with in-camera playback, two-way audio, alarm inputs but also has a nice wide range varifocal lens from a very wide 2.8mm to a good telephoto 12mm. Although it costs a little more than it’s little brother, it’s a far better camera in many respects.
Main Features
1. 1/3” 3 Megapixel CMOS sensor
2. H.264 dual-stream encoding
3. 30fps @ 1080P (1920 x 1080) or 15fps @ 3MP (2048 x 1536)
4. 2.8-12mm vari-focal lens
5. Built-in Micro SD/SDHC/SDXC card slot, up to 64 GB
6. Day/Night IR Cut Filter
7. IR LED advertised working distance 30m
8. IP66 Rated Outdoor Bullet
9. Powered by PoE
10. 3D DNR & DWDR & BLC
11. Smartphone apps available
Overall, this is an impressive camera with very good image quality and very good low light performance, well-organized menus and smaller than some of it’s competition but larger than their mini dome.
This is a typical dome with a pigtail with a power and Ethernet jack that comes out the back of the camera plus it has a separate pigtail for alarm and audio. To make the install clean, you’ll need to drill a whole about 1″ diameter to slip the jack inside. It comes with a weatherproof connector should you need it. In order to take advantage of it, you need to cut the Ethernet plug, slip the weatherproof connector through and then crimp on a new RJ45 plug. This may seem like extra work, but it provides the smallest weatherproof adapter I’ve seen, meaning a smaller hole.
Unlike the mini dome, aiming this camera is a lot easier as this is a 3-axis dome and the moving the lens to aim it is smooth and easy. The way it’s mounted is there’s a cast metal plate that attaches to the wall, eave, ceiling and then you attached the camera base with a few machine screws and then attach the dome with the included tool. Much easier to work with in all regards and better made and designed than the mini dome.
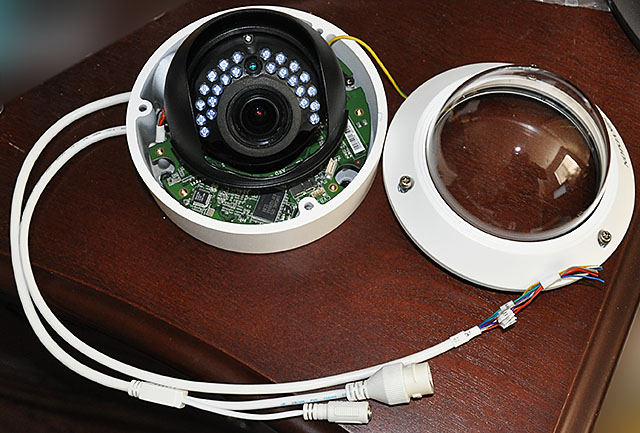
Here’s an inside look at the camera, you can see the extra pigtail here for the alarm input as well as the 2 way audio wires. To get to the zoom and focus wands, remove the black plastic cover and tilt the lens down and the wands are in the back, easy to reach and adjust. The IR LEDs are not partially blocked like they are on the mini dome, something that required a larger form factor to accomplish. I got zero IR light bleed from this camera.
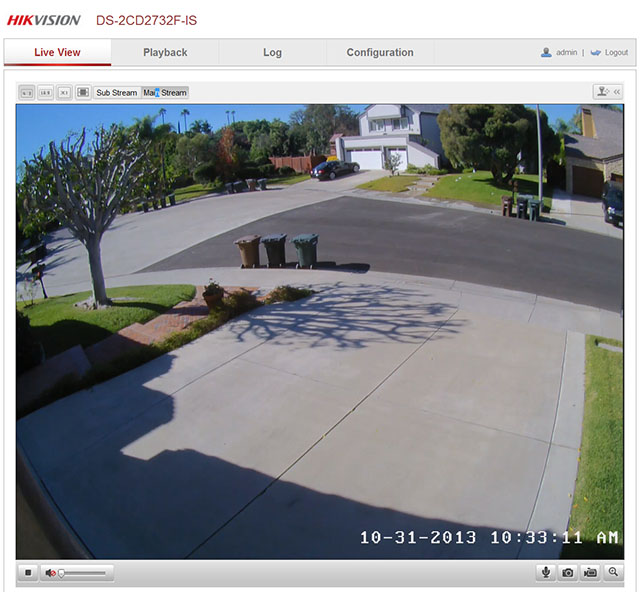
This is what the web interface looks like when you first log in. There’s options to take a snapshot, manually record, chose a stream and you can chose the aspect ratio which should be automatic, but it’s not. For example, if you chose 1080P, then you have to click on 16:9, if you chose 3MP mode, then click on 4:3. The default is sort of in between. What’ different here than the previously reviewed Hikvision cameras are the audio controls at the bottom. The speaker volume control in the lower left, the microphone on/off icon in the lower right.
As with the other Hikvision cameras I’ve reviewed, the IP address comes from the factory set to 192.0.0.64. They include a program on a CD called SADP that you run, finds the cameras and you can change the IP address to one that’s appropriate for your home network.
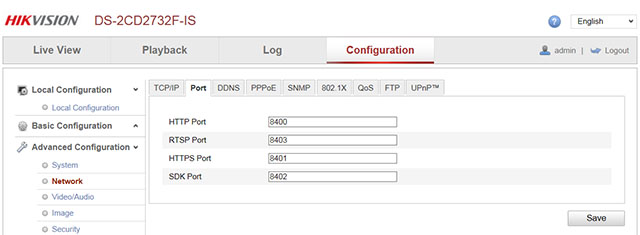
I’ll go over some of the setup screens of interest. After setting the IP address in SADP, you can change it again under Network, but since that’s done, the next step may be configuring the ports if you want to access the cameras from the internet. What I like to do is make them sequential, for example, I would make the HTTP port 8400, RTSP port 8402, HTTPS port 8401 and SDK port 8402 and then in my router I would setup port forward range from 8400-8403. Makes it easier to track which ports go with which camera.
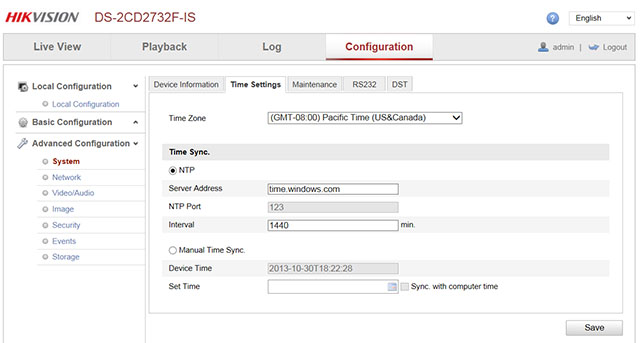
Under Advanced Configuration / System are where you can set the Time Settings, in my case, I used the old standby Windows NTP server to keep all my cameras time synced the same way.
From the Advanced Configuration you can also set the Daylight Savings Time (DST) schedule for your area.

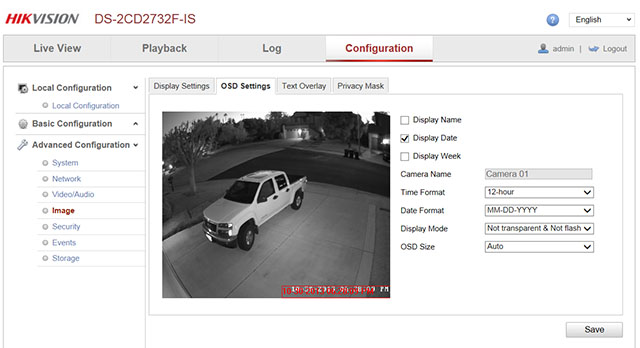
Another screen I use is the OSD settings under Advanced Configuration / Image. Here you can put the on screen displays for date and camera name. I turned off Display Week (which displays the day of week) to make it smaller and moved the date down to the lower right. I turned off camera name (Display Name) for my purposes but you here you can put the location name, like Driveway, Backyard, Office, etc.
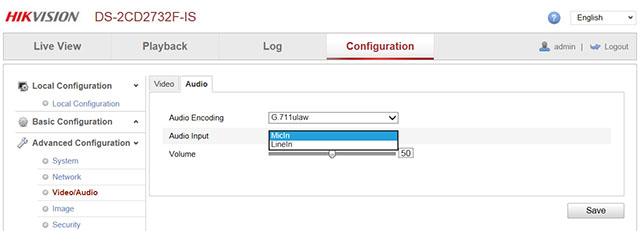
One of the things that distinguishes this camera is the audio capabilities. What’s very clever on this camera is it takes line-in or mic-in. Line-in means it takes an amplified microphone, but this requires a separate power source, but you can use mic-in which takes a standard microphone, no power needed.
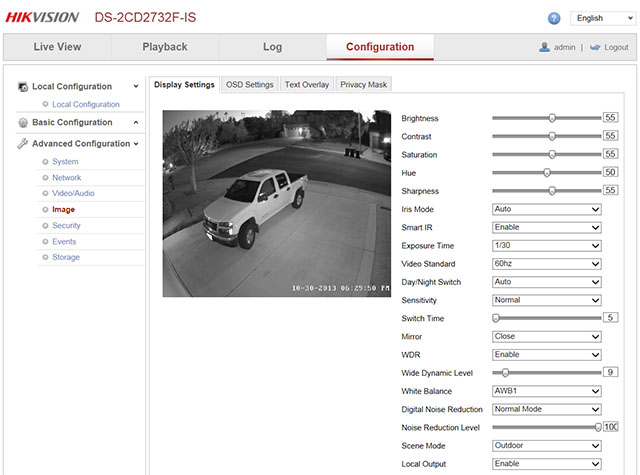
The Image settings screen is where you set the image settings like brightness, contrast and exposure. A few interesting things to note is that Video Standard or what many call NTSC vs. PAL is the Video Standard setting, 50hz for PAL and 60hz for NTSC (USA). This controls the frames per second setting under Video/Audio, for example, set at 50hz you can set the max frame rate to 25fps max for 1080P, set at 60hz allows you to set the max rate to 30fps.
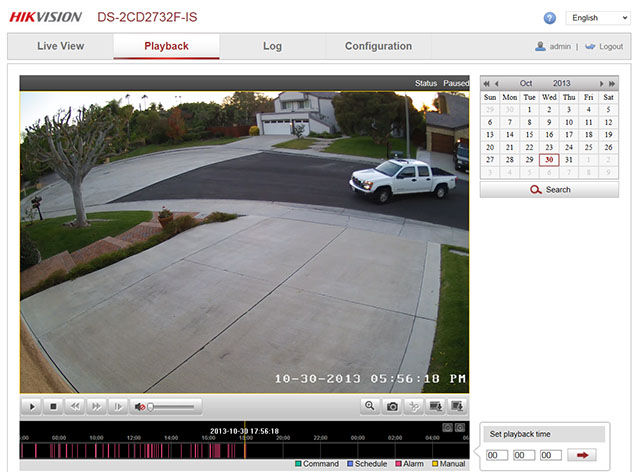
Another unique feature on this camera is the microSD card slot and ability to play back recordings. You reach this from the Playback tab and it has a calendar on the right to select a date. There’s a timeline below the image and you can adjust the timeline period using the plus and minus signs. Basically you drag the timeline with your mouse and click play icon to start playing the next video. You can also set the playback speed using the fast forward/rewind buttons just above the timeline. Works very well for those that do not want a separate recording solution. For an in-camera recording solution, this is the best I’ve seen.
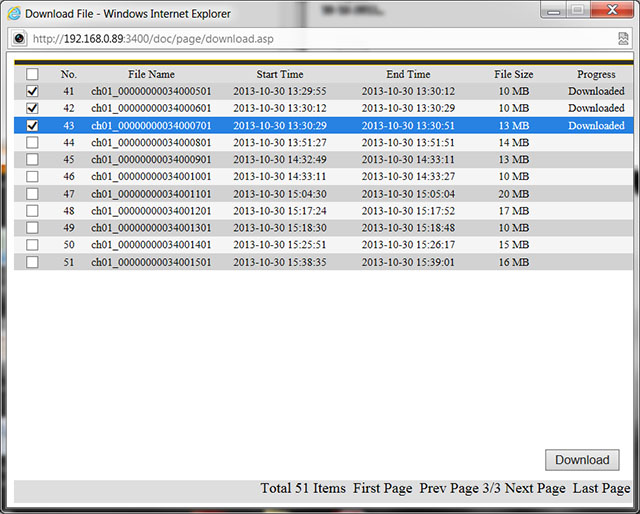
You can always remove the microSD card to find video files, they are in mp4 format but you can also do it easier by clicking the export icon, the second icon from the right that shows a film strip with an arrow. You select which video files to export, click download and it copies them to your PC in the directory setup in Local Configuration menu.
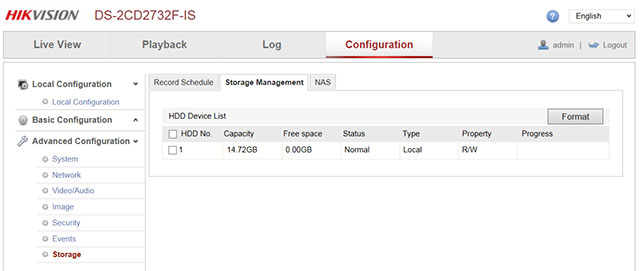
There are several steps to get this working and not always intuitive. The first step is to insert the microSD card in the camera and then format it under the Advanced Configuration / Storage screen and the Storage Management tab. Unlike the NAS feature previously reviewed, this format is a real format, destroys anything you have recorded on the microSD card.
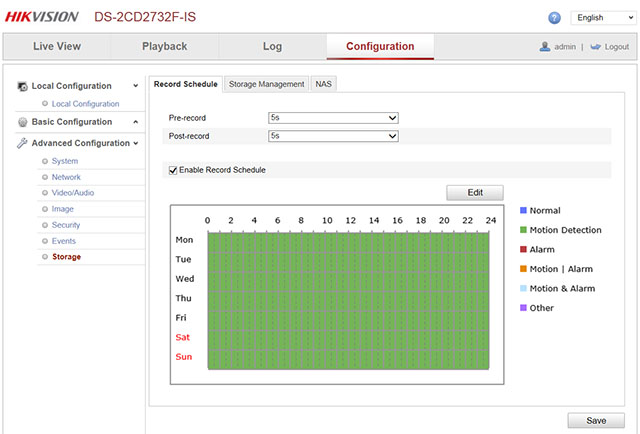
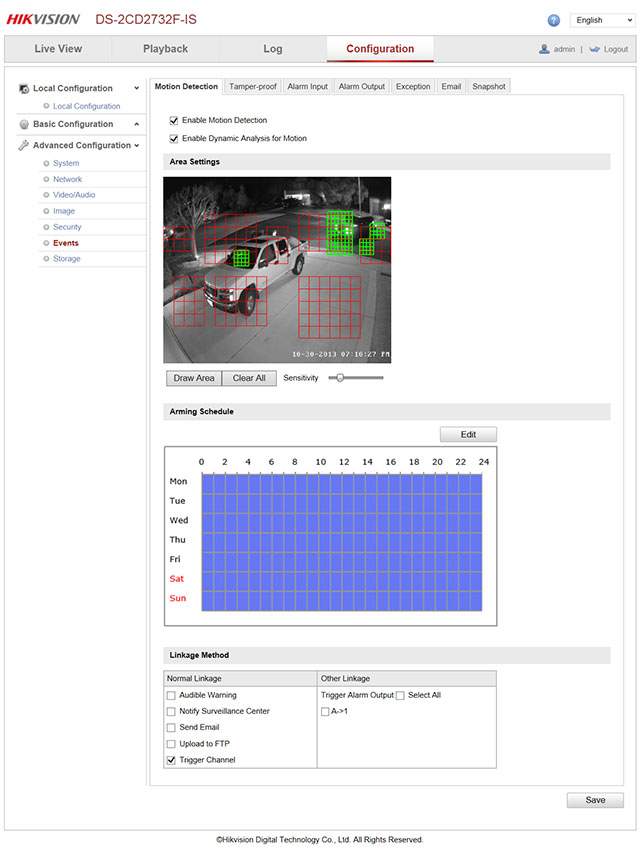
The next step is to setup the “Record Schedule” for motion detection. Note the green color, if it was blue it would record continuously.
The last step is to setup the motion detect criteria. Under Advanced Configuration / Events, check “Enable Motion Detection”. If you check the “Enable Dynamic Analysis for Motion”, it shows green highlights in this screen and in your live view, good for figuring out if you have your motion detect areas setup as you intended. This does not affect recordings. Set the arming schedule and check the box that says “Trigger Channel”. There’s many choices for recording, but this will get you started with video motion detect events. You can also setup an external alarm input, for example a PIR motion detector, a door sensor, a sensor mat to trigger recordings.
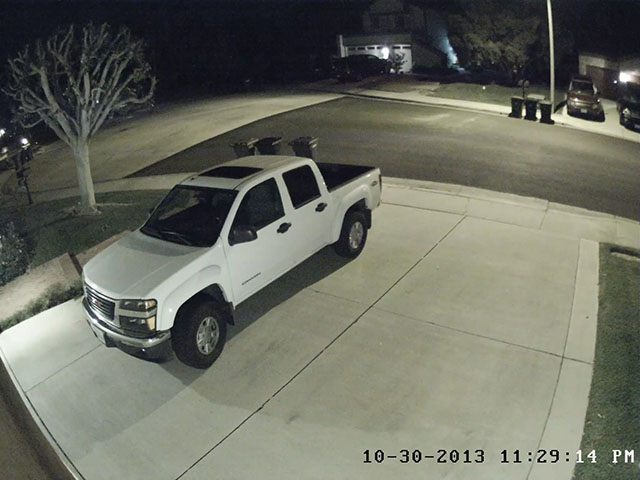
Now onto the images. I mounted the camera with the lens set at 2.8mm wide angle in the usual spot, under the eave of my garage. As before, you can click on the image to see the full size 3 megapixel image straight from the camera. Also as before, I set the max exposure time to 1/30th which is a good compromise between low light performance and movement.
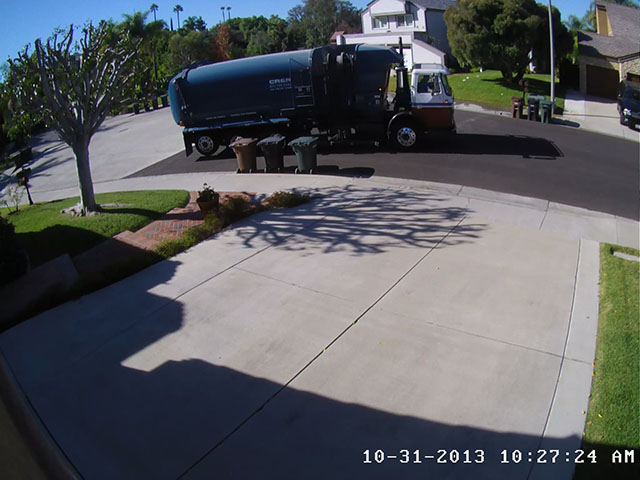
This is a day shot with WDR turned off, color balance is quite good and it’s a clear and sharp image but the sharp contrast in the image makes detail in the shadows hard to distinguish.
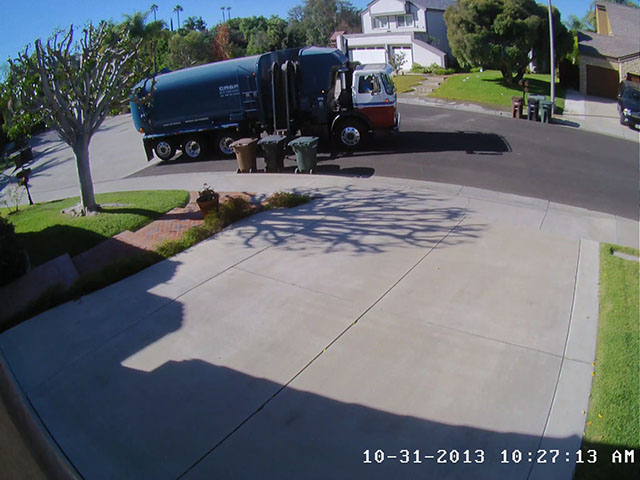
With WDR set to just 21% you can start to see more details in the shadows of the truck. You can keep going and setting it to 50% would give you even more shadow detail but may make the image look more washed out. A lot of this is personal preference.
At night in B&W night mode, the IR is brighter in the center than on the edge. Not readily apparent because of the street lighting. It’s a nice clear noise free image.
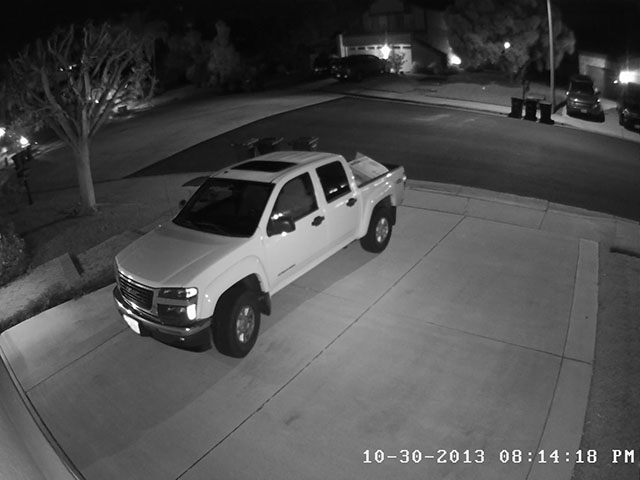
You can run this camera without IR by setting it to Day mode. The image to me is actually a little shaper yet with a little noise, but actually preferable for me. Check out the YouTube videos in this mode, you will be surprised.
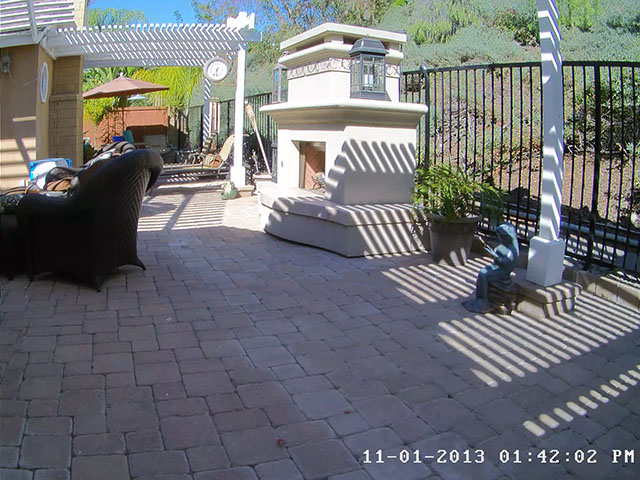
In the backyard, where there’s a different mix of lighting, I took this daytime image with WDR off. You can see the sharp contrast from the patio cover and shadows from the chair make it hard to see detail.
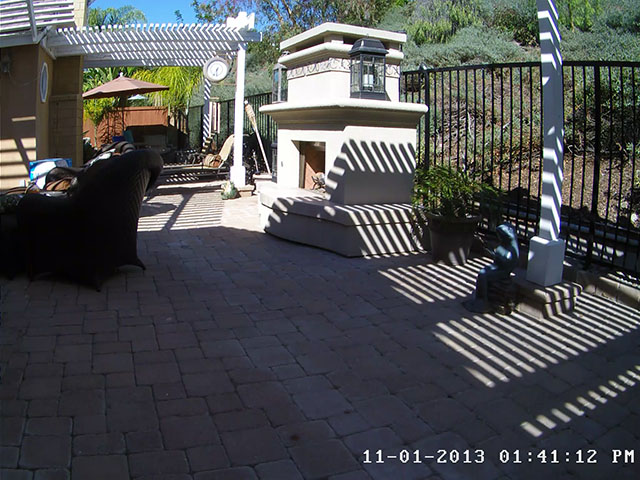
With WDR set to 21 you start seeing a lot more detail in the shadows
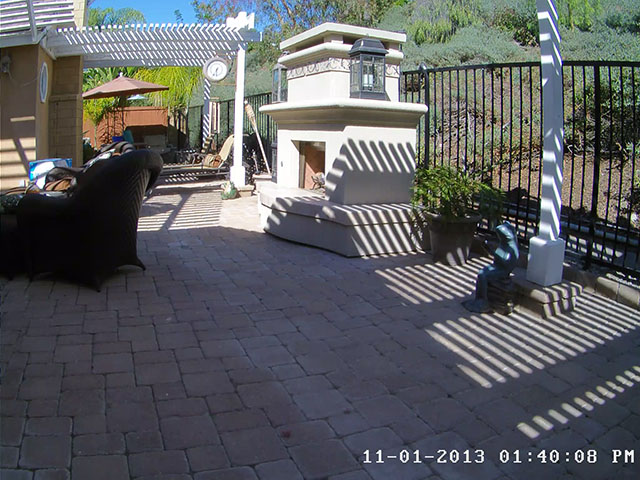
Go to more of an extreme at 47% and you get less contrast, but even more detail in the shadows. Again, personal preference as to what to set this parameter to.
Next we’ll look at night mode in the backyard. Sometimes you can’t appreciate the lighting conditions until you see them first in color “Day” mode. Not much to see here. Without any light source other than the moon, you won’t see much.
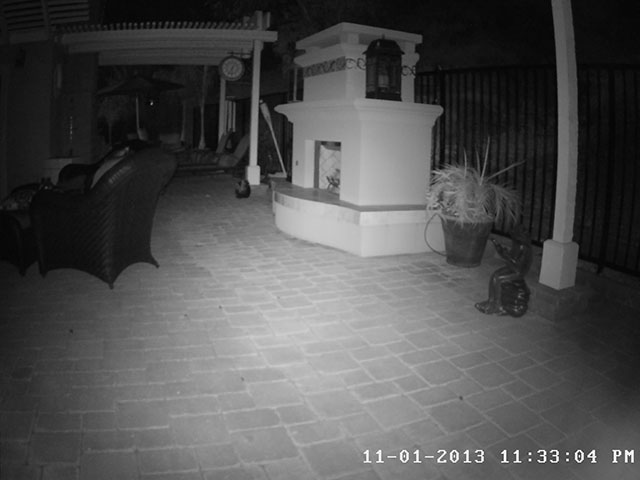
In night mode, with IR LEDs on and WDR off and the camera set to about 4.5mm, you can see the IR illuminator has a hot spot in the center. This is common for wide angle varifocal IR domes as it’s a trade off between making the IR LED’s work best at 2.8mm or 12mm and most manufacturers lean toward the middle of the scale.
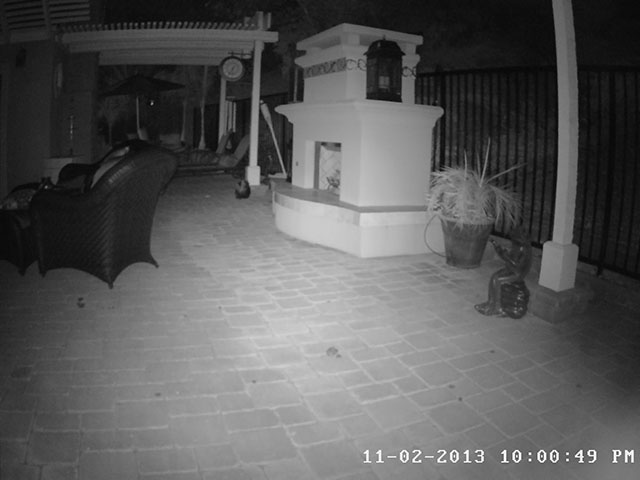
But with WDR set to even only 7%, you can start seeing more detail in the shadows but slightly more noise.
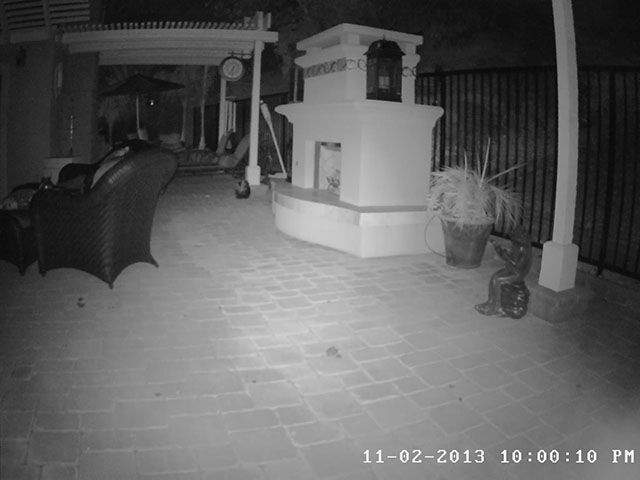
Go up to 21% WDR and you get more detail in the shadows. Not sure I would go beyond this as noise because an issue.
Since audio may be one of the motivations for getting this camera, I picked a very cheap mic at Radio Shack, cut the plug off and wired it to the camera. In the real world, I would recommend a higher quality mic made for this purpose that can work outdoors if that’s where this camera is mounted. I set the camera up for MicIn as this mic was not amplified. The sounds quality was as expect, as good as any PC mic. When I set the camera up with Milestone XProtect, it recorded audio as expected. The only thing to note was the video and audio were not sync’ed but close enough for most people, after all, this is for security purposes, not a camcorder.
I uploaded day and night videos to YouTube. I also added a color night time video to show you how well this may work for you at night if you have enough light. Youtube does not seem to show 3MP anymore but you can still see them in 1080P mode, you must click on the gear icon and select 1080Pquality and then click on the icon with 4 corners to see the video full screen. The videos were extracted from the microSD card on the device.
- Pre:Hikvision DS-2CD2132-I 3MP IR 2014/9/3
- Next:Hikvision DS-2CD3332-I 3MP out 2014/9/3